DragonWarden
  • Adventures
  • The Oven
  • The Un-Tea Party
  • Secret Ingredients
  • About

Strawberry-Rhubarb Crumb Bars

7/8/2015

0 Comments

 
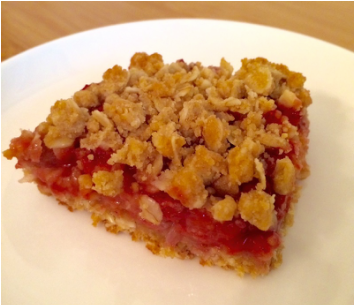
This was taken (with some very heavy adaptations) from an idea on Cooking.com. However, I found quite a few problems with the original recipe after eyeballing the ingredients, so I played around with the proportions just going by previous experience of what recipes for my rhubarb pie and other crumbles called for. In the end, the first attempt was probably a B+, but it wouldn't take much to get it into the A range on the second try!
Picture
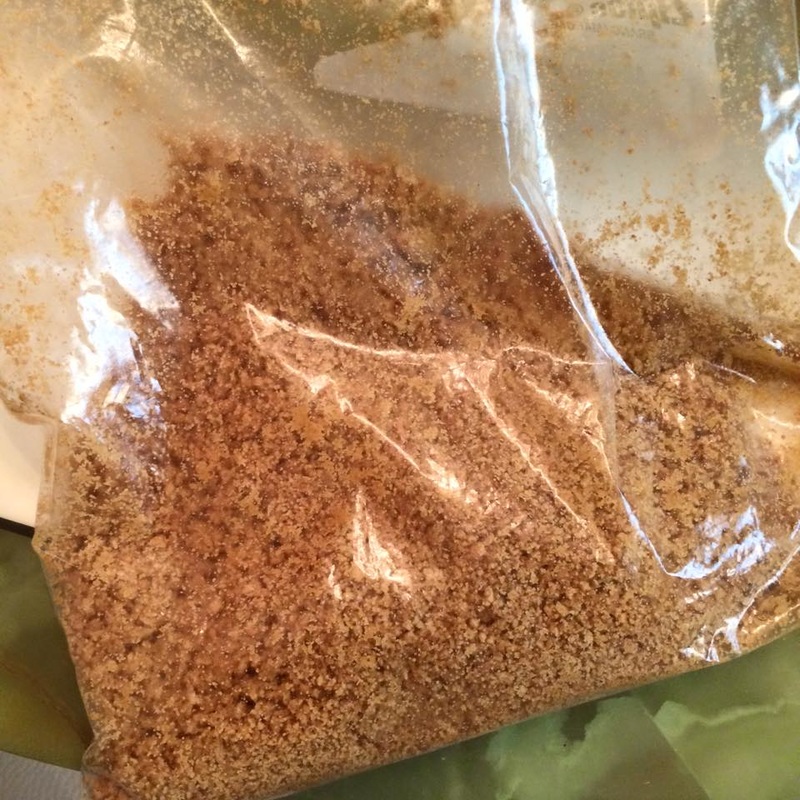
Base and crumble topping:
  • 8 tbsp unsalted butter, room temperature, cubed
  • 1.25 cup old-fashioned oats
  • 1 cup flour
  • 1/4 cup packed brown sugar
  • 1/4 tsp salt
Fruit mixture:
  • 2 cups chopped rhubarb
  • 1.5 cups chopped strawberries
  • 1 tbsp cornstarch
  • 1/2 cup sugar
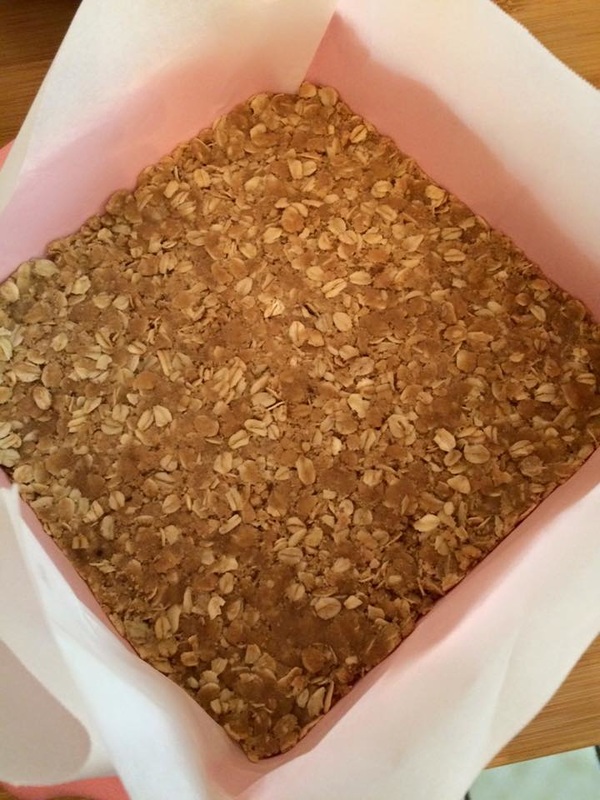
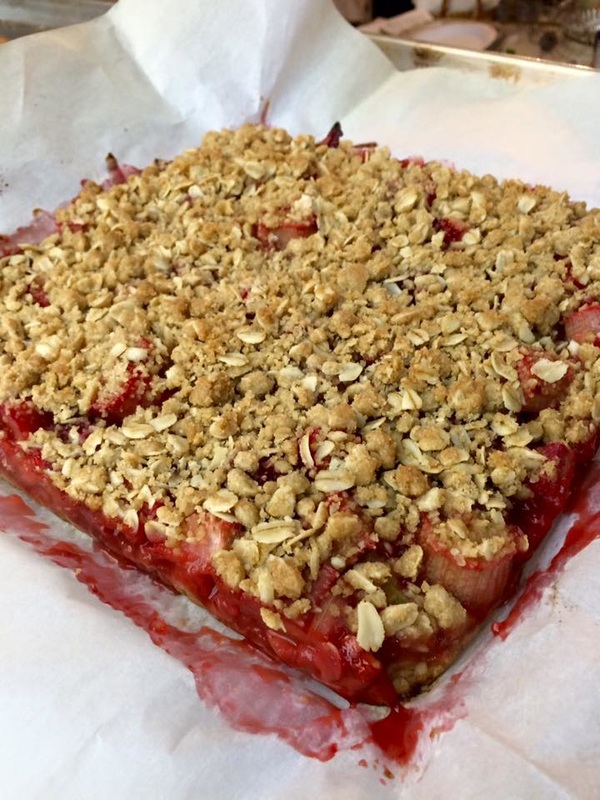
  1. Preheat the oven to 350 degrees F. Line an 8 x 8-inch square pan with parchment paper.
  2. In a medium bowl, blend the base ingredients together with a fork or your fingers until the butter is no longer visible and the mixture is loose and crumbly. Transfer about 3/4 of the mixture to the prepared pan. Use your fingers or a measuring cup to press the mixture into an even layer on the bottom of the pan.
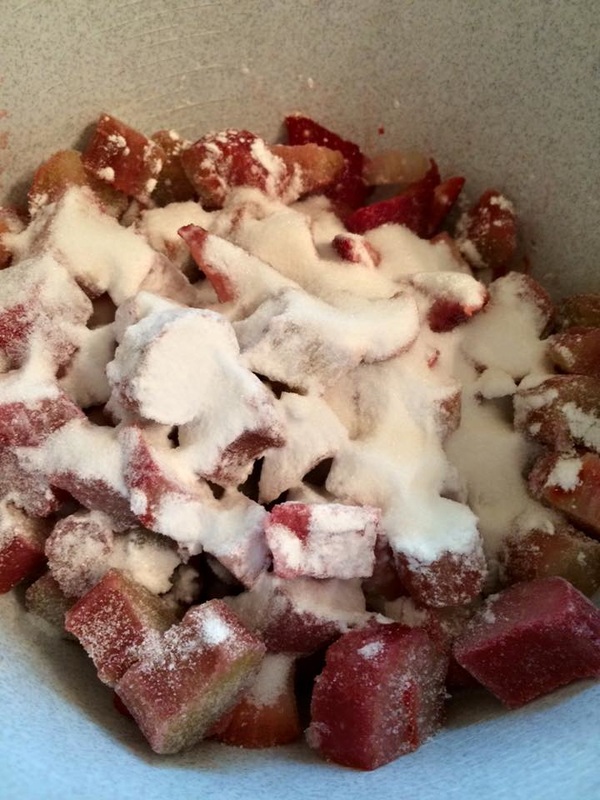
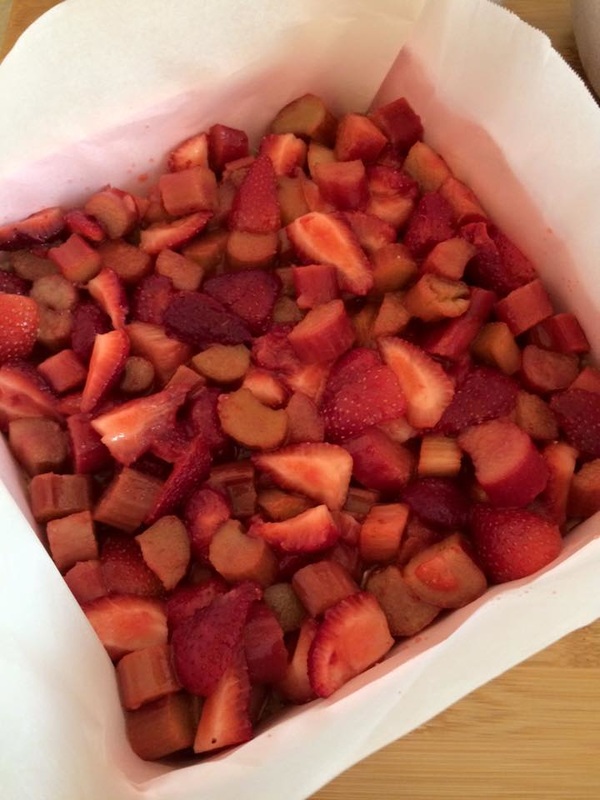
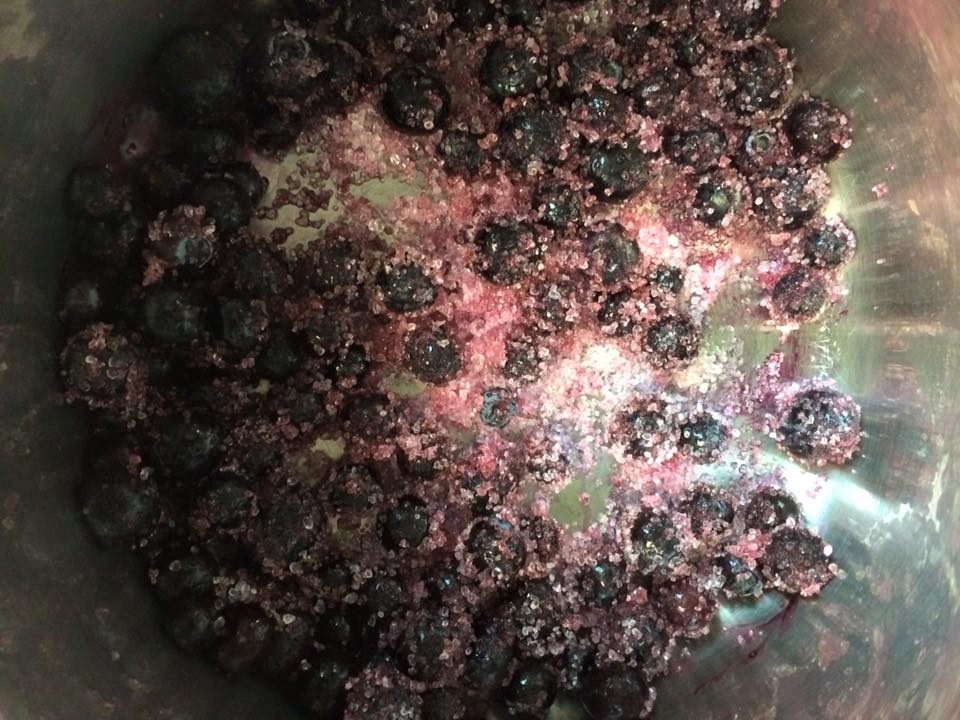
  3. In another medium bowl, stir the rhubarb, strawberry, cornstarch and sugar together. Pour into the pan. Crumble the remaining base mixture on top of the fruit.
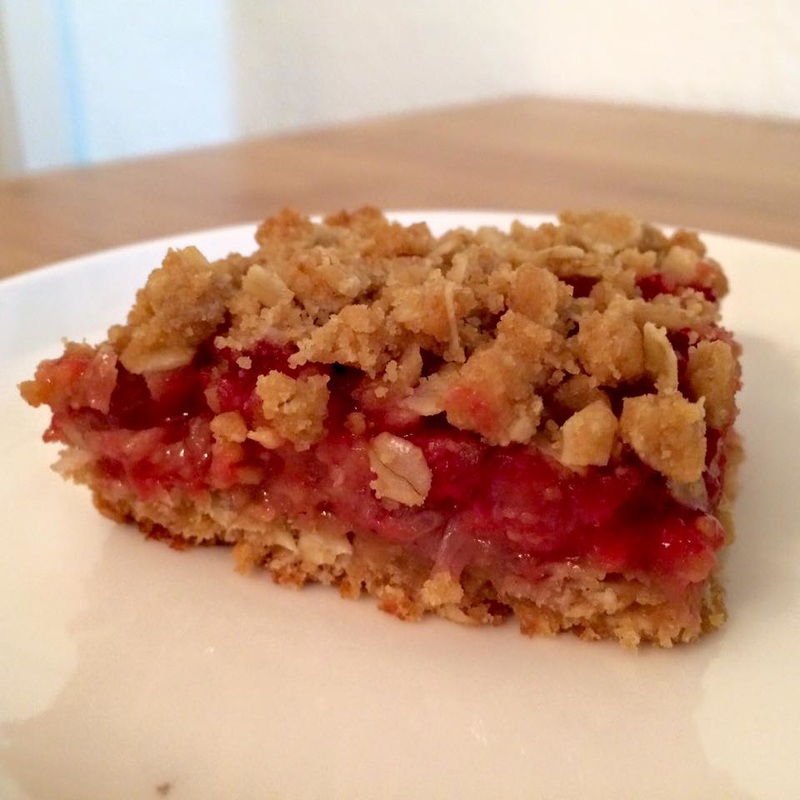
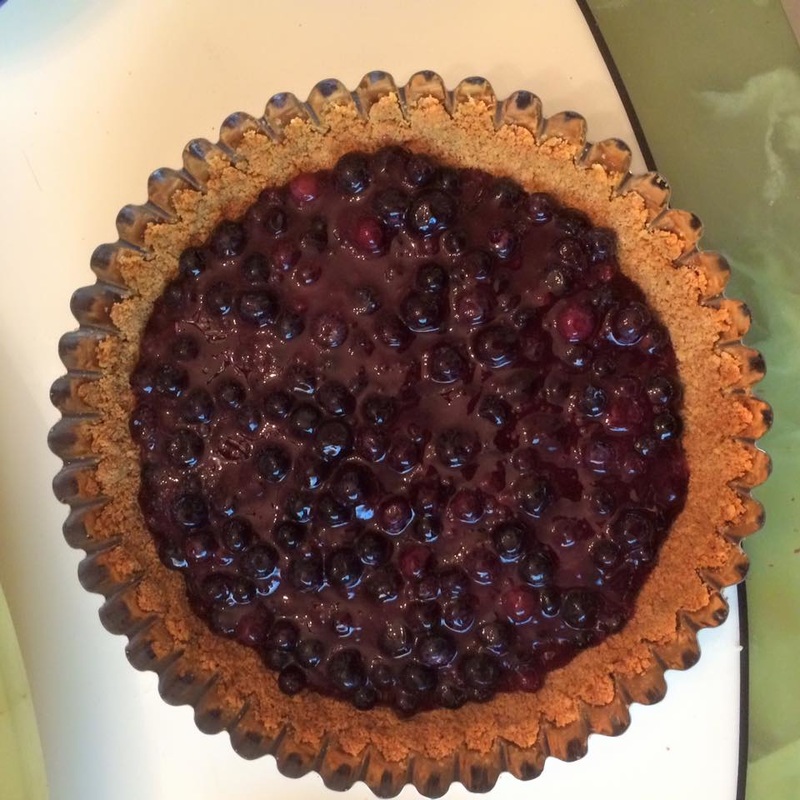
  4. Bake in the oven for about 40 minutes. Remove from the oven. Let cool in pan for at least 30 minutes before slicing into pieces.
Note: The flavors tend to take time to blend together. It will taste different the next day, but the crumble may not be as fresh and crispy due to the liquids in the center. So, it's best to enjoy it the day-of, but allow it time to sit and settle.
0 Comments

Blueberry Custard Pie or Tart

7/3/2015

 
This was adapted from a Country Living recipe. The first attempt was both weirdly my least-favorite but my family's most-favorite baking attempt ever - I simply could not get over the weird snot-thick consistency of the blueberry topping that came from the original recipe's 3 tbsp of cornstarch, though my father and brother literally gobbled up over half the tart in the space of a morning. A second try not only improved the texture but the appearance considerably, and after substituting lactose-free milk for whole milk, I was also able to enjoy it tablet free! With the sweetness dialed down somewhat and a few extra steps added to improve custard and topping consistency, the second one disappeared nearly as quickly as the first.
Picture
  • 1 graham cracker crust, either store-bought or hand-made
The custard:
  • 1.25 cups whole milk
  • 2 large egg yolks
  • 1/4 cup sugar
  • 2 tbsp cornstarch
  • 1/2 tsp vanilla extract
  • 1 tbsp unsalted butter
The blueberry topping:
  • 4 cups fresh or frozen blueberries
  • 1/3 cup sugar
  • 1.5 tbsp cornstarch
  • 3/4 cups water
  • 1 tbsp lemon juice
  • 1 tbsp butter
  1. In a saucepan, cook the milk, egg yolks, sugar, and cornstarch over medium heat, stirring constantly, until mixture boils and thickens. Stir in vanilla and butter. Transfer custard to a shallow dish to cool.
  2. Meanwhile, in a saucepan, mix 1 cup of blueberries with sugar over medium to high heat. Stir occasionally, until the blueberries start to soften and burst and become a slurry. Mix the cornstarch into the water, then pour into the saucepan. Bring to a boil while continuing to stir, until the mixture thickens. Stir in lemon juice and butter, then remove from heat and let cool. Gently stir in remaining 3 cups of berries.
  3. Once the custard is near room temperature, spread it into the bottom of the graham cracker crust. Top with the berry mixture and refrigerate until set.
Note: If you're going to use lactose-free milk instead of whole milk, you might want to dial down the sugar amount for the custard slightly, as lactose-free milk tends to be sweeter. The filling can be made a day ahead and refrigerated separately. To prevent the custard from forming a film, press cling film all over the surface.
    Picture

    Sweet Enough

    Part of the reason I started baking was because I like my goodies to be less obviously sweet - I want to taste the flavor, not just the sugar. So most of these recipes will have the sugar dialed down.

    This site also acts as my mobile recipe box, so instructions are often pared down to a minimum - very few frills but for some hints and suggestions!

    RSS Feed

    Categories

    All
    Alcohol
    Almond
    Apple
    Avocado
    Baklava
    Banana
    Bars
    Biscotti
    Blackberry
    Blueberry
    Bread
    Buttercream
    Cake
    Candy
    Carrot
    Cheese
    Cherry
    Chickpea
    Chinese
    Chocolate
    Cider
    Cobbler
    Coconut
    Coconut Milk
    Cookie
    Corn
    Cranberry
    Cream
    Cream Cheese
    Creme Brulee
    Crumb
    Crust
    Cupcake
    Custard
    Dates
    Decoration
    Dip
    Dough
    Doughnut
    Dumpling
    Easy Peasy
    Egg
    Filling
    Flowers
    Frosting
    Fruit
    Garnish
    Gelee
    Granola
    Green Tea
    Honey
    Ice Cream
    Icing
    Jam
    Lamb
    Lemon
    Lime
    Lobster
    Lotus Seed
    Macaron
    Mango
    Marshmallow
    Meringue
    Mochi
    Muffin
    Nectarine
    Nutella
    Nuts
    Oat
    Oats
    Onion
    Orange
    Pancake
    Panna Cotta
    Peach
    Peanut Butter
    Pear
    Pecan
    Phyllo
    Pie
    Pistachio
    Plum
    Popsicle
    Pound Cake
    Pumpkin
    Quiche
    Raspberry
    Red Bean
    Rhubarb
    Rice
    Ricotta Cheese
    Rugelach
    Sauce
    Savory
    Scone
    Sesame
    Shortbread
    Soup
    Sponge
    Sponge Cake
    Strawberry
    Streusel
    Tart
    Tofu
    Topping
    Torte
    Vegetable
    Vinaigrette
    Walnut
    Watermelon
    Yogurt
    Zucchini

    Archives

    November 2020
    October 2020
    July 2020
    May 2020
    April 2020
    March 2020
    October 2019
    December 2018
    October 2018
    August 2018
    April 2017
    July 2016
    May 2016
    March 2016
    February 2016
    January 2016
    December 2015
    November 2015
    October 2015
    September 2015
    July 2015
    June 2015
    May 2015
    April 2015
    February 2015
    January 2015
    November 2014

© 2019 Jacqueline Teng | DragonWarden