DragonWarden
  • Adventures
  • The Oven
  • The Un-Tea Party
  • Secret Ingredients
  • About

Chocolate-dipped Strawberries with Cacao Nibs

3/20/2016

0 Comments

 
This isn't a very precise recipe - there's a lot of eyeballing involved because I think everyone knows what they should do with leftover chocolate or strawberries. However, I've typed this up to provide some tips on melting chocolate, which can be tricky or daunting, particularly if using any random chocolate as opposed to the specially formulated kinds advertised as being easy to melt for dipping. I absolutely love the crunch that the cacao nibs add - because they blend right into the chocolate's flavor, the added texture reminds me of Magic Shells ... except with your own customized flavor of chocolate.
Picture
  • quality chocolate (percentage to taste)
  • strawberries
  • cacao nibs
  • (optional) powdered sugar
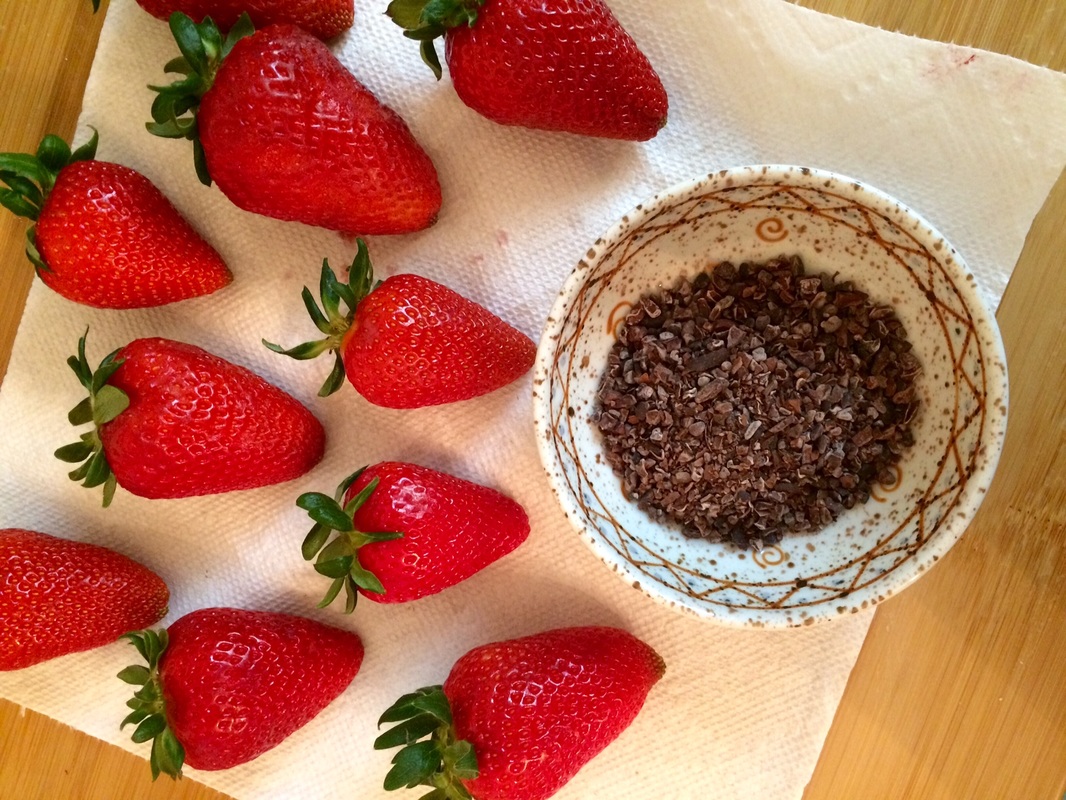
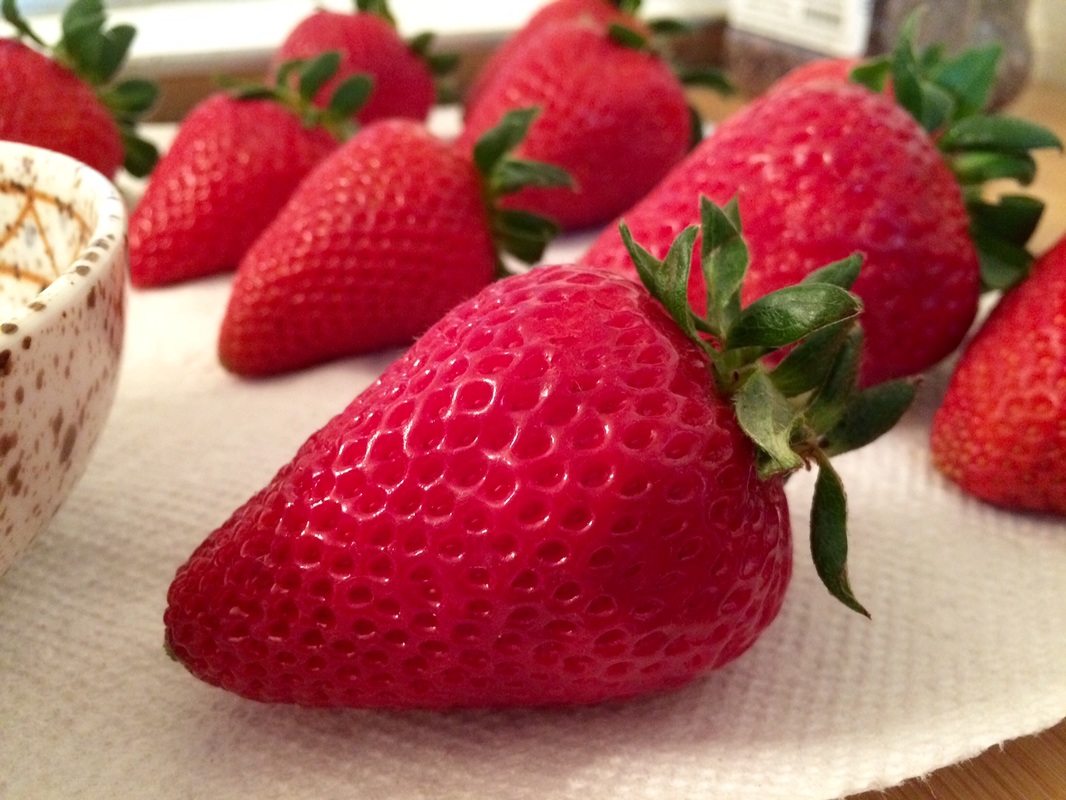
  1. Rinse any dirt and detritus off the strawberries. Pat dry and then let them continue to air dry on a paper towel (make sure they are dry before dipping them - water and chocolate don't mix). Cover a cooking sheet or some plates with parchment paper or foil.
  2. If using a microwave, heat the chocolate in a microwave-safe bowl at medium power for 20 seconds at a time. Make sure to scrape and stir the chocolate each time before heating again. Do so until MOST of the chocolate is melted - at that point, just keep stirring, and the remaining little pieces should melt themselves without the microwave's help. If, partway through dipping the strawberries the chocolate gets too thick, heat it again at medium power for 10 seconds.
  3. If using a stove and the bain marie method, pour about an inch's worth of water into a small pot, and then use a metal bowl that can sit on top of the pot without the bottom touching the water. Heat the pot until the water is lightly simmering (this may be less than you think - when you cover the pot with the bowl, the higher pressure can bring the water to a higher boil than anticipated). Put the chocolate into the bowl, and make sure to mix it while it melts. When removing the bowl, have a kitchen towel handy - steam will have gathered on the bottom of the bowl, and it can drip down and burn you if you don't mop it up immediately. Remember to be careful not to let any steam or drips of water get inside the bowl. (I like to keep the pot simmering on the stove while I dip the strawberries - if the chocolate gets too thick as it cools, I just set the bowl back on the pot for a few seconds, stirring, and then I'm ready to dip again.)
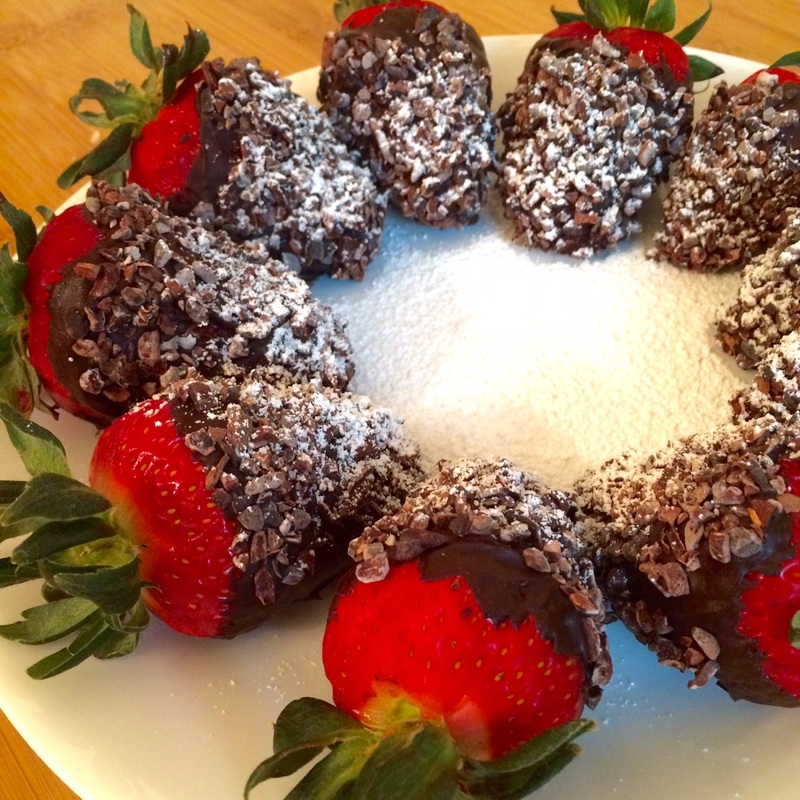
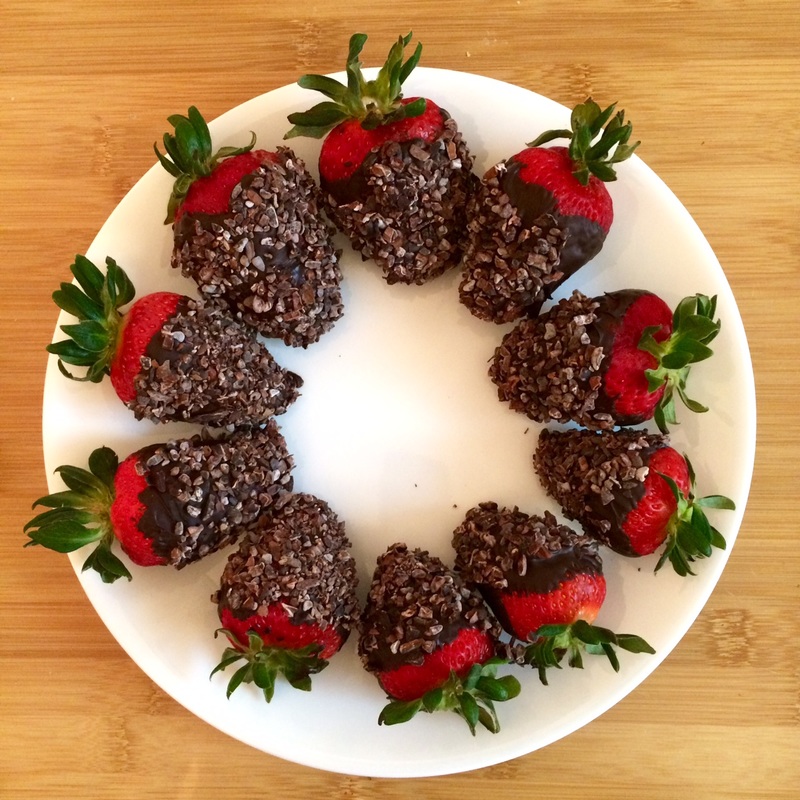
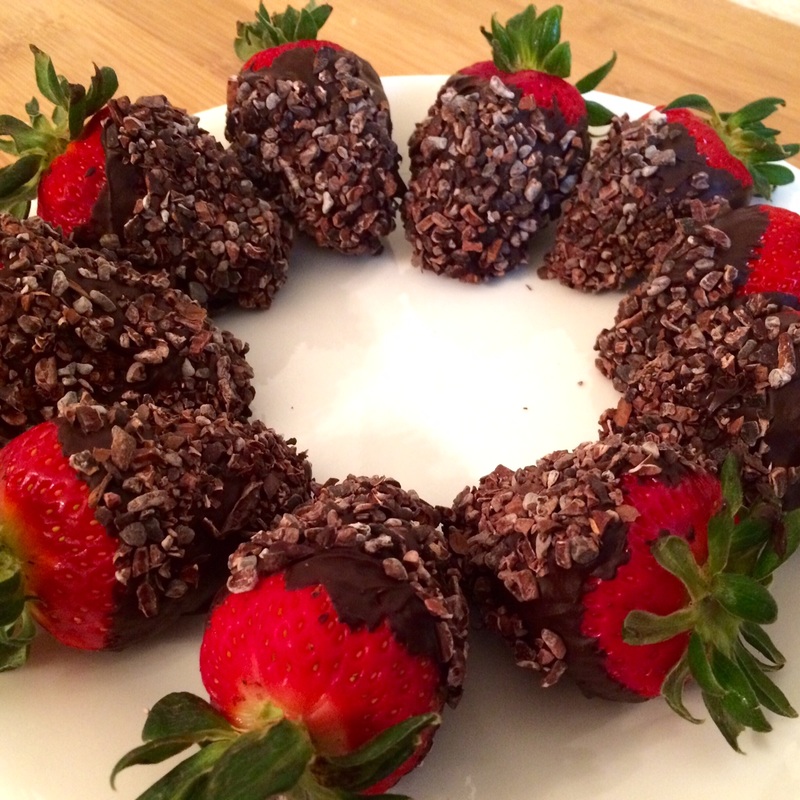
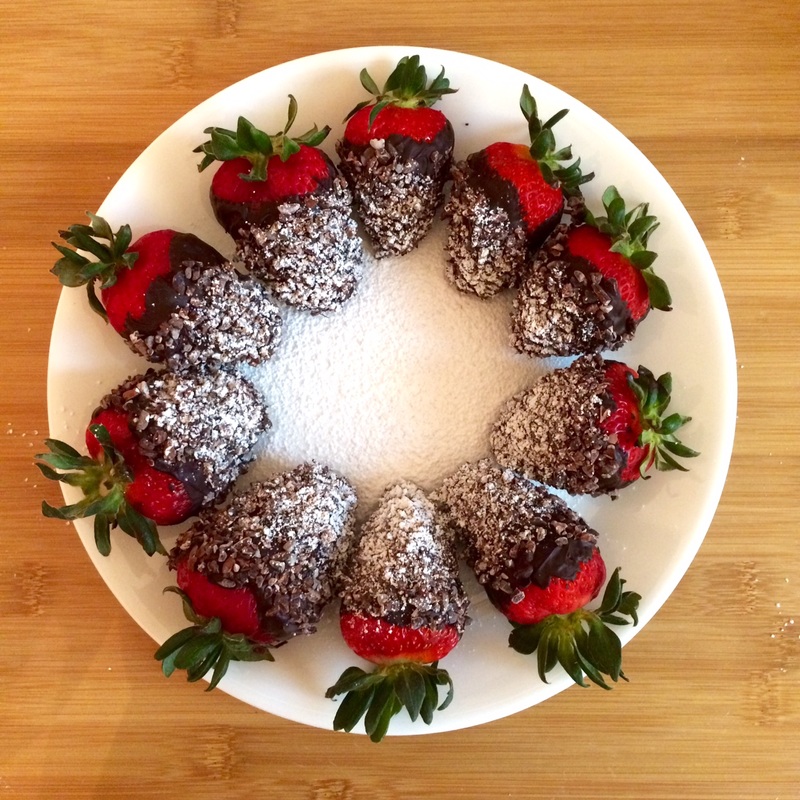
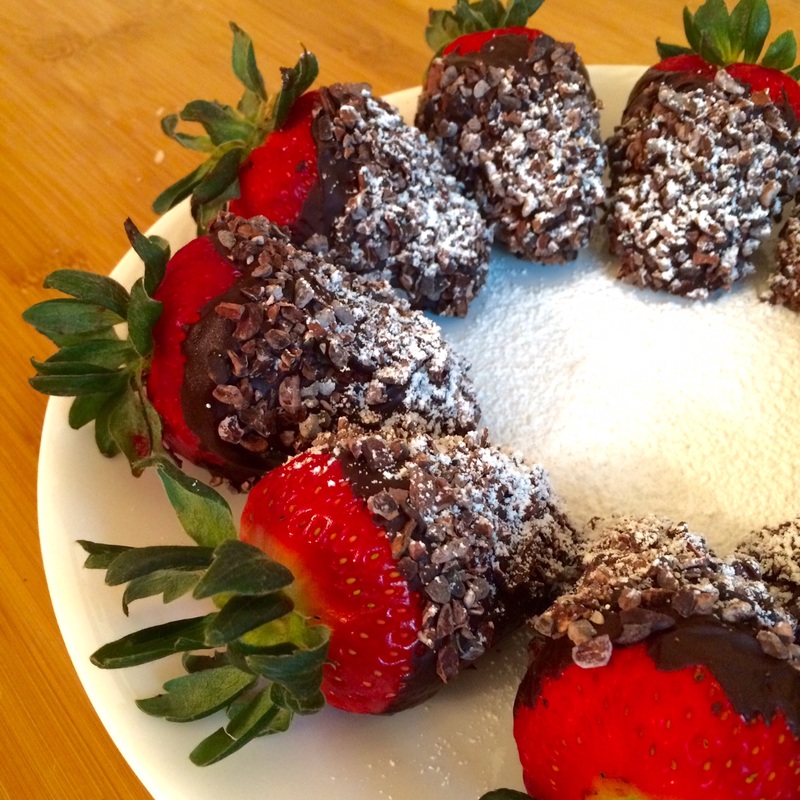
  4. Pour the cacao nibs into a small bowl. Dip the strawberries in the melted chocolate to coat them, then dip one side of the strawberries into the cacao nibs. (I find you don't really need more than one side to be covered, otherwise they can be overwhelming.) Set the strawberry, non-nibbed side down, on the parchment paper to cool and set.
  5. Once you have dipped and covered all the strawberries, if you are impatient to eat them, you can move the cookie sheet or plates to the refrigerator or freezer for a few minutes. Dust with powdered sugar if you wish for presentation.
Notes: It's easy to burn chocolate, which is why there is so much care to make sure you don't overheat it, and to constantly stir it around. However, there's no need to worry about tempering the chocolate, so it's a fairly straightforward process to melt it.

If you have leftover chocolate (and want to save it as opposed to simply licking it off the bowl), you can pour it out onto a parchment-lined plate or just a piece of foil and leave it in the fridge to harden for some homemade chocolate pieces. Clean-up of the chocolate bowl can be a tough process - I've found the best way is to first wipe out the bowl with a paper towel before the chocolate gets too set, and then to make sure to wash it with hot water. If you use cold water, the chocolate will merely set, and smear under scrubbing without coming off. If I'm handwashing after using the bain marie method, I just use the hot water from the pot to rinse out the bowl.
0 Comments

Strawberry-Rhubarb Crumb Bars

7/8/2015

0 Comments

 
This was taken (with some very heavy adaptations) from an idea on Cooking.com. However, I found quite a few problems with the original recipe after eyeballing the ingredients, so I played around with the proportions just going by previous experience of what recipes for my rhubarb pie and other crumbles called for. In the end, the first attempt was probably a B+, but it wouldn't take much to get it into the A range on the second try!
Picture
Base and crumble topping:
  • 8 tbsp unsalted butter, room temperature, cubed
  • 1.25 cup old-fashioned oats
  • 1 cup flour
  • 1/4 cup packed brown sugar
  • 1/4 tsp salt
Fruit mixture:
  • 2 cups chopped rhubarb
  • 1.5 cups chopped strawberries
  • 1 tbsp cornstarch
  • 1/2 cup sugar
  1. Preheat the oven to 350 degrees F. Line an 8 x 8-inch square pan with parchment paper.
  2. In a medium bowl, blend the base ingredients together with a fork or your fingers until the butter is no longer visible and the mixture is loose and crumbly. Transfer about 3/4 of the mixture to the prepared pan. Use your fingers or a measuring cup to press the mixture into an even layer on the bottom of the pan.
  3. In another medium bowl, stir the rhubarb, strawberry, cornstarch and sugar together. Pour into the pan. Crumble the remaining base mixture on top of the fruit.
  4. Bake in the oven for about 40 minutes. Remove from the oven. Let cool in pan for at least 30 minutes before slicing into pieces.
Note: The flavors tend to take time to blend together. It will taste different the next day, but the crumble may not be as fresh and crispy due to the liquids in the center. So, it's best to enjoy it the day-of, but allow it time to sit and settle.
0 Comments

Peanut Butter Thumbprints with Strawberry Lambic Jam

1/1/2015

0 Comments

 
From a Tasting Table recipe.
Jam:
  • 12 oz strawberries, hulled and cut into 1/4" pieces
  • 12 oz bottle strawberry lambic
  • 1/4 cup granulated sugar

Cookies:
  • 1/2 cup (4 oz) unsalted butter, at room temperature
  • 1/3 cup granulated sugar
  • 1/3 cup firmly packed light brown sugar
  • 3/4 cup creamy peanut butter
  • 1 extra-large egg, at room temperature
  • 1 tsp vanilla extract
  • 1-1/4 cups all-purpose flour
  • 1/2 tsp baking powder
  • 1/2 tsp baking soda
  • 1/2 tsp kosher salt
  • 1/2 tsp sea salt flakes
  • 1 cup roasted red-skinned peanuts
  • 1 cup strawberry lambic jam
  1. Make the strawberry lambic jam: In a medium saucepan over medium-high heat, combine the strawberries, lambic and sugar, and simmer, stirring often to prevent from boiling over, 6 to 8 minutes. Reduce the heat to medium low and cook until most of the liquid has evaporated and the jam is thick enough to coat a spoon, 20 to 25 minutes. The jam will continue to thicken as it cools.
  2. Make the cookies: In the bowl of a stand mixer fitted with the paddle attachment, mix the butter and both sugars on medium speed until the butter is light and airy, 3 to 4 minutes. Using a rubber spatula, scrape the sides and bottom of the bowl to bring the batter together. Add the peanut butter and mix on medium speed until thoroughly combined. Add the egg and vanilla to the butter mixture and mix until the batter starts to resemble cottage cheese.
  3. In a separate bowl, whisk together the flour, baking powder, baking soda and both salts.
  4. Add the dry ingredients all at once to the butter mixture and mix on low speed until the dough comes together but still looks shaggy, 20 to 30 seconds. Remove the bowl from the stand mixer. With a plastic bench scraper, bring the dough completely together by hand.
  5. Stretch out a long sheet of plastic wrap onto a work surface and place the dough on top. Pat the dough into a 6-by-8-inch rectangle, using the bench scraper to square off the sides. Wrap the dough with plastic wrap and chill in the fridge for at least 2 hours or up to 3 days.
  6. Preheat the oven to 350°. Line two baking sheets with parchment paper.
  7. In a food processor, pulse the nuts just until they are finely ground.
  8. Cut the dough lengthwise into 5 even strips. Roll the strips back and forth into logs to round out the edges. Each log should be about 9 inches long. Coat each log with the ground nuts.
  9. Cut each log into 8 equal pieces. Roll each piece with the ground nuts again to round out the edges, then place the pieces cut-side up on the prepared baking sheet. You should be able to fit 20 cookies per baking sheet.
  10. With the tip of your thumb, make an indentation into the center of each cookie and slightly flatten the cookie. Spoon the jam into the center of each thumbprint.
  11. Bake for 8 minutes. Rotate the pan and continue to bake until the cookies begin to crack a bit on the top and are just set, another 6 minutes. Remove the cookies from the oven and let cool before serving.
0 Comments
    Picture

    Sweet Enough

    Part of the reason I started baking was because I like my goodies to be less obviously sweet - I want to taste the flavor, not just the sugar. So most of these recipes will have the sugar dialed down.

    This site also acts as my mobile recipe box, so instructions are often pared down to a minimum - very few frills but for some hints and suggestions!

    RSS Feed

    Categories

    All
    Alcohol
    Almond
    Apple
    Avocado
    Baklava
    Banana
    Bars
    Biscotti
    Blackberry
    Blueberry
    Bread
    Buttercream
    Cake
    Candy
    Carrot
    Cheese
    Cherry
    Chicken
    Chickpea
    Chinese
    Chocolate
    Cider
    Cobbler
    Coconut
    Coconut Milk
    Cookie
    Corn
    Cranberry
    Cream
    Cream Cheese
    Creme Brulee
    Crumb
    Crust
    Cupcake
    Custard
    Dates
    Decoration
    Dip
    Dough
    Doughnut
    Dumpling
    Easy Peasy
    Egg
    Filling
    Flowers
    Frosting
    Fruit
    Garnish
    Gelee
    Granola
    Green Tea
    Honey
    Ice Cream
    Icing
    Jam
    Lamb
    Lemon
    Lime
    Lobster
    Lotus Seed
    Macaron
    Mango
    Marshmallow
    Meringue
    Mochi
    Muffin
    Nectarine
    Nutella
    Nuts
    Oat
    Oats
    Onion
    Orange
    Pancake
    Panna Cotta
    Peach
    Peanut Butter
    Pear
    Pecan
    Phyllo
    Pie
    Pistachio
    Plum
    Popsicle
    Pound Cake
    Pumpkin
    Quiche
    Raspberry
    Red Bean
    Rhubarb
    Rice
    Ricotta Cheese
    Rugelach
    Sauce
    Savory
    Scone
    Sesame
    Shortbread
    Soup
    Sponge
    Sponge Cake
    Strawberry
    Streusel
    Tahini
    Tart
    Tofu
    Topping
    Torte
    Vegetable
    Vinaigrette
    Walnut
    Watermelon
    Yogurt
    Zucchini

    Archives

    September 2021
    March 2021
    February 2021
    December 2020
    November 2020
    October 2020
    July 2020
    May 2020
    April 2020
    March 2020
    October 2019
    December 2018
    October 2018
    August 2018
    April 2017
    July 2016
    May 2016
    March 2016
    February 2016
    January 2016
    December 2015
    November 2015
    October 2015
    September 2015
    July 2015
    June 2015
    May 2015
    April 2015
    February 2015
    January 2015
    November 2014

© 2019 Jacqueline Teng | DragonWarden