DragonWarden
  • Adventures
  • The Oven
  • The Un-Tea Party
  • Secret Ingredients
  • About

Homemade Artisan Bread

12/27/2020

0 Comments

 
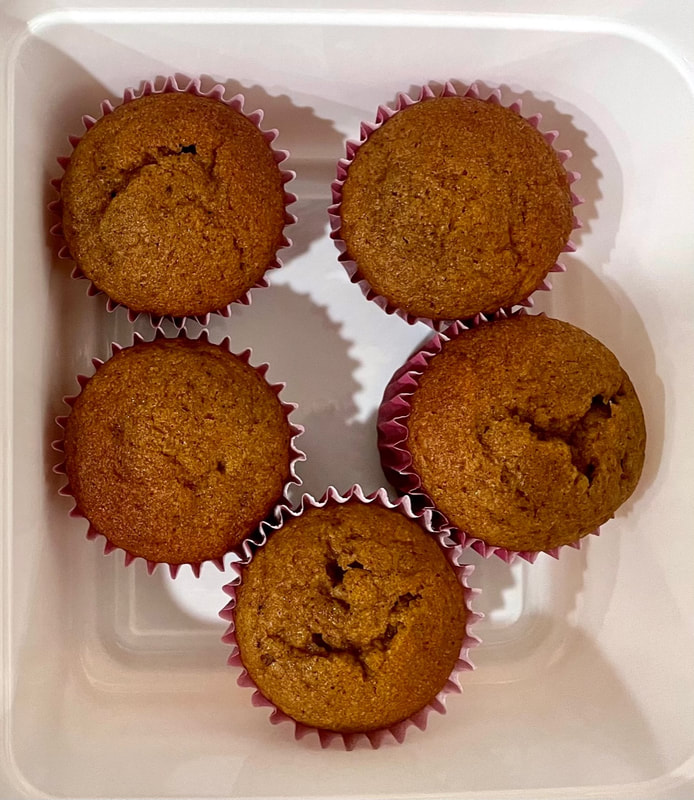
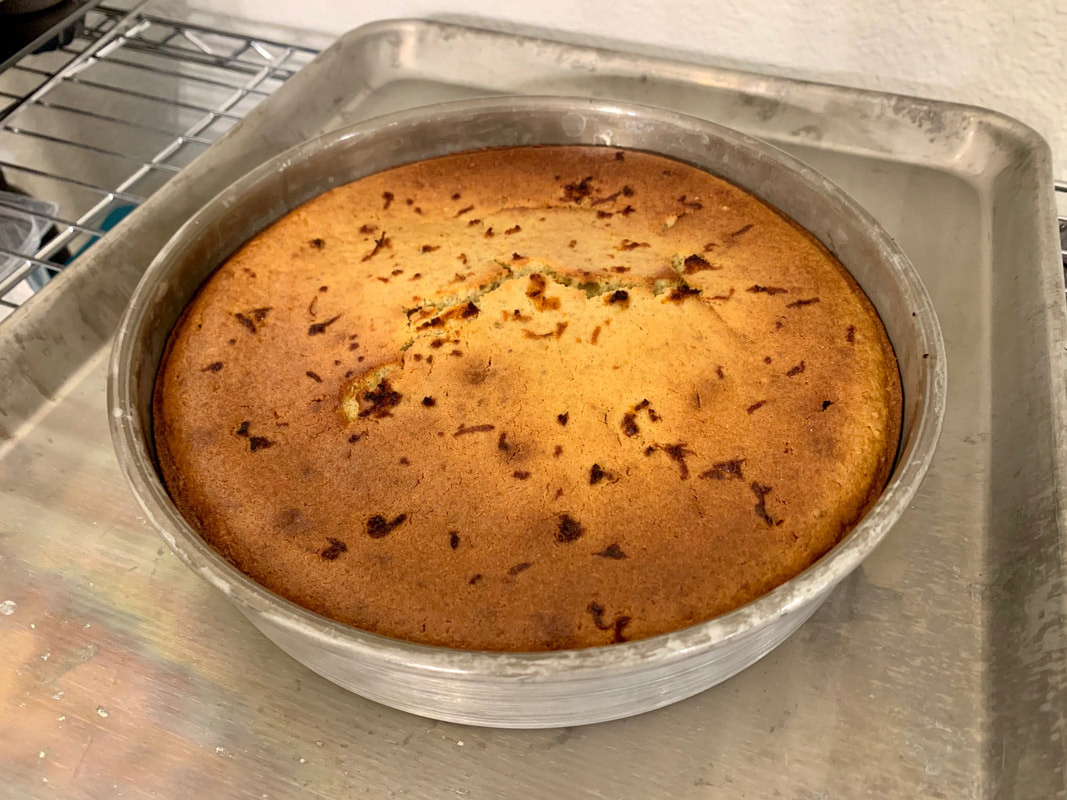
This bread was so popular I ended up making a new batch every single day for nearly a week! It delivered on everything that Sally's Baking Addiction promised. I'm copying the recipe here for my own easy reference when I bake at home, but I suggest checking out her page for all the tips and tricks if you're trying this out for the first time. The recipe really is as easy as it looks, but you may want to know how you can customize and adapt it to your taste - it's incredibly versatile and worth trying all the variations of!
Picture
  • 3 and 1/4 cups (460g) bread flour (see notes on substitutions), plus more for hands and pan
  • 2 teaspoons instant yeast
  • 2 teaspoons coarse salt (if only fine table salt available, reduce to 1.5 tsp)
  • 1 and 1/2 cups (360ml) cool water
  • optional: cornmeal for dusting pan
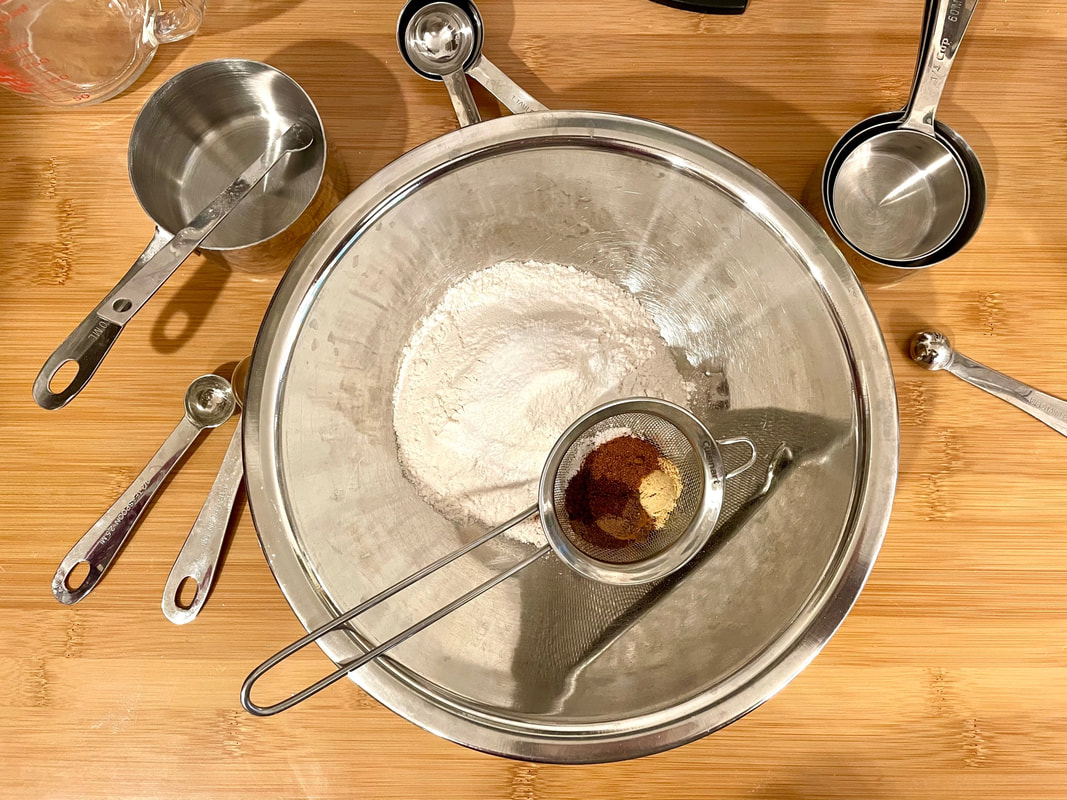
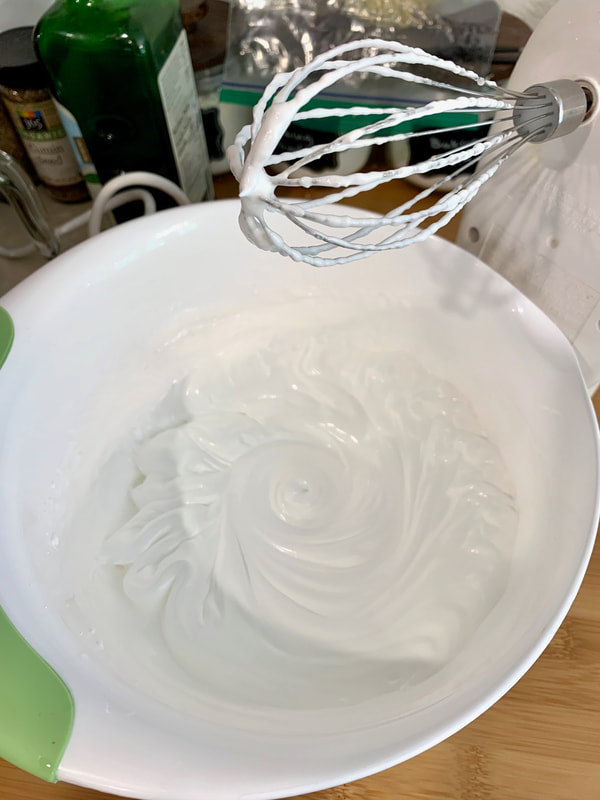
  1. In large un-greased mixing bowl, whisk flour, yeast, and salt together. Pour in cool water and gently mix together with a rubber spatula or wooden spoon. The dough will seem dry and shaggy, but keep working till all the flour is moistened and becomes sticky. If needed, use your hands. Shape into a ball in the bowl as best you can.
  2. Cover dough tightly with plastic wrap or aluminum foil and set on counter at room temperature. Allow to rise for 2-3 hours. The dough will just about double in size, stick to the sides of the bowl, and have a lot of air bubbles.
  3. You can continue with step 4 immediately, but for absolute best flavor and texture, let covered dough rest in refrigerator for at least 12 hours and up to 3 days. The dough will puff up, but may begin to deflate after 2 days. That’s fine and normal.
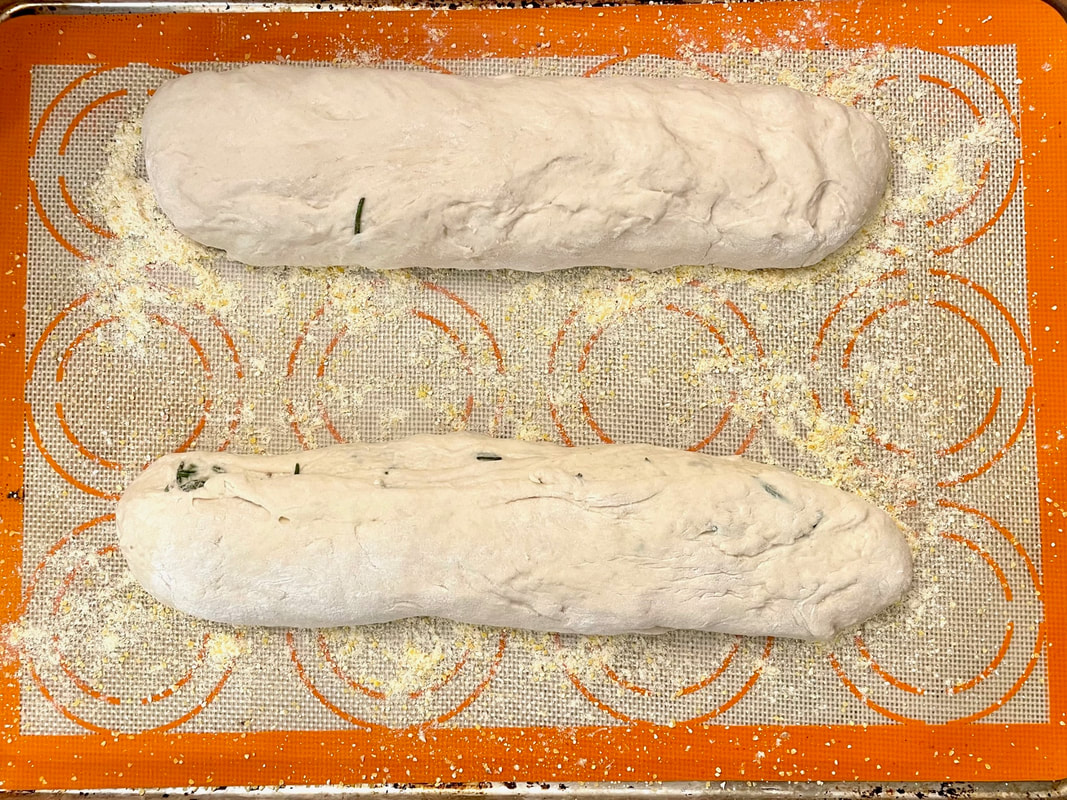
  4. Lightly dust a large nonstick baking sheet (with or without rims and make sure it’s nonstick) with flour and/or cornmeal. Turn cold dough out onto a floured work surface. Using a sharp knife or bench scraper, cut dough in half. Place dough halves on prepared baking sheet. Using floured hands, shape into 2 long loaves about 9×3 inches each (doesn’t have to be exact) about 3 inches apart. Loosely cover and allow to rest for 45 minutes.
  5. Preheat oven to 475°F (246°C).
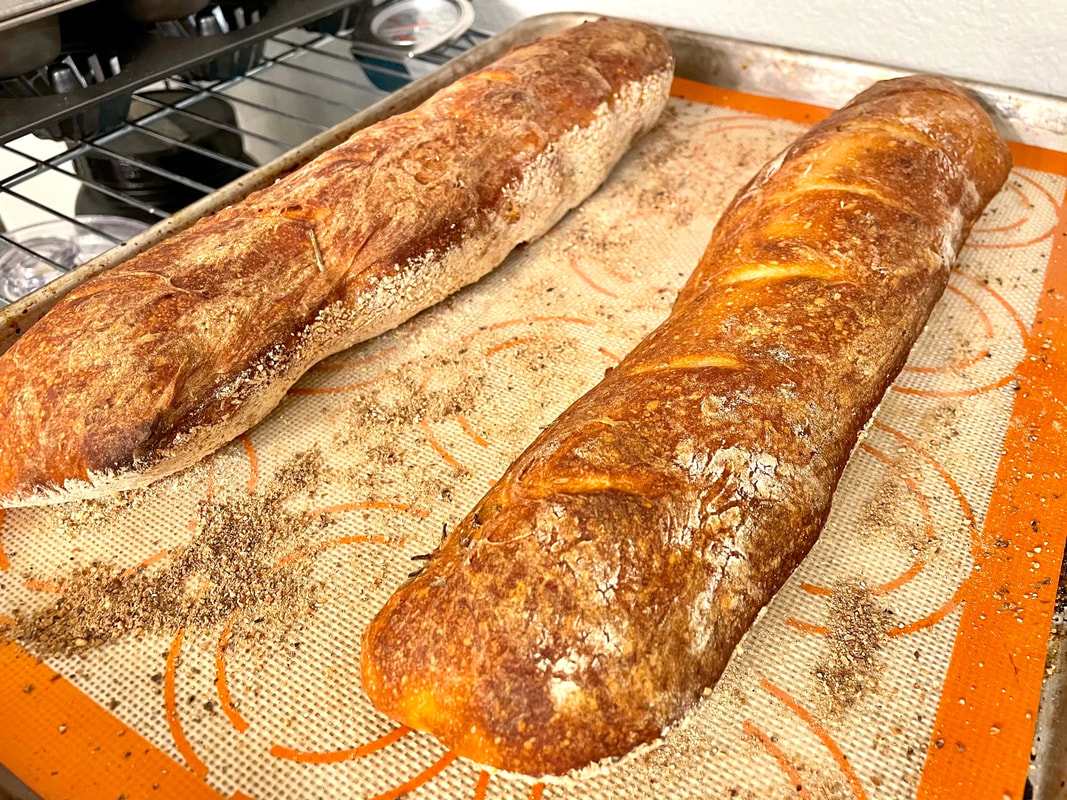
  6. When ready to bake, using very sharp knife or bread lame (or even kitchen shears), score bread loaves with 3 slashes, about 1/2 inch deep. If shaped loaves flattened out during the 45 minutes rest, use floured hands to narrow them out along the sides again.
  7. Optional for a slightly crispier crust: After oven is preheated and bread is scored, place a shallow metal or cast iron baking pan or skillet (such as a metal 9×13 baking pan) on the bottom oven rack. Carefully and quickly pour 3-4 cups of boiling water into it. Place the scored dough/baking pan on a higher rack and quickly shut the oven, trapping the steam inside. The steam helps create a crispier crust.
  8. Place the pan with the shaped and scored dough in preheated oven on center rack. Bake for 20-25 minutes or until crust is golden brown. Gently tap loaves – if they sound hollow, the bread is done.
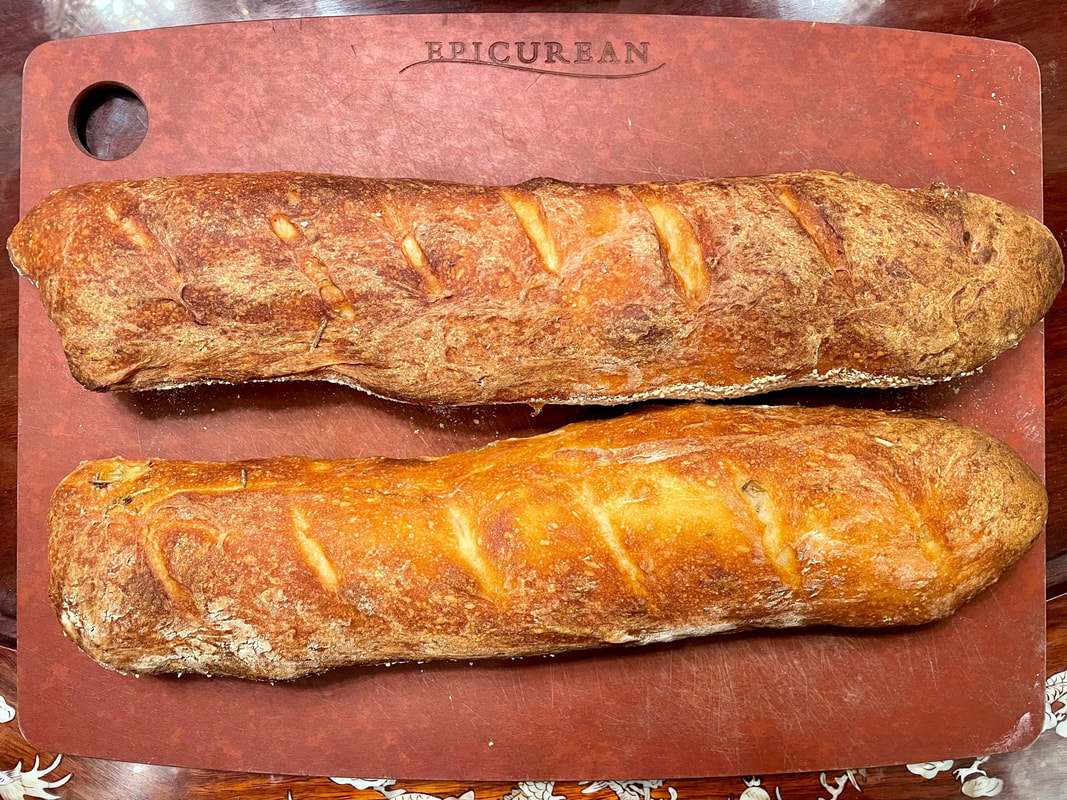
  9. Remove bread from oven and allow to cool for at least 5 minutes before slicing and serving. Store leftovers loosely covered at room temperature for up to 5 days or in refrigerator for up to 10 days.

Notes:
Make Ahead & Freezing Instructions: Dough can sit in refrigerator for up to 3 days. You can also bake the bread, allow it to cool, and freeze for up to 3 months. Thaw in refrigerator and allow to come to room temperature before serving. You can also freeze the dough. Complete the recipe through step 3. Wrap in plastic wrap and place in a freezer-friendly container. To bake, allow dough to thaw overnight in the refrigerator, or for 2-3 hours at room temperature. Continue with step 4 and the rest of the recipe instructions.
Flour: For absolute best flavor and chewy texture, I strongly recommend using bread flour. You can use a 1:1 substitution of all-purpose flour in a pinch with no other changes to the recipe. I recommend avoiding whole wheat flour in this dough. If necessary, use half bread flour and half whole wheat flour. The bread will taste a bit dense.
Round Loaf: If you want to shape the dough into a boule (round loaf) simply shape into a round ball instead of 2 loaves in step 4. Baking instructions are the same, but the loaf will take a few extra minutes in the oven. 
Using a pizza stone: If you want to bake your bread loaves on a pizza stone, place pizza stone in the preheating oven. Transfer shaped and scored loaves to hot pizza stone and bake as directed.
No Nonstick Pan: If you don’t have a nonstick baking sheet, line it with parchment paper instead. Coat with a dusting of flour and/or cornmeal before placing the dough on top. Parchment paper can burn, so it’s best to check the box to see how much heat yours can tolerate. Lower your oven heat if necessary and bake the bread for longer until golden brown and when gently tapped, sound hollow.
Flavor ideas: Before pouring in the water in step 1, add any of the following ingredients/combination of ingredients to the dry ingredients in the bowl: 4 cloves minced garlic + 3 Tablespoons chopped rosemary, 3 Tablespoons your favorite fresh herb (chopped), 1 cup your favorite shredded cheese, a diced jalapeño, 3/4 – 1 cup dried cranberries and/or chopped nuts, 2 teaspoons garlic powder, etc.
0 Comments

Pumpkin Cupcakes

11/16/2020

0 Comments

 
While I started baking to accommodate my taste buds, now it's become an outlet for accommodating my eyes as a visual creative outlet. While I had started with browsing cake decorations, it occurred to me that baking cupcakes would give me many more opportunities to decorate on a mini-canvas ... and mini cupcakes even more so! And since I had some leftover pumpkin puree from my Fall baking, it seemed the perfect time to dig up some mini pumpkin cupcake recipes such as this one, which was moist and fluffy and more spice than sugar - my perfect combo.
Picture
  • 1 cup (125 g) flour
  • 1 tsp baking powder
  • 1/2 tsp baking soda
  • 1/2 tsp salt
  • 1 tsp ground cinnamon
  • 1 1/2 tsp pumpkin pie spice OR:
    • 1/2 tsp ground allspice
    • 1/2 tsp ground ginger
    • 1/4 tsp ground nutmeg
    • 1/4 tsp ground cloves
  • 1/2 cup canola or vegetable oil
  • 2 large eggs
  • 3/4 cup (150 g) packed light or dark brown sugar
  • 1 cup (225 g) canned or fresh pumpkin puree
  • 1 tsp vanilla
  1. Preheat oven to 350 F. Line cupcake pans with cupcake liners.
  2. Sift and whisk flour, baking powder, baking soda, salt, cinnamon, and pumpkin pie spices together in small bowl. In another large bowl, whisk oil, eggs, brown sugar, pumpkin, and vanilla extract together until combined. Combine dry ingredients into the wet ingredients in portions of 1/3, combining completely between each addition.
  3. Pour/spoon the batter into the liners, or if doing mini cupcakes, fill a piping bag and snip off the tip to help fill the cupcake liners. Fill each liner 2/3 full. For regular sized cupcakes, bake for 20-22 minutes, or until a toothpick inserted in the center comes out clean. For mini sized cupcakes, bake for about 12-13 minutes.
0 Comments

Dairy-Free Pumpkin Pie

11/16/2020

0 Comments

 
As I've grown older, sadly, I've also grown more lactose-intolerant. While usually this is easily fixable with a tablet or two of Lactaid, I can also get very lazy about taking them (not to mention I don't want to be buying a box of them every other week). So I searched for a dairy-free version of pumpkin pie, and lo and behold, the internet delivered! Here's a version that I adapted from here.
Picture
  • 1 pie crust
  • 1 teaspoon ground cinnamon
  • 1/2 teaspoon ground ginger
  • 1/4 teaspoon ground nutmeg or allspice
  • 1/4 teaspoon ground cloves
  • 1/2 teaspoon salt
  • 1/2 tbsp corn starch
  • 1 cup regular, full-fat, canned coconut milk (make sure to shake up or mix the coconut milk before measuring in case the fat has separated)
  • 2 large eggs + 1 egg white
  • 1/3 cup brown sugar, firmly packed
  • 1/4 cup white sugar
  • 1 tsp vanilla
  • 1 15-oz can pumpkin puree (or 15-oz of fresh pumpkin puree)
  • 1 teaspoon vanilla extract
  1. Line a 9" pie pan with a single pie crust and put in the freezer to chill. Preheat oven to 425 F.
  2. In a small bowl, whisk together the spices and salt. In another small bowl, mix the corn starch into the coconut milk.
  3. In a large bowl, beat the eggs. Then beat into the eggs both sugars, vanilla, pumpkin, and spices. Whisk in the coconut milk.
  4. Pour the filling into your crust. Bake the pie for 15 minutes, then lower the oven temperature to 350 F (you may wish to put a heat shield on the crust rim now). Bake for about another 45 minutes or until a knife or toothpick in the center comes out clean.
  5. Once done, cool on a wire rack before serving.
Note: The pie pictured also uses the gelatin-stabilized Chinese whipped cream frosting and some hazelnut praline sprinkled on top.
0 Comments

Lobster Tails

10/23/2020

0 Comments

 
Since lobster tails were always the purview of some fancy restaurant, the making of lobster tails was also associated with "fancy cooking" - or, rather, "complicated cooking" - in my mind. But nothing could be further from the truth! Even the prep work was easy peasy, as long as you have some kitchen rubber gloves to protect your hands (as I learned the hard way) and a pair of good kitchen shears. Even a Costco six-pack of lobster tails came out deliciously sweet and delicate! Adapted from this page.
Picture
  • lobster tails
  • 3 tablespoons melted butter or olive oil
  • 1 teaspoon salt
  • 1 teaspoon black pepper
  • 1 teaspoon garlic powder
  • 1 teaspoon paprika
  • 1 teaspoon fresh parsley, chopped
  • 1 teaspoon lemon juice
  • 2 wedges lemon, to serve
Note: Like a lot of cooking recipes, the ingredient amounts are highly flexible. While some ratios are given here, you can really adjust it to your taste - just make sure there's enough to drench all the lobster tails. 
  1. Using a clean pair of scissors or kitchen shears, cut in a straight line along the middle of the top of the shell towards the fins of the tail. Cut through all of the horizontal segments, but do not cut through the end of the tail.
  2. For this step, you may wish to use a pair of kitchen rubber gloves to handle the tails if they are particularly spiny. Using a spoon or your fingers, separate the meat from the two sides of the shell, then lift the meat up and out from inside the shell. (If you are having difficulty opening the shell up to lift out the meat, flip the tail over and make cuts along the carapace where the legs meet the bottom part tail, or you can squeeze the edges of the shell together until the ribs crack. This will help break the rigid structure of the shell and allow it to be more flexible.)
  3. Press the two sides of the shell together, then lay the meat over the seam where the two shells meet.
  4. While cutting through the shell, you may have also cut into the meat, which is perfectly okay. Make a shallow cut through the middle of the lobster meat so that you can peel down the thin layer of meat over the sides. This gives the lobster tail its signature look.
  5. Preheat oven to 425°F (230°C).
  6. In a small bowl, combine the butter, salt, pepper, garlic powder, paprika, lemon juice, and parsley, then brush the mixture evenly over the lobster meat.
  7. Place the tails onto a baking sheet, then bake for approximately 12-15 minutes for larger tails, or 7-10 minutes for smaller tails, until the lobster meat no longer has any translucency throughout. If you have an instant thermometer, you can check that the internal temperature reaches 140°F. The key here is you never want to overcook them - when in doubt, take them out to check their middle, and then put them back into the oven 1-2 minutes at a time depending on how well done they are by that point. 
  8. Serve with a side of lemon wedges.
0 Comments

Fresh Pumpkin (Puree)

10/19/2020

0 Comments

 
This might seem a weirdly simple item to have its own "recipe", but it's precisely because it's so simple that it deserves a call-out! It used to be that I depended solely upon canned pumpkin - which, don't get me wrong, there's nothing wrong with that. But, ever since I found out how easy it was to simply pop a fresh pumpkin into a pie or any other baked good looking for it, I couldn't resist buying up all those pie pumpkins in the supermarket whenever they came in season. (And they'll back you up if there's ever a repeat of the great canned pumpkin shortage of 2019!) Be aware that fresh pumpkin is also super moist - keep that in mind if your recipe is very sensitive to moisture content! I've so far not had any issues with just doing a straight ounce-for-ounce substitution of canned pumpkin (in fact, that extra moisture has been very welcome in some recipes) but forewarned is forearmed.
Picture
  • one or two pumpkins
    Note: Pie pumpkins are smaller and sweeter. You can usually fit two on a baking sheet and it wouldn't change the baking time. Larger pumpkins work just as well for a lot of baking projects, but you probably won't want to try and stuff more than one in the oven at a time.
  • Set the oven to 425 F. Punch a few slits or holes into the pumpkin(s) with a knife for venting while it cooks.
  • Line a baking sheet with foil and fold up the edges a little in case juices vent or leak from the pumpkin. Set the pumpkin in the middle of the foil and then bake in the oven for 1 hour. The pumpkin skin will look slightly burnt but is easy to peel, and the inside should be totally soft (you can test if you're uncertain by sticking a knife or skewer through the side - it should be VERY easy to poke through).
  • Take it the pumpkin out and let it cool. To help it cool more quickly, you can peel back the skin and quarter it with a spoon (be very careful, it will be very hot and as soon as you open it probably a lot of super-heated steam will puff out).
  • Once cooled, scoop out the seeds and guts, then throw the meat of the pumpkin into a food processor. Process for a few seconds, pause to mix it up a little with a spoon, then process again. After two or three rounds of this, it should have released enough moisture that you can just leave it on and it will start to circulate itself until all the bits have been pureed.
  • Scoop out and either use immediately, refrigerate, or freeze for later use. (Note: you can also let it drain a little first by dumping it into a collander and letting it sit for a few hours.)
0 Comments

Pavlova

7/20/2020

0 Comments

 
I've avoided meringues for most of my life as 1) I had some strange misguided prejudice against them because they reminded me of macarons (and I don't like macarons) and 2) everyone always exclaims how hard it is to make a meringue. However, I was finally tossed right into the pool and it was sink or swim when I committed to making an elaborately fancy cake that used Italian meringue in its frosting ... and I discovered that all of my preconceptions were completely false.

I managed to make the pavlova on the first try. It was not without a few hiccups along the way, but there were plenty of tips and tricks on the internet and I not only salvaged it but it became a week-long hit at multiple households. So, don't be intimidated by the meringue's reputation! In fact, if it wasn't for the fact that it takes a really long time of holding the beaters, I would say this was totally an easy-peasy rating, and you can dress it up with all manner of fanciful and beautiful treats, such as a tangy lemon curd and sweet strawberries.
Picture
  • 4 large egg whites
  • 1 cup sugar
  1. Preheat oven to 250 F. Line a baking sheet with parchment paper.
  2. Whip egg whites in a large bowl until uniformly frothy. While whipping, add a few spoonfuls of sugar. Whip until the soft peak stage, then add another few spoonfuls of sugar while whipping. Continue until all the sugar has been added, then continue whipping until the stiff peak stage and the meringue is thick and glossy.
  3. Place 6 dollops of meringue on the baking sheet. Use the back of a spoon to shape the meringues and create a slight well in the centers.
  4. Bake for one hour, turn off the oven, and then prop open the door with a wooden spoon until completely cooled.
Notes: This is one recipe where you can't get away with just reducing the sugar. The sugar is necessary to help the meringue hold its structure. There will be some inevitable cracking once the meringue starts to cool down and settle - it will crack slightly less if you let it cool down gradually by keeping it in the oven and letting the heat escape gradually.

If you add the sugar too quickly, the meringue will not firm up, so best method is to get it to the soft peak stage, add sugar, then get it back to the soft peak stage again if it has collapsed, add sugar again, etc. If it's a humid day and it seems to need a little extra help, you can add a bit of lemon juice or cream of tarter at the frothy stage. You can also separately whip one egg white to stiff peak stage, then fold it into the main bowl and then whip the entire bowl, and it should firm up better than before.
0 Comments

Chinese Sesame Candy

7/17/2020

0 Comments

 
While all my memories of this candy are very fond - drawn as they are from a childhood of mahjong parties, when the adults would lay out trays of snacks and candies for easy munching while they played and the kids would gleefully filch more from the stashes than the adults did - I hadn't thought of them in literally decades. But a couple weeks ago while I was escorting my mother at 99 Ranch Market, I happened to glimpse some very pretty packaging for black sesame candy and had a sudden craving for them. Except, of course, why not make my own?

I tried this recipe and it was not only an amazingly fast and easy assembly, earning the easy-peasy rating, but the candy was honestly more delicious than any store-bought one from my memories and each batch disappeared literally within an hour or two of making. I ended up making double-batches three times in one week!

Bonus points - my boyfriend had a truly inspired suggestion and the crumbled bits of semi-smoky slightly-sweet sesame seed turned out to be an amazing topping for vanilla bean ice cream. ^_^ Yum!
Picture
  • 1/2 cup black sesame seeds
  • 1/2 cup sesame seeds
  • 1 1/2 teaspoons canola or vegetable oil
  • 2 tablespoons honey *
  • 1/3 cup sugar
Additional equipment:
  • 2 silicone mats
  • rolling pin
  1. Lay a silicone mat on your work surface. You will use this for rolling out the sesame candy.
  2. Pour the black sesame seeds into a large pan and toast them on medium-high heat for about 3 to 4 minutes, stirring frequently. Because of their black color, it may be difficult to tell when the sesame seeds are done toasting. The sesame seeds usually release a faint aroma when they are ready. You can also see wisps of smoke coming from the sides of the pan. Turn off the heat and transfer the sesame seeds to a bowl.
  3. Next, toast the plain sesame seeds for 3 to 4 minutes, stirring occasionally. Transfer the toasted seeds to the bowl with the black sesame seeds. Mix the two types of seeds together.
  4. In a large stainless steel pan, add the oil, honey, and sugar over medium-high heat. Stir everything together and wait for the sugar to dissolve completely and the resulting syrup takes on a golden color and is runny. Make sure to stir frequently to keep the sugar from burning.
  5. Once the sugar dissolves, turn off the heat. Add the sesame seeds and stir to coat the seeds with the syrup.
  6. Working quickly, pour the sesame seeds onto the silicone mat. Try to pile all the seeds into one mass. Lay the other silicone mat over the seeds and press down gently. Use a rolling pin to roll out the sesame candy. You want to make sure to be quick here so that you can roll out the candy into a thin layer.
  7. Take off the top silicone mat and lay a chopping board over the candy. Carefully flip the candy onto the chopping board. Remove the second silicone mat.
  8. Use a sharp knife to trim the sides of the sheet of sesame candy so that you get straight edges. Cut the candy sheet into 1-inch strips of candy. Cut each strip into candies about 1 1/2 to 2 inches long. Don’t worry if your candy isn’t uniform in size. Mine are never perfect.
  9. You can enjoy the candy immediately. The candy will continue to harden as it cools to room temperature. Once cooled, store the candy in an airtight container for several weeks. (A ziploc baggie is sufficient - if it is not stored in a container, the candy will soften into a crumbly mess.)
* Note: The honey helps to keep the candy soft enough to roll as it cools, and also provides some chewiness after it has cooled completely. Depending on your preferences, you can reduce the honey by as much as a half if you'd like the final candy to be crisper.
0 Comments

Pistachio-Orange Ricotta Cake

4/13/2020

0 Comments

 
This was a surprisingly extraordinary cake considering its borderline easy-peasy status! From the Better Baking book by Genevieve Ko, it was a surprise hit as I had only made it because I had leftover ricotta in the fridge. Wonderfully fragrant, with the pistachio's nutty undertones and a density and texture reminiscent of pound cake, the cherry on top was that you can throw all the ingredients into the food processor and be done with it.
Picture
  • 8 tbsp (114 g) unsalted butter, softened (almost melting point)
  • 1_1/4 cups (180 g) white whole wheat flour
  • 2 tsp baking powder
  • 1/2 tsp salt
  • 1/2 cup (64 g) shelled roasted salted pistachios
  • 1 cup (110 g) sugar
  • 1_1/2 cups (339 g) whole-milk ricotta cheese, drained
  • 3 large eggs, room temperature
  • 1 small orange
  • 1 tsp vanilla extract
  1. Position rack in center of oven and preheat to 350 F. Butter 2" deep 9" round cake pan, line bottom with parchment paper, and butter the parchment.
  2. Whisk flour, baking powder, and salt in small bowl. Combine pistachios and sugar in food processor and process until mixture resembles coarse meal. Add butter and ricotta and pulse until smooth, scraping bowl occasionally. Add eggs and process until smooth, scraping bowl occasionally. Zest half the orange into mixture. Squeeze 2 tbsp juice from orange and add to processor, then add vanilla and process until liquids are incorporated.
  3. You can add the flour mixture directly and process, or pour liquid mixture into another bowl and hand-mix flour mixture in until everything is incorporated evenly. Pour batter into prepared pan and smooth the top.
  4. Bake until a toothpick inserted into the center of cake comes out clean, 50-55 mins.
  5. Cool in the pan on wire rack for 10 mins, then run a thin-bladed knife between the edges of the cake and pan. Invert the cake onto the rack and discard parchment paper. Carefully flip cake again to cool completely on rack.
0 Comments

Coconut Milke Panna Cotta

4/5/2020

0 Comments

 
This is a great dairy-free option for the lactose intolerant, and was incredibly easy to make. It set beautifully, and everyone in the family called for more afterward! You could make this sweeter by adding more honey, or making some macerated berries to garnish on top.
Picture
  • 2 tsp powdered gelatin
  • 1.5 tbsp water
  • 13.5 oz full-fat coconut milk (preferred: Aroy-D)
  • 1.5 tbsp honey or maple syrup
  • (optional) 1 tsp vanilla extract
  1. Add the water to a small bowl and sprinkle the gelatin on top. Allow to bloom for 5 mins.
  2. Heat the coconut milk, honey, and vanilla if using, in a small pot on medium heat. Whisk together and bring to a low simmer. Take pot off the burner and whisk in the gelatin until it is fully dissolved.
  3. Pour the panna cotta mixture into the ramekins (I like to pour it into a measuring cup first to make it easy for pouring) and refrigerate until set (at least 4 hours).
Note: To remove the panna cotta from the ramekin for presentation, place the ramekin in a small bowl of hot water for 10-15 seconds to warm the outside of the ramekin. Then invert onto a plate. Repeat the warming step is necessary so that the panna cotta slides out easily.
0 Comments

Shortbread Lemon Tart Recipe

3/26/2020

0 Comments

 
Beautifully lemony, I found this recipe here. Even better, it achieves the easy-peasy rating because you literally throw all the ingredients into a blender and a food processor and you're done! Per usual, I've adjusted the sugar levels a bit - not only do I usually apportion only 1 cup of sugar for something cake-sized these days, but I felt it really lets the brightness of the lemon shine through. 
Picture
Lemon Filling:
  • 4 large eggs
  • 1/3 cup fresh lemon juice
  • 1 cup granulated sugar
  • 1 tablespoon lemon zest
  • 1 tablespoon orange zest
  • 1/3 cup butter, melted
  • powdered sugar, for topping
Shortbread Crust:
  • 2 cups all-purpose flour
  • 1/2 cup powdered sugar
  • 3/4 cup cold butter, cut into cubes
  1. Preheat the oven to 350ºF.
  2. In a blender, combine the eggs, lemon juice, granulated sugar, lemon zest and orange zest.  Process on high until smooth.  Add the butter, replace the cover, and blend again on high until smooth.  Set aside.
  3. In a food processor, combine the flour and powdered sugar.  Pulse a few times to combine.  Add the butter and continue to pulse until the mixture looks sandy and the butter is fully incorporated into the flour and sugar.
  4. Place an 11-inch tart pan on a baking sheet.  Pour the crust mixture into the pan.  Press the mixture firmly and evenly into the bottom and up the sides of the pan. (You can use the bottom of a cup to help press the crust more evenly on the bottom of the pan.)
  5. Pour the filing into the crust, then transfer the tart into the oven.  Bake until the center is almost set, 30-35 minutes. 
  6. Cool the tart completely.  When ready to serve, sprinkle powdered sugar over the top and cut into slices.
0 Comments
<<Previous
    Picture

    Sweet Enough

    Part of the reason I started baking was because I like my goodies to be less obviously sweet - I want to taste the flavor, not just the sugar. So most of these recipes will have the sugar dialed down.

    This site also acts as my mobile recipe box, so instructions are often pared down to a minimum - very few frills but for some hints and suggestions!

    RSS Feed

    Categories

    All
    Alcohol
    Almond
    Apple
    Avocado
    Baklava
    Banana
    Bars
    Biscotti
    Blackberry
    Blueberry
    Bread
    Buttercream
    Cake
    Candy
    Carrot
    Cheese
    Cherry
    Chickpea
    Chinese
    Chocolate
    Cider
    Cobbler
    Coconut
    Coconut Milk
    Cookie
    Corn
    Cranberry
    Cream
    Cream Cheese
    Creme Brulee
    Crumb
    Crust
    Cupcake
    Custard
    Dates
    Decoration
    Dip
    Dough
    Doughnut
    Dumpling
    Easy Peasy
    Egg
    Filling
    Flowers
    Frosting
    Fruit
    Garnish
    Gelee
    Granola
    Green Tea
    Honey
    Ice Cream
    Icing
    Jam
    Lamb
    Lemon
    Lime
    Lobster
    Lotus Seed
    Macaron
    Mango
    Marshmallow
    Meringue
    Mochi
    Muffin
    Nectarine
    Nutella
    Nuts
    Oat
    Oats
    Onion
    Orange
    Pancake
    Panna Cotta
    Peach
    Peanut Butter
    Pear
    Pecan
    Phyllo
    Pie
    Pistachio
    Plum
    Popsicle
    Pound Cake
    Pumpkin
    Quiche
    Raspberry
    Red Bean
    Rhubarb
    Rice
    Ricotta Cheese
    Rugelach
    Sauce
    Savory
    Scone
    Sesame
    Shortbread
    Soup
    Sponge
    Sponge Cake
    Strawberry
    Streusel
    Tart
    Tofu
    Topping
    Torte
    Vegetable
    Vinaigrette
    Walnut
    Watermelon
    Yogurt
    Zucchini

    Archives

    November 2020
    October 2020
    July 2020
    May 2020
    April 2020
    March 2020
    October 2019
    December 2018
    October 2018
    August 2018
    April 2017
    July 2016
    May 2016
    March 2016
    February 2016
    January 2016
    December 2015
    November 2015
    October 2015
    September 2015
    July 2015
    June 2015
    May 2015
    April 2015
    February 2015
    January 2015
    November 2014

© 2019 Jacqueline Teng | DragonWarden