DragonWarden
  • Adventures
  • The Oven
  • The Un-Tea Party
  • Secret Ingredients
  • About

No-Bake Cheesecake

12/22/2015

0 Comments

 
I had pinned this article from Epicurious from back in forever, and had honestly forgotten about it altogether. It wasn't until I offered to make a cake for my mother for the holiday potluck and trawled through my Pinterest board (and quietly panicking when I realized I almost never pay any attention to cakes) when I stumbled across this recipe again.

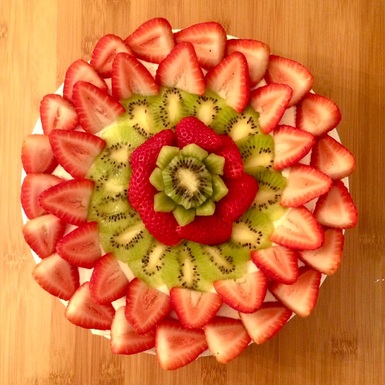
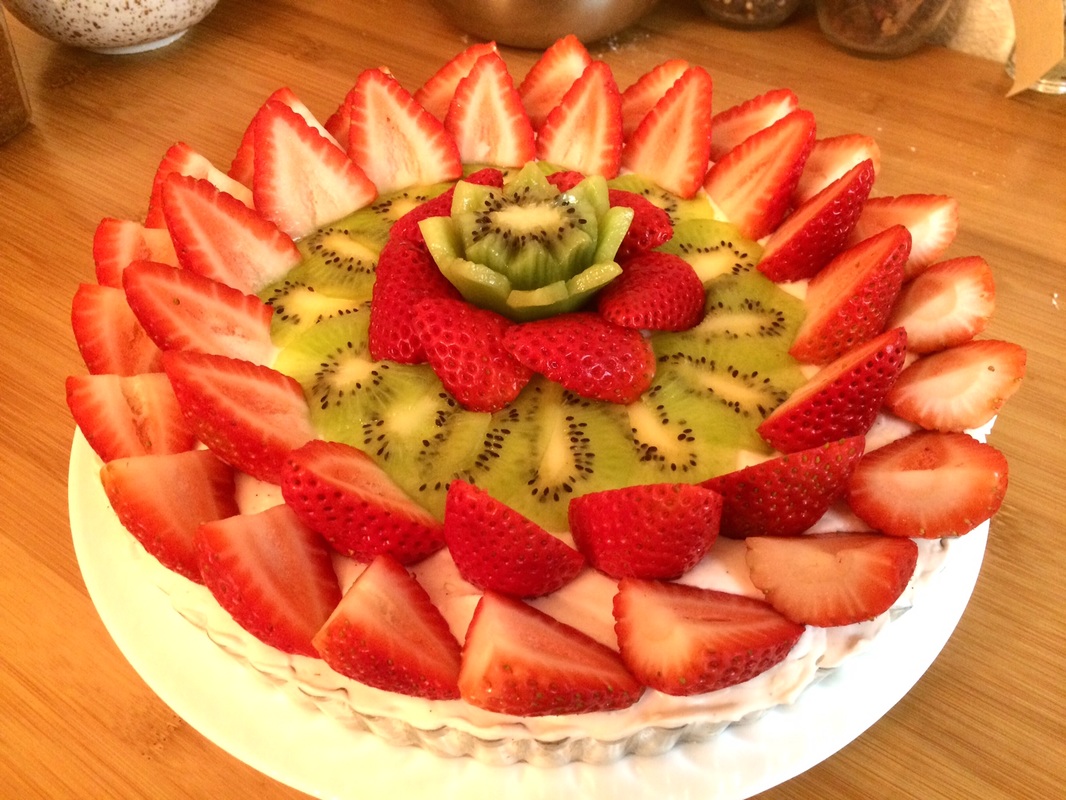
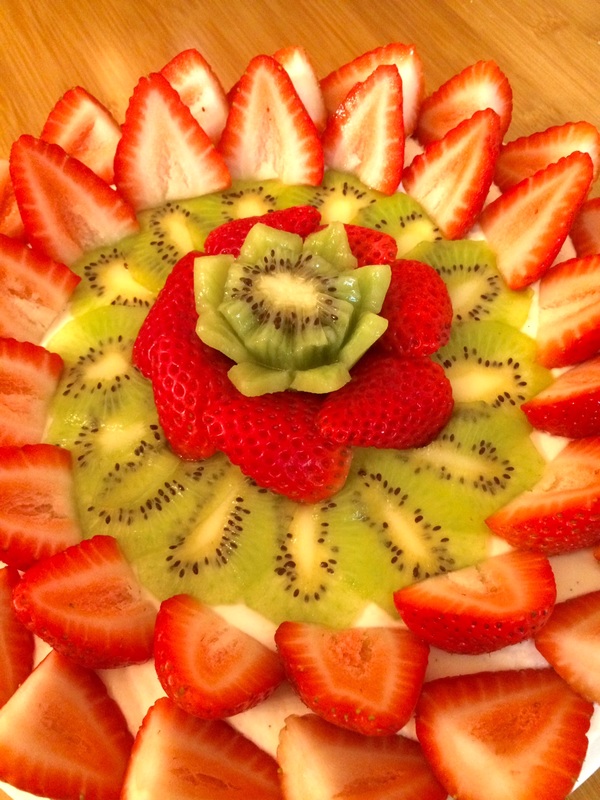
Since it was for the holidays, I added some green to help complement the red, and had a grand old time carving and essentially playing with the fruit. With a ready-made crust and store-bought whipped topping, this is a quick and easy recipe, though I usually opt to make my own graham cracker crust and whipped cream.
Picture
  • 8 ounces cream cheese, softened
  • 1/3 cup sugar
  • 1 cup sour cream (or 1 1/3 cup for a more NY-style sour cheesecake)
  • 2 teaspoons pure vanilla extract
  • 1 lemon zested
  • 8 ounces prepared whipped topping, thawed
  • 1 prepared graham cracker crust
  • 1 pound fresh strawberries, hulled and halved lengthwise
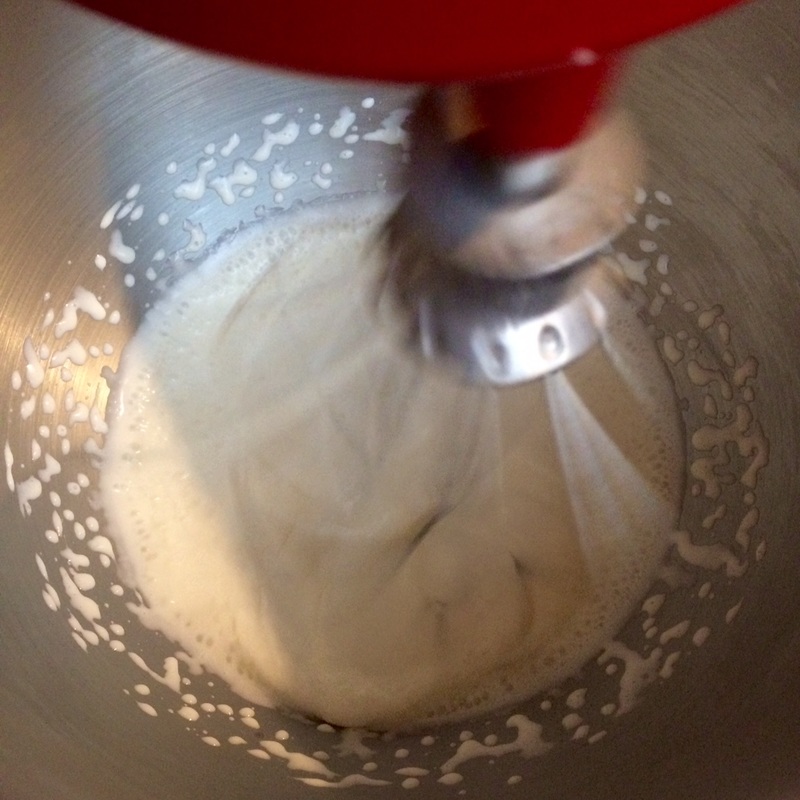
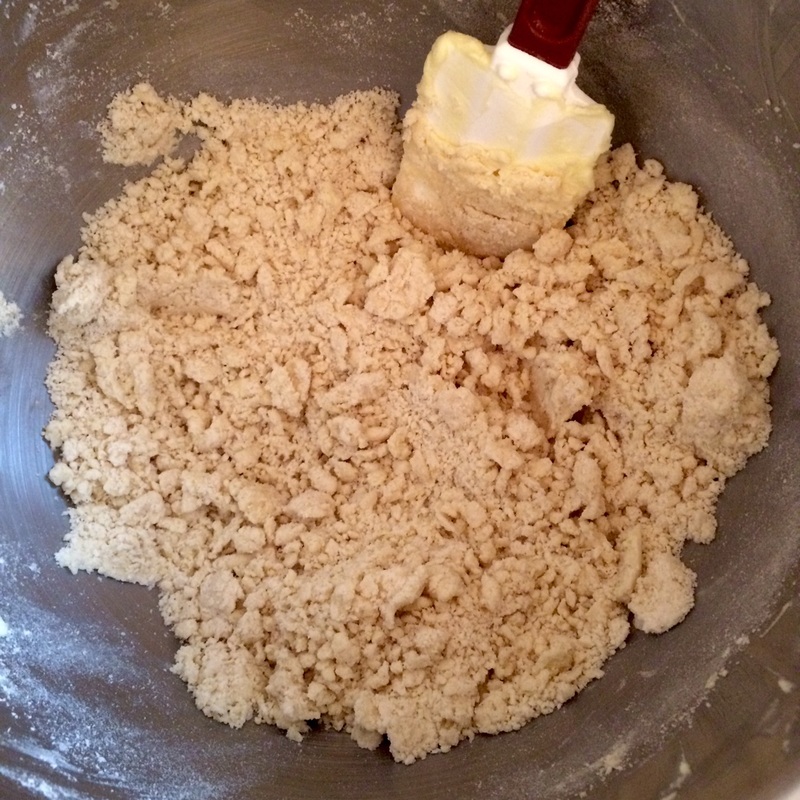
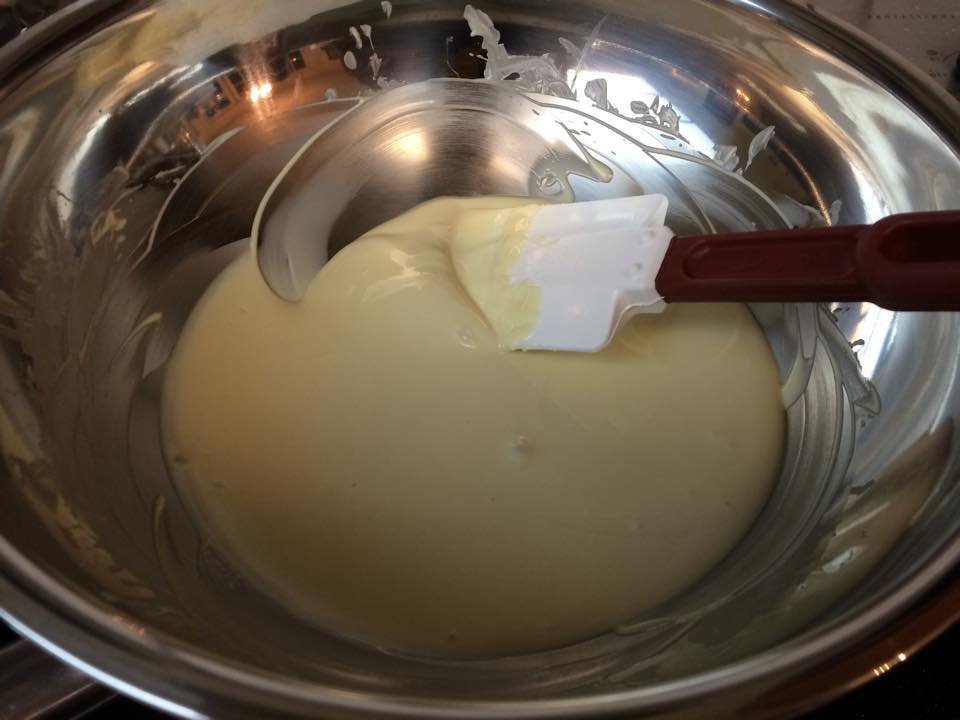
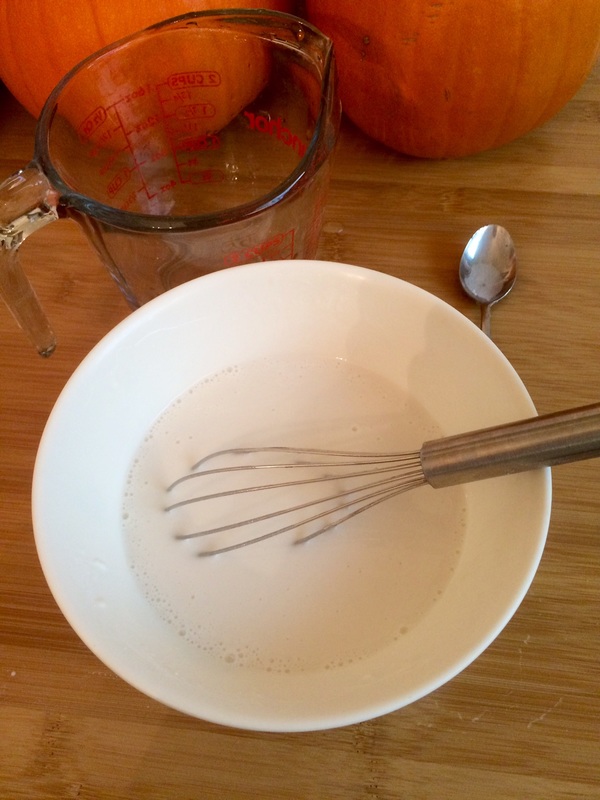
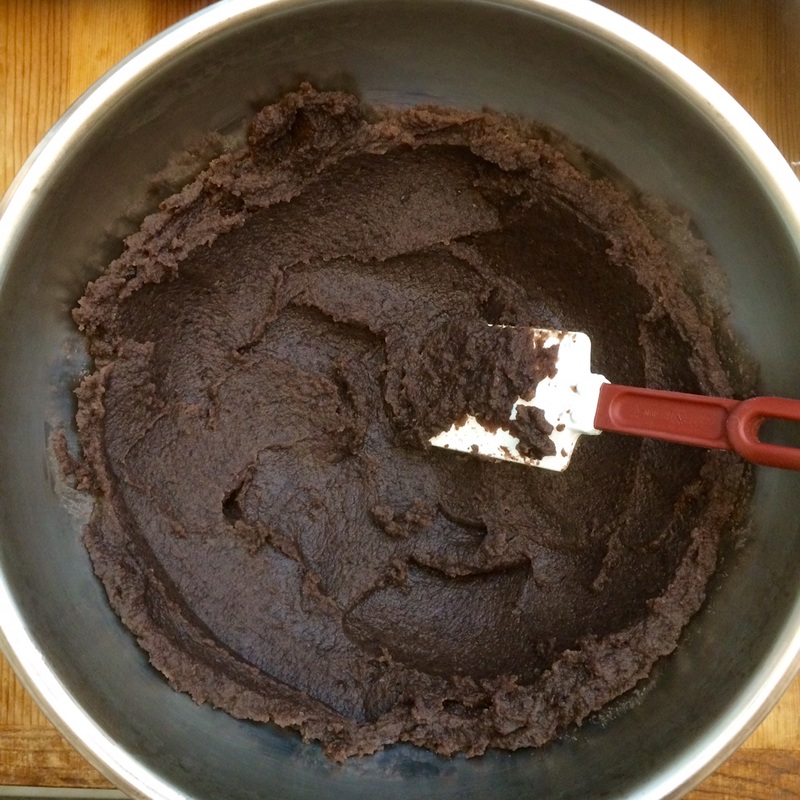
  1. Beat the cream cheese until smooth with an electric mixer. Gradually beat in the sugar. Beat in the sour cream, vanilla, and lemon zest until just combined.
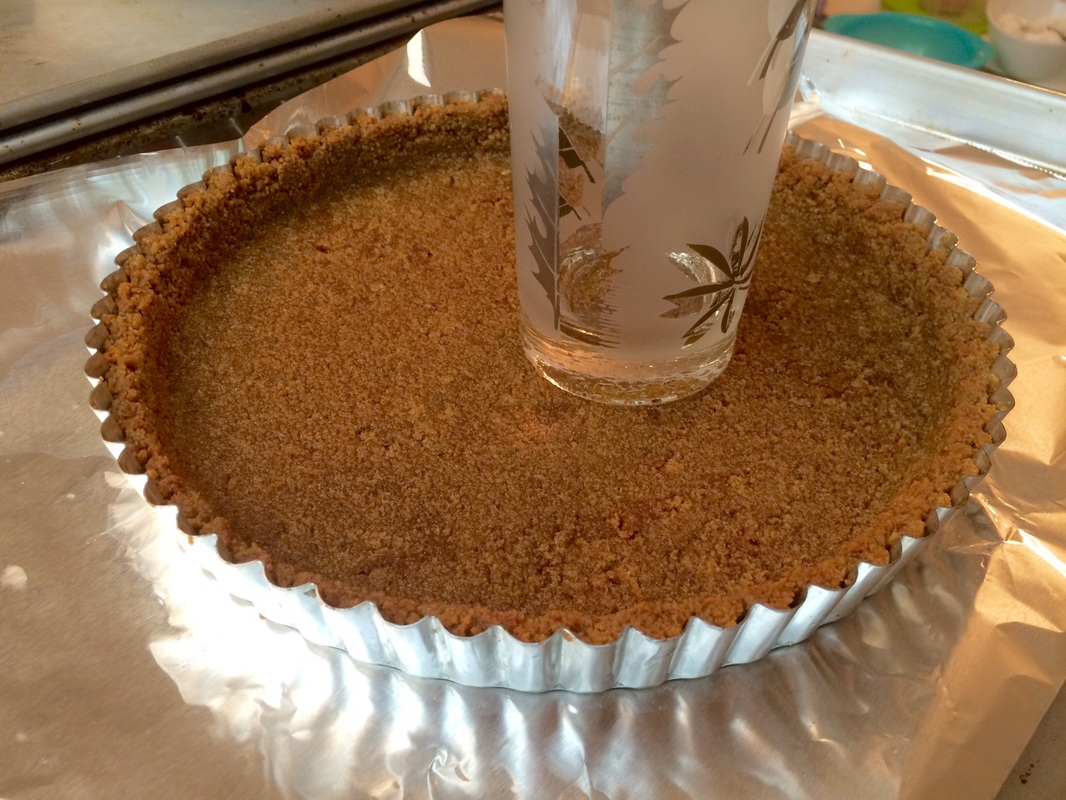
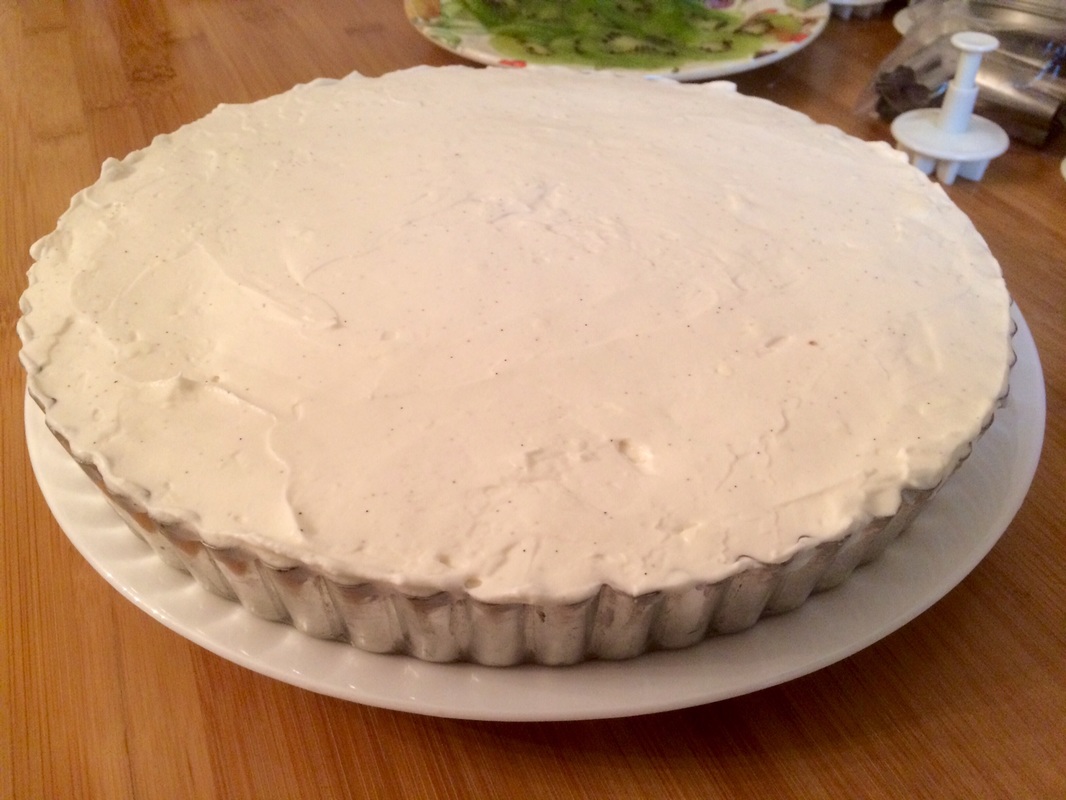
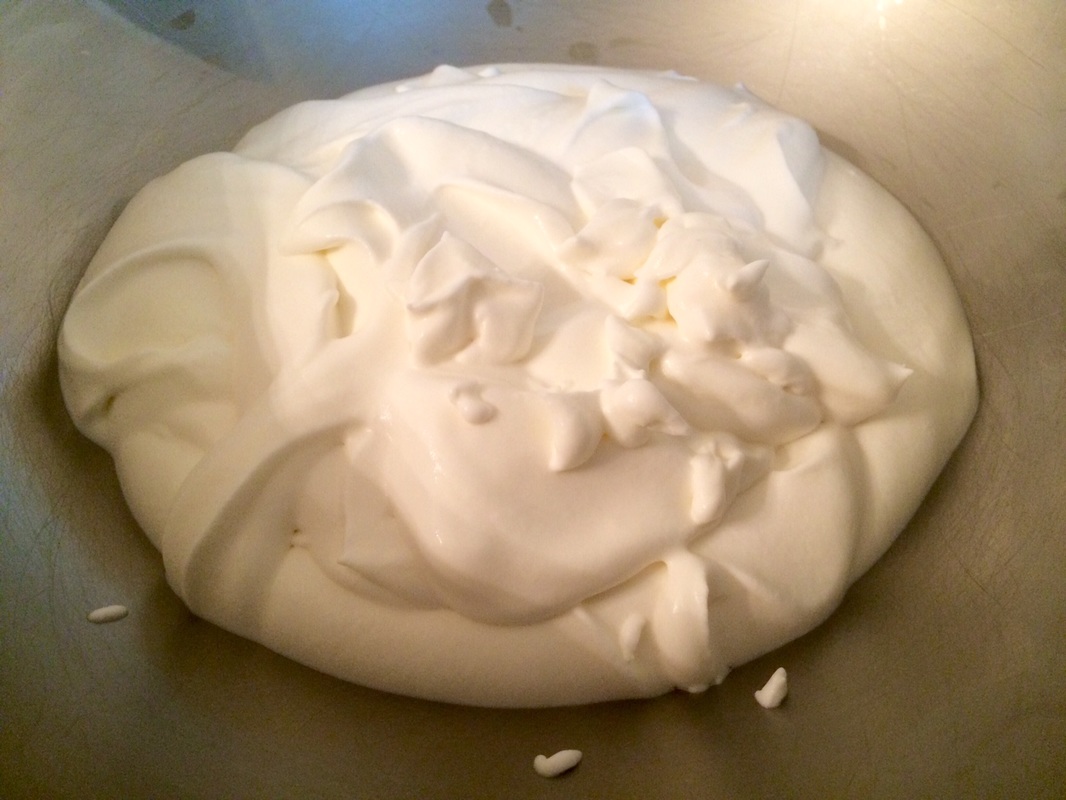
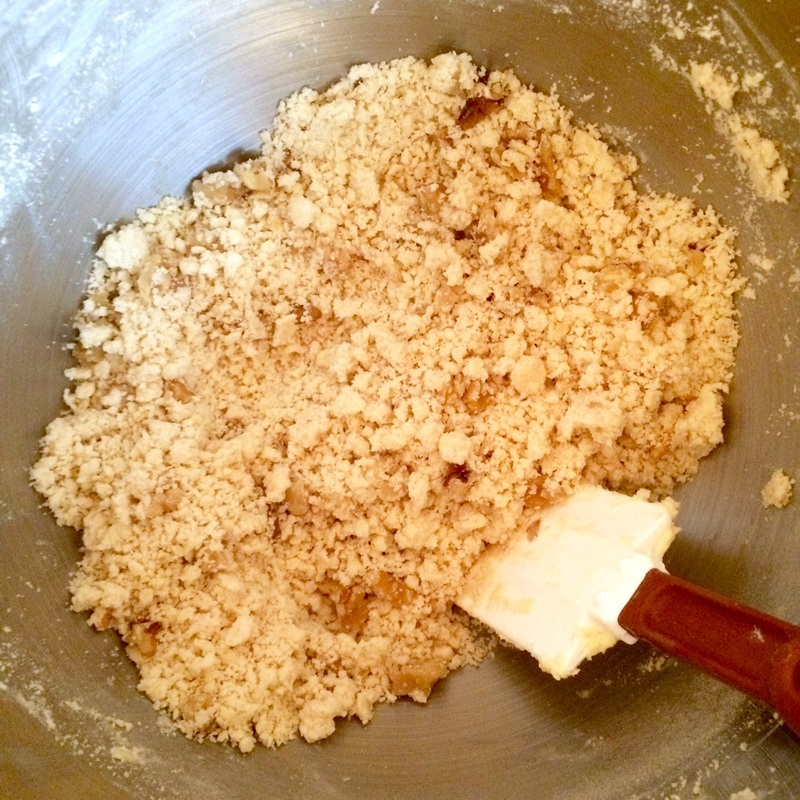
  2. Fold in the whipped topping. Scrape mixture into the piecrust. (There may be some filling left over. If so, reserve it to be decoratively piped onto the top of the pie.) Chill in the refrigerator for 4 hours.
Notes: Half of those who tried this mentioned that they preferred a thicker graham cracker crust than I usually make for other tarts to go with this cheesecake.

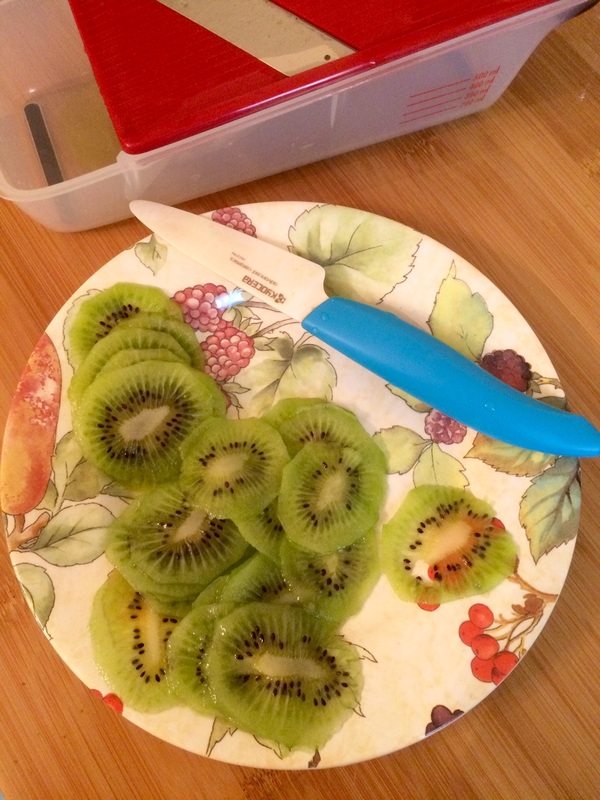
If you're going to use kiwis, find some that are firmer/not-quite-ripe. They will be easier to slice using a mandolin, and they'll be so thin that their not-so-perfect state of ripeness won't be as much of an issue. Also, turn the fruit 180 degrees after each slice; otherwise, the trailing end will start to get ragged after a while depending on the sharpness of your mandolin, particularly if the fruit is already softer than ideal.
0 Comments

Whipped Cream / Topping

12/22/2015

0 Comments

 
I highly recommend reading through Bon Appetit's do's and don'ts of homemade whipped cream. It's a succinct guide of the common pitfalls of making your own whipped cream, tips on how to recover if you've misstepped, and what effects different ingredients have. Otherwise, I've simply copied the most common steps below for easy reference.
Picture
  • 1 cup heavy cream
  • 1 tbsp confectioner's sugar or granulated sugar
  • (optional) additional 1 tbsp of sugar for sweeter whipped cream
  1. Chill the bowl and whisk, either in the freezer (for about 10 minutes) or the refrigerator (for about 20 minutes).
  2. Pour the heavy cream in the bowl. If using granulated sugar, add it now.
  3. Using an electric mixer, beat the cream until soft to medium peaks form. If using confectioner's sugar, add it now.
  4. You may wish to switch to a hand-whisk to continue beating the whipped cream to the desired stiffness. Or else use the electric mixer in short bursts, to avoid over-beating the cream.
  5. Chill whipped cream until ready to use. You can "refresh" it just before use by hand beating it for about 10-15 seconds.
0 Comments

Sour Cream Cheese Frosting

12/20/2015

 
I love the extra tang the sour cream gives this version of the common cream cheese frosting. While the sour cream may not be evident if you sample the frosting by itself, when garnishing something else - such as the pumpkin bread/cupcake - the sour tang becomes much more evident.
Picture
  • 1 (8 oz) package cream cheese, softened
  • 1/4 cup butter, softened
  • 2 tbsp sour cream
  • 2 tsp vanilla extract
  • 1.5 - 2.5 cups confectioners' sugar, sifted
    ​(less sugar for a slightly less sweet but softer spread, more sugar for a stiffer spread that will hold its shape - the photo used 2 cups for the frosting)

  1. Beat cream cheese, butter, sour cream, and vanilla in large bowl until light and fluffy.
  2. Gradually beat in confectioners' sugar until smooth. Add more sugar for stiffer frosting, leave some out for softer frosting.

Mexican Wedding Cookies

12/19/2015

0 Comments

 
These are a definite hit among family and friends - one batch makes like a million little cookies, but they're always gone in just a few days (depending on how many people are in the house at the time). Even though I would ordinarily label this an "easy-peasy" recipe, but it's a little labor/time-intensive when you use a 1/2 tbsp scoop like suggested. I lowered the sugar in the cookie itself so that it's balanced by the powdered sugar coating.
Picture
  • 3/4 cup vegetable shortening
  • 1/4 cup granulated sugar
  • 1 tsp vanilla extract
  • 2 cups all-purpose flour
  • 1/2 cup walnuts, chopped
  • powdered sugar for rolling
​Yield: about 60

  1. Preheat oven to 325 degrees and place rack in the bottom 1/3 of the oven. Line 2 baking sheets.
  2. In a large bowl, cream the shortening and sugar together. Beat in the vanilla extract. Gradually blend in the flour (the dough should be crumbly). Fold in the walnuts.
  3. Pinch off pieces of dough and roll into balls (or pack into a 1/2 tbsp scoop to shape half-dome pieces). Place 1" apart on the prepared baking sheets.
  4. Bake for 12 minutes. (They may still be tacky on the surface - this is okay. They will harden as they cool, and that tackiness will help the powdered sugar to stick and set.)
  5. While still warm, roll in powdered sugar and transfer to wire racks to cool. (Note that the powdered sugar sticks best when the cookies are warm, so that the sugar melts a little. After they've cooled, you can dump them in a container with more powdered sugar so that they look nice and Christmas-y.)
Note: I've made these in both 1 tbsp size, and 1 tsp size, and I've found that the 1/2 tbsp is really the best compromise. The 1 tbsp sized cookies never really created the tacky surface that was needed to make the powdered sugar adhere well, and the 1 tsp size was just way too small - it took forever to finish up the dough that way. In the end, I can get through the whole bowl of dough using a 1/2 tbsp in about 15-18 minutes.
0 Comments

Peppermint Bark

12/12/2015

0 Comments

 
I'm actually not a fan of mint myself (not because of the taste, but because they can give me headaches), so I've never taste-tested these myself. But I had some friends request some over the holidays, and all reports I received from them were that it was AMAZING, so this recipe appears to be a raging success!
Picture
  • 8 ounces high-quality semisweet chocolate, broken into pieces
  • 1/2 teaspoon peppermint extract, divided
  • 8 ounces high-quality white chocolate, broken into pieces
  • 25 peppermint candies, crushed (or if you buy the candies already crushed, just scatter as much as you'd like throughout)

  1. Line a 9" x 9" inch pan with foil or parchment paper, smoothing out wrinkles; set aside.
  2. Place the semisweet chocolate in the top of a double boiler over just barely simmering water, stirring frequently and scraping down the sides with a rubber spatula to avoid scorching. When the chocolate is melted, stir in 1/4 teaspoon of the peppermint extract. Pour the melted chocolate into the prepared pan, and spread evenly over the bottom of the pan. Sprinkle half of the crushed peppermints over the chocolate layer. Put in the refrigerator while you make the second layer. (Note: Leaving it a little tacky instead of chilled rock-hard will allow the two layers to bond more completely, so that they don't separate when you break up the bark.)
  3. Place the white chocolate in the top of a double boiler over just barely simmering water, stirring frequently and scraping down the sides with a rubber spatula to avoid scorching. When the chocolate is melted, stir in the remaining 1/4 teaspoon peppermint extract. Pour the white chocolate directly over the semisweet chocolate layer; spread evenly. Sprinkle the remaining crushed candy over the top and gently press in. Refrigerate until completely hardened. 
  4. Remove from pan and peel off the paper or foil; break into small pieces to serve.
Notes: Do not let any water - even the steam from the bottom of the double boiler - get into the chocolate, as this may cause the chocolate to seize. White chocolate has a lower melting point than regular chocolate; I recently had a batch become thick and lumpy when I tried to put it over the same heat settings as I had melted the dark chocolate, and it would never become liquid. You can try and "save" it by adding some fat to re-emulsify it - I happened to have some cocao butter on hand from some other projects, and this seemed to do the trick. Otherwise, you can try regular butter or some vegetable oil. It may be a ratio of as much as a tablespoon for every 6 oz of white chocolate, but add a little at a time first and see how it goes.
0 Comments

Plain Mochi

12/8/2015

0 Comments

 
To continue my recent obsession of experimenting with Chinese treats, I recall eating one memorable "new style" mooncake that had a ball of mochi in the center instead of the traditional salty yolk, which was a win-win in my book since I love mochi and hate salty yolks. A bit of research implied that the recipe for mochi was just as deceptively "simple" as that for mooncakes ... except, this time, it really was that simple! Apparently, mochi is quite forgiving as a recipe, though obviously, some mochi will taste/feel/look better than others.

This recipe is intended to make several mochi balls without fillings, as these were intended to be embedded inside other desserts such as mooncakes. While I had perused many sites for tips and techniques, most of the below recipe was adapted from Just One Cookbook.
Picture
  • 115 g Mochiko (sweet rice flour)
  • 50 g sugar
  • 180 mL water (or substitute half with coconut milk)
  1. Whisk together the mochiko and sugar. Pour in the liquid and whisk until everything is completely blended.
  2. Cover the bowl with a plate and microwave on high for 1 minute. Using a rubber or silicone spatula, mix up the contents (making sure to scrape down the sides), then microwave for another minute. Scrape down and mix, then microwave for 30 seconds. Mix the now-pasty contents one more time to ensure everything is blended.
  3. Lay parchment paper down on a work surface and keep half a cup of corn or potato starch nearby. Using two spoons, measure out about 20 g of the mochi paste onto a scale. Coating your fingertips and palms with the starch, pick up the measured mochi paste and roll into a ball, then dip directly into the starch to cover the surface more thoroughly, brushing off the excess and ensuring that it is no longer sticky to handle. Repeat until the mochi paste has been used up.
  4. Can be eaten plain, or stored in an air-tight container.
Note: This is one of the few times where I didn't adjust the sugar levels. Not only was it already pretty mild in sweetness, but the sugar is apparently important in maintaining the pliability of the mochi, so cutting it out unduly would have adverse affects on the texture. Also, my instructions on how to handle the dough is simply my personal preference for how to get a VERY sticky paste into a prettier-looking ball. You can certainly feel free to experiment with your own techniques.
0 Comments

Mooncake (Yue Bing)

12/6/2015

 
Two weeks ago, I received a Black Friday advertisement from a baking site with some deals on mooncake molds and mooncake recipe books. I laughed to myself, wondering who would actually make them at home, because I've always felt that Chinese baking was extraordinarily finicky - the recipes always seemed like the TRUE science that people keep claiming baking to be, as opposed to the pies and cookies I usually do, which are quite tolerant of experimentation and sloppy measurements.

But then curiosity sat like the devil on my shoulder and I started looking up what it actually took to make your own mooncakes ... and wow, it looked so SIMPLE. Only 3 ingredients, of which the one exotic ingredient (golden syrup) could be substituted with plain ol' honey, and no arcane techniques involved! One thing led to another, I found myself suddenly in possession of a set of plastic mooncake plunger molds, and I found that, yes ... Chinese baking is extraordinarily finicky. This is probably the first and only recipe I have where the notes section is longer than the actual instructions, and I have never made so many batches of the same thing in as many days, (accidentally) figuring out every failure case possible in order to get things just right.

Take the following with a grain of salt; I have a feeling that things may be slightly different with other people's kitchen appliances and I had to do a lot of guesswork reading between badly translated lines. Make sure to read all the notes beforehand so that you can learn from my mistakes!

This recipe was
mostly adapted from the China Si Chuan Food site.
Picture
  • flour for dusting
  • filling (such as one portion of red bean paste, lotus seed paste, and/or sandwiching a mochi in it)
Wrapper (makes about 12 large mooncakes):
  • 112 g vegetable oil
  • 300 g honey
  • 8 g water
  • 460 g flour
Egg wash:
  • 1 egg
Honey wash (optional):
  • 1/3 cup water
  • 2 tbsp honey
  1. To make the wrapper: Pour the vegetable oil, honey, and water into a large mixing bowl. Whisk well until they are all completely blended and emulsified. Sift in a third of the flour and whisk. Sift in the rest of the flour and use a spatula to fold the flour in - as you work, the dough will start to become shaggy. Be patient - as you fold, you may notice that the flour slowly "soaks in". When there is very little loose flour left, set aside the spatula and use your hands to knead the dough together into one mass. Roll into a ball - most of the dry flour should by now be absorbed, but if you still see uneven bits, knead the ball a few more times. Once everything is evenly mixed, wrap well with saran wrap, and let rest at room temperature for 1 hour.
  2. (For the proportions of filling and dough, see the notes section below.) Measure the filling out into separate portions according to weight and roll each portion into a ball. (If you are inserting a mochi in the center, wrap the filling around the mochi until it is completely covered, then roll into a ball.) If you are working with a filling that is more moist (such as lotus seed) you can keep it chilled in either the refrigerator or the freezer before using.
  3. Line a baking sheet with foil or parchment paper. Set the oven to 350 F. While my current oven bakes the cakes fine when the rack is in the middle, you may need to adjust your oven rack to the upper third of the oven if you find that the bottoms of your cakes tend to burn.
  4. Measure out the appropriate amounts for the dough, rolling each portion into a ball. Because it is easy for the dough to dry out, keep all the dough balls lightly covered under a sheet of saran wrap. To shape a mooncake, take one of the dough balls and start to flatten the dough by pinching gently in the center, forming a disc with thicker edges and a thinner center (if you are wrapping a large mooncake, make it more of a long oblong rather than a circle). Place the ball of filling in the center of the dough, then continue gently pressing and thinning the dough down the sides of the filling until the edges wrap over and can meet each other in the middle. Gently massage together the seam and any other holes in the dough, so that the filling is completely covered - don't worry if there are cracks, as the dough very easily blends with itself. Roll the whole ball between your palms, and the dough will start to smooth itself. It doesn't have to be perfectly smooth, but you should feel secure that there are no seams that may fall open. (Note that you can even pinch off thicker sections of dough to move them into gaps elsewhere in the dough ball - the dough melts into itself very easily and is forgiving of being torn and moved around this way.)
  5. Lightly dust your hands with flour and then roll the finished ball between your hands, lightly coating it. The mold I am using are the plastic plunger types (ordered right from Amazon), not the traditional wooden ones, which have a different technique for filling and loosening the cake from. To fill these plastic molds, I lightly squeeze the ball into an oblong shape so that I'm sure I can fit it inside the mold without catching the dough on the edges. Once inside the mold completely (don't worry if some of the dough still sticks out), push the mold down onto the work surface and let the work surface push the excess dough completely into the mold (the pressure will deform the cake so that it fills the interior of the mold without tearing). Then, I give the plunger several hard, vigorous pushes (don't worry, the cake can take it), then lift the mold while slowly pushing down on the plunger one more time, releasing the cake from the mold. (See note 4 below for additional tips)
  6. Arrange the cakes on the prepared baking sheet. Bake for 6 minutes. Meanwhile, in a small bowl, make the egg wash by whisking the egg. It's important to pre-bake the cakes, because the dough is very absorbent - if you try to give them an egg wash before they have cooked a little, the stamped designs will simply melt back into the cake.
  7. Take out the half-baked mooncakes and brush a thin layer of the egg wash over them, then return them to the oven and continue baking for 10-12 minutes or until the mooncakes become golden brown.
  8. (Optional) I sometimes add a honey wash after the cakes cool down a little bit, which not only helps the baked dough become moist and soft faster, but can help put a nice sweet-ish glaze on the skin. Whisk together the honey and water until the honey is dissolved, then brush over the baked mooncakes. Return the mooncakes to the oven for about 3-4 minutes, or until they feel tacky but not actually wet.
  9. Remove from the oven and let cool. The mooncake wrapping will be stiffer than the retail kind, almost like a shell - some people may prefer this texture and can eat it right away. For the softer, more moist version that is more common in bakeries, wrap in film or place in an airtight container and wait for 1-2 days, and it will continue to soften as it absorbs moisture.
Notes:
  1. The proportions for the wrapper are VERY important! Do not try to convert to cups and tablespoons - I tried and they failed miserably. The only way I was able to get a reliable dough was to use weighing. ​The resultant ball of dough should be slightly oily, pliable, and a consistent amber throughout, with no hints of dry flour at all. Too much flour, and the dough became too dry and would break up when handled. Too much oil, and the dough wouldn't stretch - pressing and kneading for mooncake wrappers would result in the dough starting to separate.

    Also be aware that you may be leaving behind as much as a teaspoon of oil or honey behind if you are using another bowl for measuring and then pouring into the mixing bowl. To make it easy on myself, I've simply poured them directly into the mixing bowl, zeroing out the value in between each ingredient, though be careful, if you overpour, you'll have a tough time walking back the extra portion! If using multiple bowls, make sure to use a spatula to scrape down the bowl.
  2. For small mooncakes: 22g filling, 32g dough
    For large mooncakes: 60g filling, 65g dough (you will want a thicker wrapping for the large cake to help it keep its shape). 
    If using a mochi center, divide the filling into 20g mochi, 40g filling.
  3. The goal is to "roll" the dough down and around the ball of filling, and this step is why it's important to have a filling that is dry enough to have some "resistance" - otherwise, pressing will simply squeeze the filling out too. The trick is to press the center of the dough disc into the approximate thickness you want, leaving the thicker dough around the outer rim, then once the filling is in place, using your thumbs to continue "pressing" the thicker dough so that the excess is squeezed up, NOT pushed up - pushing the dough upwards may create tears in the wrapper. If your filling is too soft to push against, you can pinch the dough edges to the desired thickness while continuing to mold it around the filling, or you can roll the filling into balls on a baking sheet and put it in the freezer for 10 minutes or so.
  4. Don't be afraid to use a little more strength than you think you need on the plunger - being too gentle can result in the design and shape softening and disappearing when the cake starts cooking. The force will also help to compact the filling and dough, and there is little chance that anything will "squeeze" out. I tend to just slap my hand down on the plunger 3 or 4 times rather than trying to do a single press.

Pseudo-Bento-Anything-Goes-All-In-One Ramekin Pot Pie

12/2/2015

0 Comments

 
Much like the Post-Thanksgiving Scraps Turkey Shepherd's Pie, pretty much this is just to give some general guidelines and you can just go nuts with what you actually throw in. I know, I know, baking and bakers are all about precision, but this once, let your inner child loose and put as much of your favorite stuff in as you want. This is just to give you an idea of the possibilities.
Picture
  • mushrooms
  • marinated artichoke hearts
  • deli meats
  • tomato sauce
  • shredded mozarella cheese
  • Pillsbury croissant roll dough
  1. Pre-heat the oven to 350 F. Using a pair of kitchen shears, cut up the mushroom and artichoke hearts and line the bottom of the ramekin. If you like your mushrooms cooked, pop the ramekin into the oven for about 5-7 minutes. The olive oil from the marinated artichokes should help to keep the mushrooms moist.
  2. Once you have the ramekin back, use the shears to cut up the deli meats and stuff them in. Layer over them some tomato sauce, and then the cheese.
  3. Unroll the Pillsbury croissant roll dough, and press together the pre-cut seams so that there is a single sheet of dough. Place over the ramekin top and trim the edges with the shears, making sure there's enough overhang to cover the edges of the ramekin. Press all the edges down, and then poke some holes in the top for venting.
  4. Stick in the oven for about 12-15 minutes, according to the Pillsbury dough's intsructions. (If you wish to have a crusty top, set the oven to broil for the last two minutes.)
0 Comments
    Picture

    Sweet Enough

    Part of the reason I started baking was because I like my goodies to be less obviously sweet - I want to taste the flavor, not just the sugar. So most of these recipes will have the sugar dialed down.

    This site also acts as my mobile recipe box, so instructions are often pared down to a minimum - very few frills but for some hints and suggestions!

    RSS Feed

    Categories

    All
    Alcohol
    Almond
    Apple
    Avocado
    Baklava
    Banana
    Bars
    Biscotti
    Blackberry
    Blueberry
    Bread
    Buttercream
    Cake
    Candy
    Carrot
    Cheese
    Cherry
    Chicken
    Chickpea
    Chinese
    Chocolate
    Cider
    Cobbler
    Coconut
    Coconut Milk
    Cookie
    Corn
    Cranberry
    Cream
    Cream Cheese
    Creme Brulee
    Crumb
    Crust
    Cupcake
    Custard
    Dates
    Decoration
    Dip
    Dough
    Doughnut
    Dumpling
    Easy Peasy
    Egg
    Filling
    Flowers
    Frosting
    Fruit
    Garnish
    Gelee
    Granola
    Green Tea
    Honey
    Ice Cream
    Icing
    Jam
    Lamb
    Lemon
    Lime
    Lobster
    Lotus Seed
    Macaron
    Mango
    Marshmallow
    Meringue
    Mochi
    Muffin
    Nectarine
    Nutella
    Nuts
    Oat
    Oats
    Onion
    Orange
    Pancake
    Panna Cotta
    Peach
    Peanut Butter
    Pear
    Pecan
    Phyllo
    Pie
    Pistachio
    Plum
    Popsicle
    Pound Cake
    Pumpkin
    Quiche
    Raspberry
    Red Bean
    Rhubarb
    Rice
    Ricotta Cheese
    Rugelach
    Sauce
    Savory
    Scone
    Sesame
    Shortbread
    Soup
    Sponge
    Sponge Cake
    Strawberry
    Streusel
    Tahini
    Tart
    Tofu
    Topping
    Torte
    Vegetable
    Vinaigrette
    Walnut
    Watermelon
    Yogurt
    Zucchini

    Archives

    September 2021
    March 2021
    February 2021
    December 2020
    November 2020
    October 2020
    July 2020
    May 2020
    April 2020
    March 2020
    October 2019
    December 2018
    October 2018
    August 2018
    April 2017
    July 2016
    May 2016
    March 2016
    February 2016
    January 2016
    December 2015
    November 2015
    October 2015
    September 2015
    July 2015
    June 2015
    May 2015
    April 2015
    February 2015
    January 2015
    November 2014

© 2019 Jacqueline Teng | DragonWarden