DragonWarden
  • Adventures
  • The Oven
  • The Un-Tea Party
  • Secret Ingredients
  • About

Paleo Banana Nut Muffins

8/22/2018

0 Comments

 
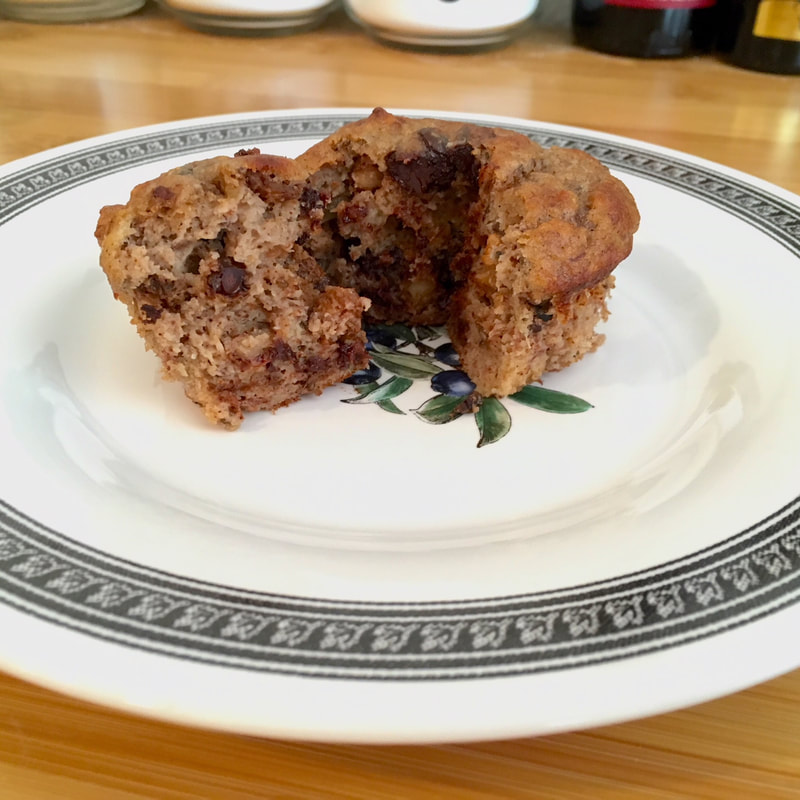
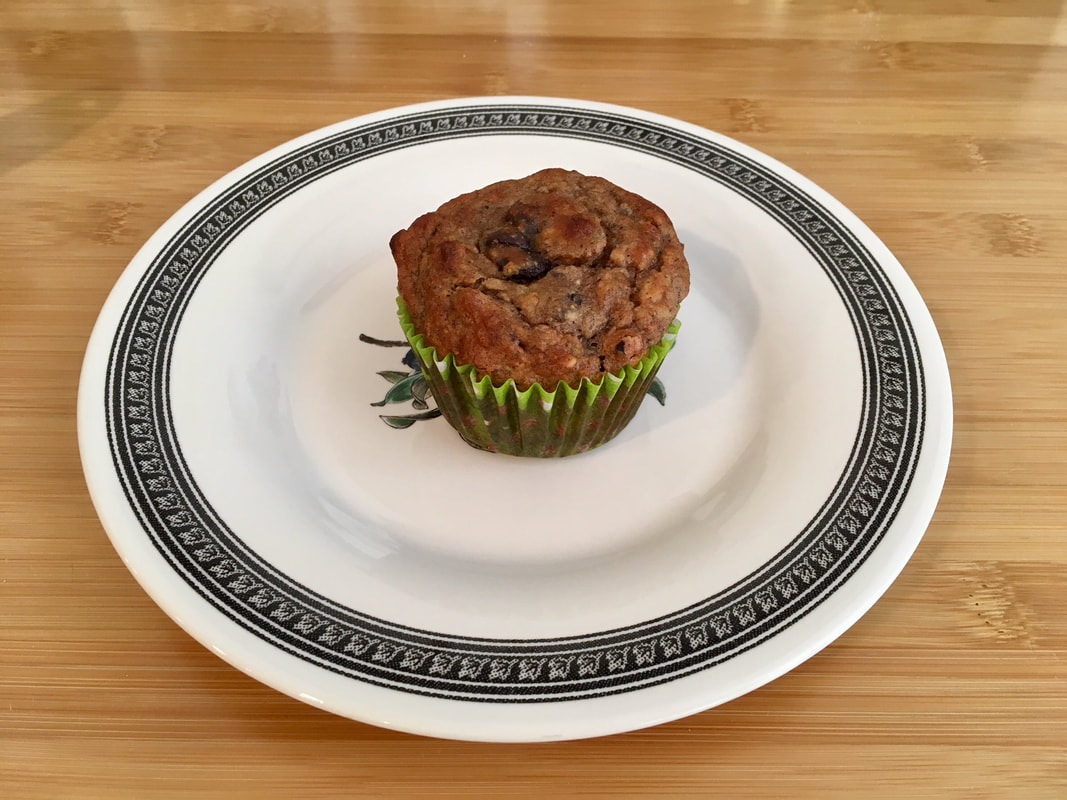
Adapted from this recipe, don't let the "paleo" part fool you - this was a super-moist fluffy muffin that had none of the meal-like texture that I usually associate with nut or coconut-based flours. Granted, there's very little "flour" associated with it at all - just enough to hold everything together, which is why I love it since I'm highly sensitive to refined carbs. Even with all the bananas, it didn't taste over-sweet - in fact, some might find it not sweet enough, though I found it perfectly to my taste, especially with the walnuts to help add texture and the addition of some dark chocolate chips. I think this is a fabulous breakfast muffin, where you don't feel like you just ate a cup of sugar, can spread a little bit of butter and salt atop it if you'd rather have some savory than sweet, and feel like you ate something reasonably healthy with all the fruit and nut bases in it (not to mention a nice shot of chocolate)!
Picture
  • 3 - 4 large ripe bananas (1_2/3 cups mashed or 380 grams)
  • 3 eggs room temperature
  • 3 tablespoons coconut oil melted
  • 1 teaspoon vanilla extract
  • 1/3 cup almond butter
  • 1/3 cup (50g) coconut flour
  • 1 teaspoon ground cinnamon
  • 3/4 teaspoon baking soda
  • 3/4 teaspoon baking powder
  • 1/4 teaspoon salt
  • 1 cup toasted walnuts chopped
  • 1/2 - 3/4 cup chocolate chips (optional)
  1. Preheat the oven to 350ºF. Line a 12 pan muffin tin with paper liners or grease with coconut oil.
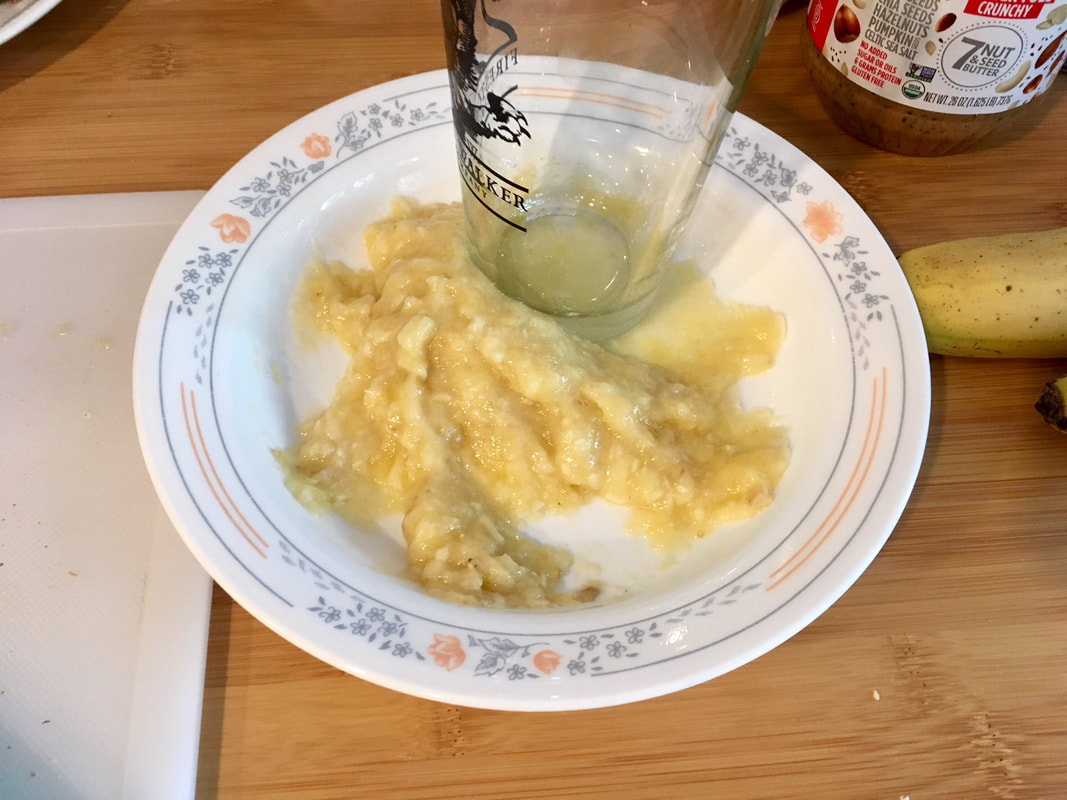
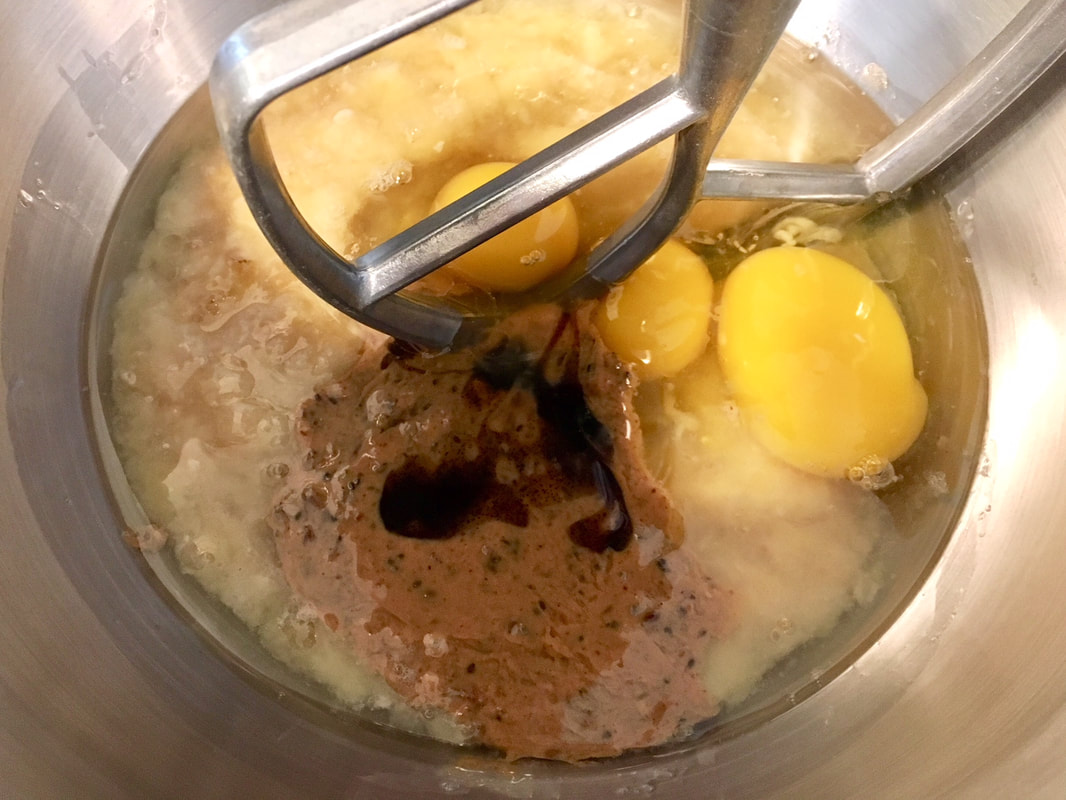
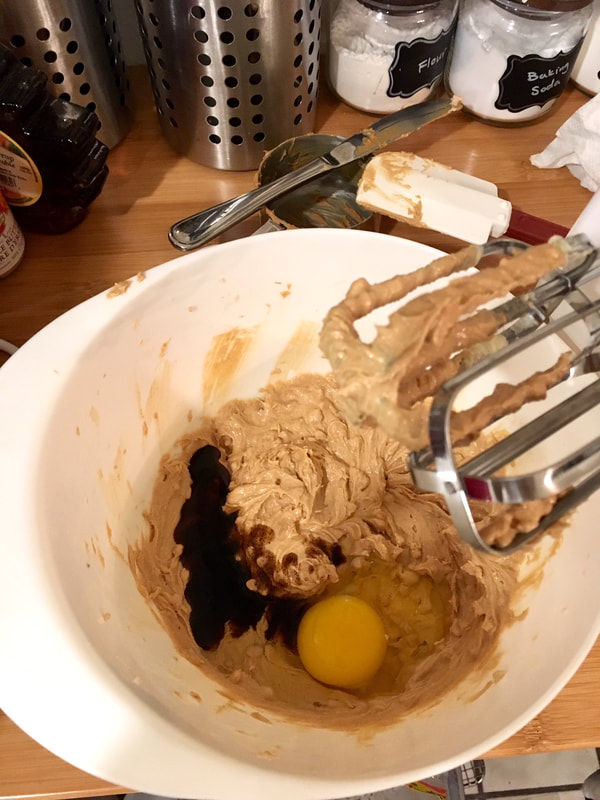
  2. In a large bowl or mixer, combine the mashed bananas, eggs, coconut oil, vanilla extract and almond butter until fully combined.
  3. Sift the coconut flour, cinnamon, baking soda, baking powder, and salt and add to the wet ingredients and mix well. Fold in the walnuts and chocolate chips.
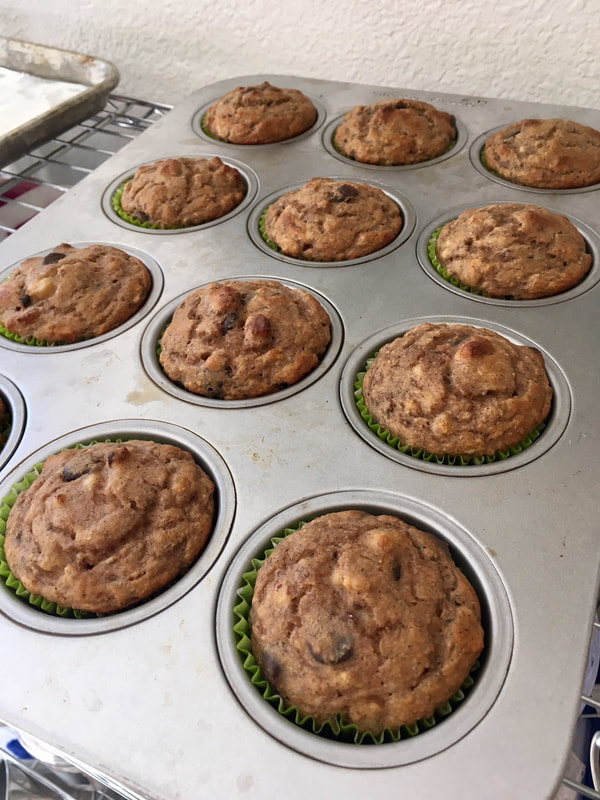
  4. Divide the batter between the prepared muffin tins.
  5. Bake in the preheated oven for about 17-19 minutes. A toothpick inserted into the center of a muffin should come out clean.
  6. Remove from oven and allow to cool on a wire rack for about 10 minutes. Flip out onto a cooling rack to finish cooling.
0 Comments

Peanut Butter Cookies

8/21/2018

0 Comments

 
I have my tried and true big fat chewy chocolate chip cookies recipe when I need to whip up a batch for friends, but as good as it is, I was getting a little bored of making it all the time. So, what's a natural complement to chocolate? Peanut butter.

So when the time came to make a batch for someone as a favor, I decided to do some research on peanut butter cookie recipes. The below is an adaptation from this recipe - as the recipe described, the original was indeed quite soft. But, I felt, it needed just a little more chewiness and oomph to it ... in short, it needed to be just like the big fat chewy chocolate chip cookie, except peanut-butter flavored. This was only further supported when I left some of the PB cookies out for a week and my brother said they were getting better as they hardened a bit on the outside. Thus, I threw in a little bit of this and that and came up with the below recipe.
Picture
  • 1 cup peanut butter
  • 3/4 cup butter softened
  • 1/2 cup white sugar
  • 1/2 cup brown sugar
  • 1 egg + 1 egg yolk
  • 1 tablespoon vanilla extract
  • 1 1/2 cups flour
  • 1 teaspoon baking soda
  • 1/4 teaspoon salt
  1. Preheat the oven to 350 F. Line 2 baking pans with parchment paper, if desired.
  2. In a large mixing bowl, cream together the peanut butter, butter, sugar and brown sugar. Beat together until smooth & creamy best if using a stand mixer or hand mixer.
  3. Add the egg and vanilla extract and continue to mix until well combined.
  4. In a small mixing bowl, whisk together the flour, baking soda and salt. Stir in the flour mixture to the butter and sugar mixture and mix until well combined.
  5. Using a cookie dough scooper or making the dough into 1 inch balls. Roll in white granulated sugar if you desire and place on to baking sheet. 
  6. Using a fork, press down on each ball of dough to slightly flatten and creating a criss-cross pattern.
  7. Bake for 8-9 minutes. Let cool on the baking sheet for a few minutes and then transfer to a wire rack.
  8. These keep well for a couple of days in an airtight container.
0 Comments

Salted Brown Butter Rice Crispy Treats

8/21/2018

0 Comments

 
This recipe landed in my inbox via a newsletter, and boy am I glad it did. It delivered on everything the original click-bait description had mentioned. The "secret ingredient game-changer", brown butter, gave the entire kitchen an irresistible nutty aroma and was still detectable under the cocoa of the puffed rice I had left over from making the Decadent Yogi chocolate cake's crunchy decorations. The crispy treats did indeed stay crispy - in fact, even a week later, they remain quite the treat. And bonus - they were soooooooo easy and quick to make - clean-up actually took longer, I think!
Picture
  • 1/4 cup unsalted butter
  • 10-oz bag of marshmallows
  • heaping 1/4 tsp coarse sea salt
  • 6 cups crispy rice cereal (about half 12-oz box)
  1. In a large pot, melt butter over medium-low heat. It will melt, then foam, then turn clear golden and finally start to turn brown and smell nutty. Stir frequently, scraping up any bits from the bottom as you do. Don’t take your eyes off the pot as while you may be impatient for it to start browning, the period between the time the butter begins to take on color and the point where it burns is often less than a minute.
  2. As soon as the butter takes on a nutty color, turn the heat off and stir in the marshmallows. The residual heat from the melted butter should be enough to melt them, but if it is not, turn it back on low until the marshmallows are smooth.
  3. Remove the pot from the stove and stir in the salt and cereal together. Quickly spread into prepared pan. I liked to use a piece of waxed or parchment paper that I’ve sprayed with oil to press it firmly and evenly into the edges and corners, though a silicon spatula works almost as well.
  4. Let cool, cut into squares and get ready to make new friends.
0 Comments

Ricotta Almond Peach Crumble Cake

8/21/2018

0 Comments

 
I first found this recipe in my inbox via the Tasting Table's newsletter. It seemed like a quick and easy experiment that would give me an excuse to play with the fruit of the season, and so I eked out a two hour period one night to throw this together.

This cake is proof that you can know a person for your whole life and still learn something new about them. I had no idea that my father didn't like peaches until I made this cake, and he asked me what it was and baldly stated when I told him, "Oh. I don't like peaches." Shock and horror on my part ensued.

But this cake was also the first part of a 2-part proof that my father could learn something new too - as in, he actually does like peaches. If they're included in the right way. He pretty much single-handedly finished off the entire thing. On top of that, he claimed that it actually became even better when it was stored in the fridge overnight - I suspect because the chill and the moisture helped to counter the natural mealy-texture of the almond flour. Not to mention that it was super-easy to make.

So, a win-win-win all around!

Picture
For the cake:
  • 1/2 cup (1 stick) soft, unsalted butter
  • 1_1/3 cups sugar
  • Zest from 1 lemon
  • 3 eggs
  • 1_1/2 cups ricotta
  • 1_3/4 cups all-purpose flour
  • 1/2 cup almond flour
  • 2 teaspoons baking powder
  • 1/2 teaspoon salt
  • 2 to 3 fresh peaches, diced
For the crumb:
  • 1_1/2 cups cake flour
  • 1/2 cup sugar
  • 1/2 cup raw almonds, coarsely chopped
  • 1/2 cup unsalted butter, melted and cooled

The cake:
  1. Preheat oven to 350º. Line a 9-inch springform pan with parchment paper and butter it or spray it with nonstick spray.
  2. In a stand mixer or with a handheld beater, cream butter, sugar and lemon zest for 1 to 2 minutes. Add eggs, scrape down the bowl and mix until thoroughly combined. Mix in ricotta.
  3. In separate bowl, combine the flours, baking powder, and salt. In 2 to 3 batches, gently mix into butter mixture without overbeating. When fully combined, fold in peaches with a spatula.
  4. Pour batter into prepared pan and set aside while making the crumb.
The crumb:
  1. Combine cake flour, sugar and almonds in a bowl. Use your hands to mix together.
  2. Pour in melted butter and gently toss until soft clumps form. Continue until no more flour is visible, and a crumble has formed with small and large crumbs.
  3. Distribute crumble evenly over cake batter and bake for 60 to 70 minutes, rotating halfway. The cake is done when a cake tester comes out clean.
  4. Let cake fully cool before removing from the pan and serving.

Note: The original crumb recipe called for 2 cups of flour, but I felt that 1) the crumb became an overwhelming layer and 2) the crumb really needed a long time to toast correctly. As it was, I was making the cake late at night, and it was already pushing 1:30 am and I decided to pull it out before the crumb layer was really done, even if the cake was already just right. So hopefully reducing the flour content helps with these two points.
0 Comments
    Picture

    Sweet Enough

    Part of the reason I started baking was because I like my goodies to be less obviously sweet - I want to taste the flavor, not just the sugar. So most of these recipes will have the sugar dialed down.

    This site also acts as my mobile recipe box, so instructions are often pared down to a minimum - very few frills but for some hints and suggestions!

    RSS Feed

    Categories

    All
    Alcohol
    Almond
    Apple
    Avocado
    Baklava
    Banana
    Bars
    Biscotti
    Blackberry
    Blueberry
    Bread
    Buttercream
    Cake
    Candy
    Carrot
    Cheese
    Cherry
    Chicken
    Chickpea
    Chinese
    Chocolate
    Cider
    Cobbler
    Coconut
    Coconut Milk
    Cookie
    Corn
    Cranberry
    Cream
    Cream Cheese
    Creme Brulee
    Crumb
    Crust
    Cupcake
    Custard
    Dates
    Decoration
    Dip
    Dough
    Doughnut
    Dumpling
    Easy Peasy
    Egg
    Filling
    Flowers
    Frosting
    Fruit
    Garnish
    Gelee
    Granola
    Green Tea
    Honey
    Ice Cream
    Icing
    Jam
    Lamb
    Lemon
    Lime
    Lobster
    Lotus Seed
    Macaron
    Mango
    Marshmallow
    Meringue
    Mochi
    Muffin
    Nectarine
    Nutella
    Nuts
    Oat
    Oats
    Onion
    Orange
    Pancake
    Panna Cotta
    Peach
    Peanut Butter
    Pear
    Pecan
    Phyllo
    Pie
    Pistachio
    Plum
    Popsicle
    Pound Cake
    Pumpkin
    Quiche
    Raspberry
    Red Bean
    Rhubarb
    Rice
    Ricotta Cheese
    Rugelach
    Sauce
    Savory
    Scone
    Sesame
    Shortbread
    Soup
    Sponge
    Sponge Cake
    Strawberry
    Streusel
    Tahini
    Tart
    Tofu
    Topping
    Torte
    Vegetable
    Vinaigrette
    Walnut
    Watermelon
    Yogurt
    Zucchini

    Archives

    September 2021
    March 2021
    February 2021
    December 2020
    November 2020
    October 2020
    July 2020
    May 2020
    April 2020
    March 2020
    October 2019
    December 2018
    October 2018
    August 2018
    April 2017
    July 2016
    May 2016
    March 2016
    February 2016
    January 2016
    December 2015
    November 2015
    October 2015
    September 2015
    July 2015
    June 2015
    May 2015
    April 2015
    February 2015
    January 2015
    November 2014

© 2019 Jacqueline Teng | DragonWarden