DragonWarden
  • Adventures
  • The Oven
  • The Un-Tea Party
  • Secret Ingredients
  • About

Ermine Frosting (Roux-based)

3/24/2021

0 Comments

 
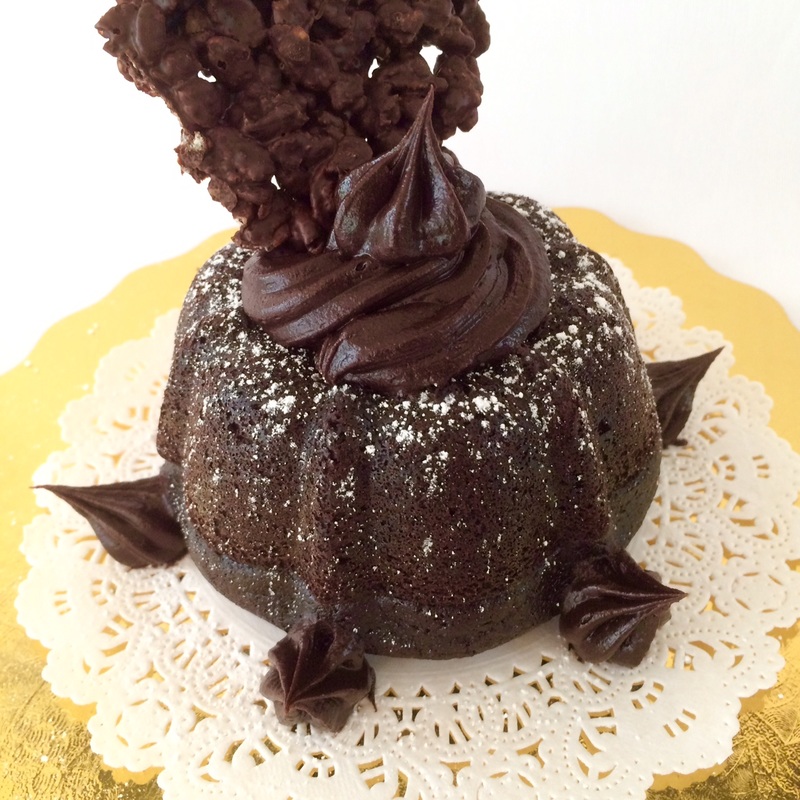
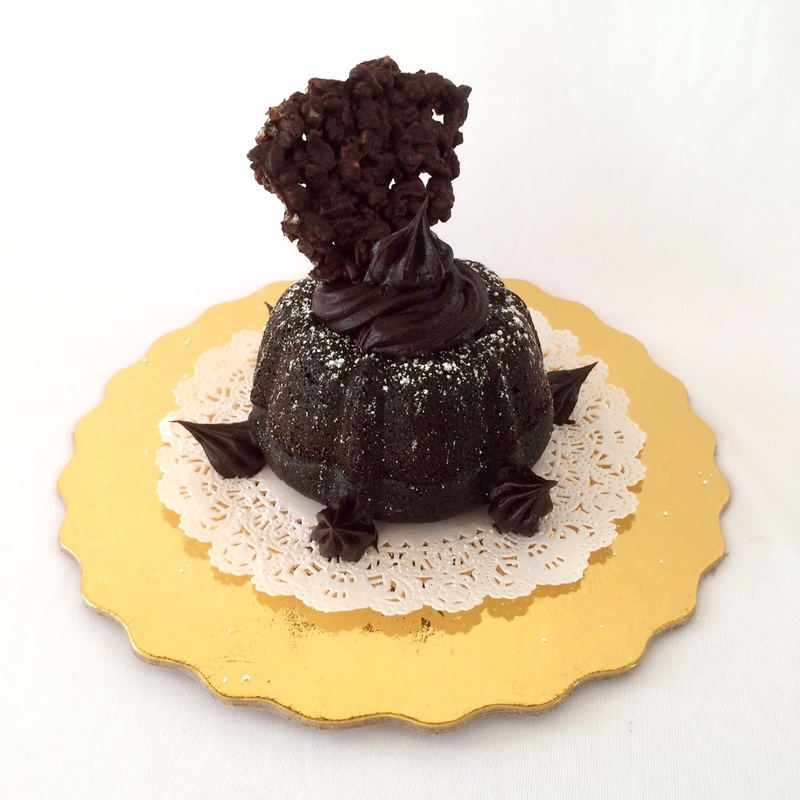
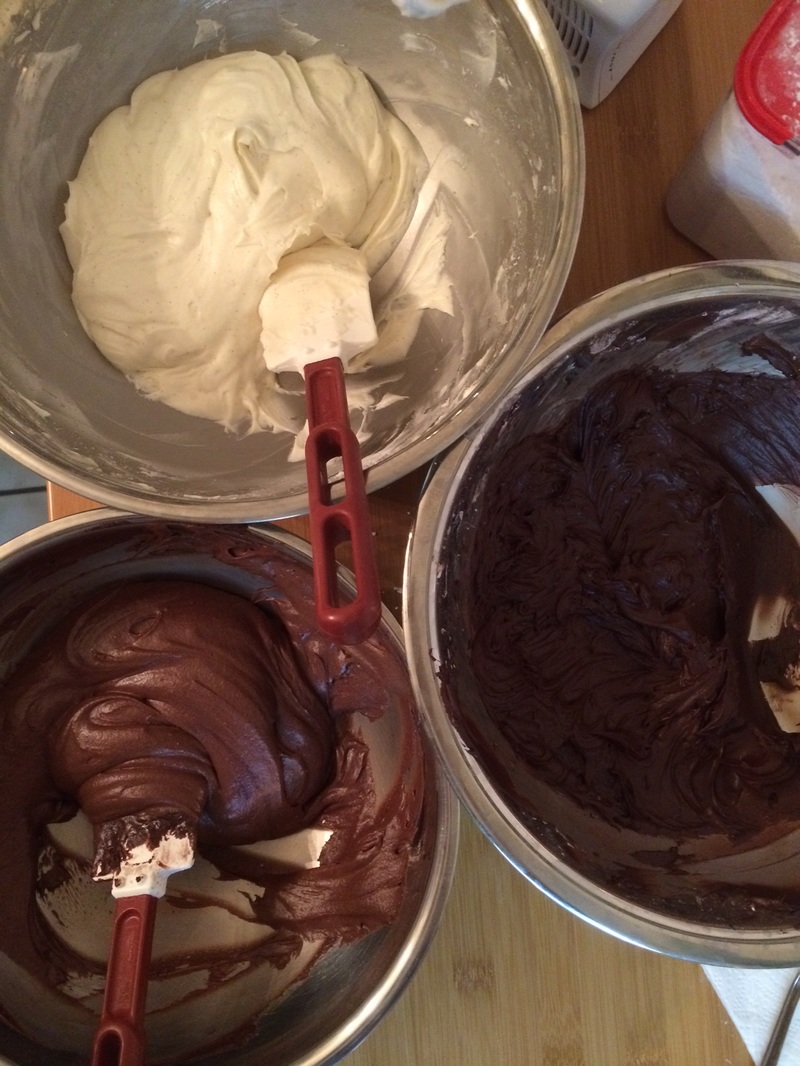
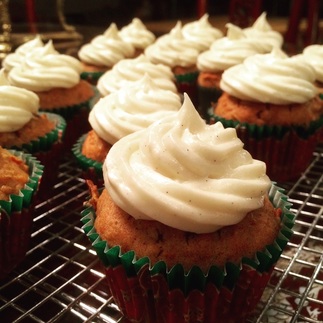
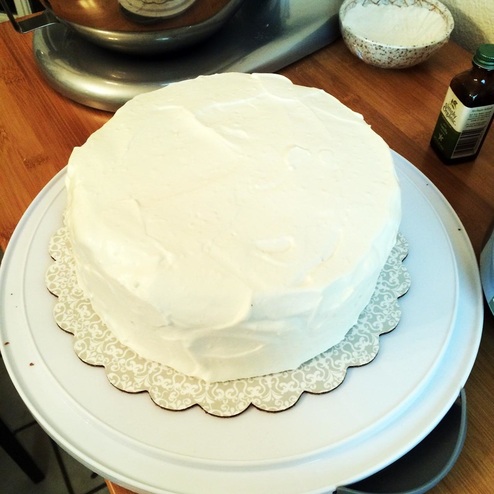
In my continuous search for less-sweet frosting options, I stumbled across this roux-based frosting that makes a fantastic base for various flavored versions that lets the flavors shine instead of the sugar!
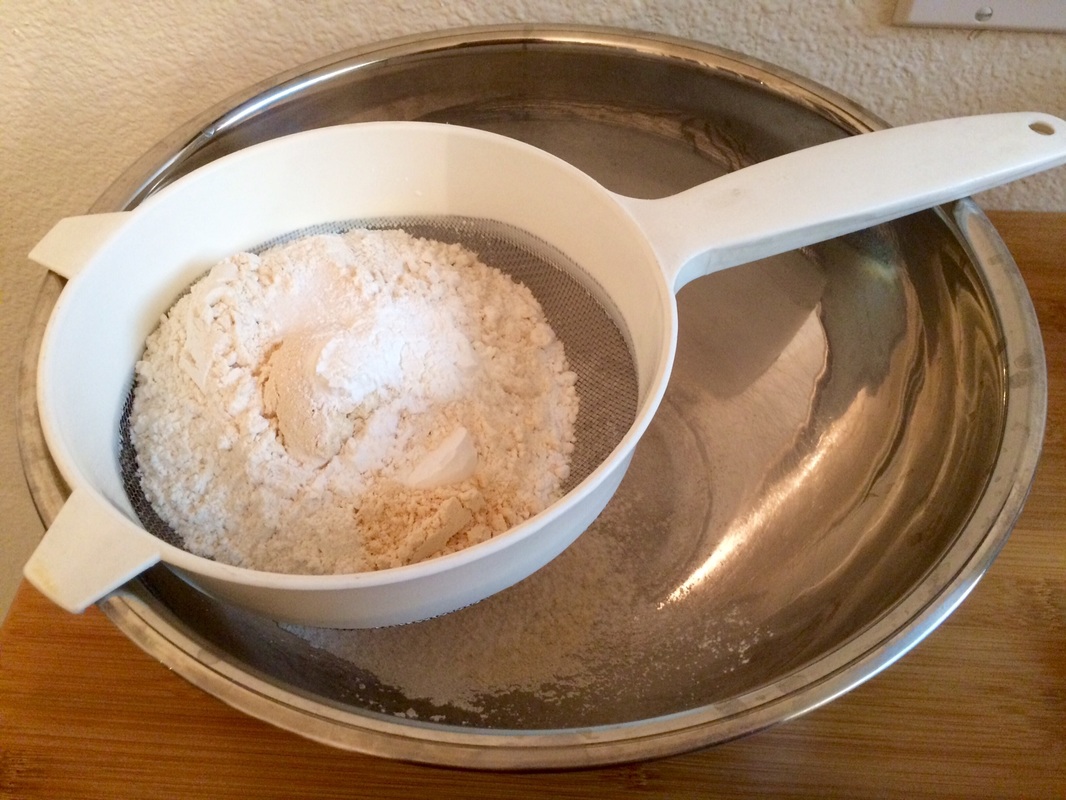
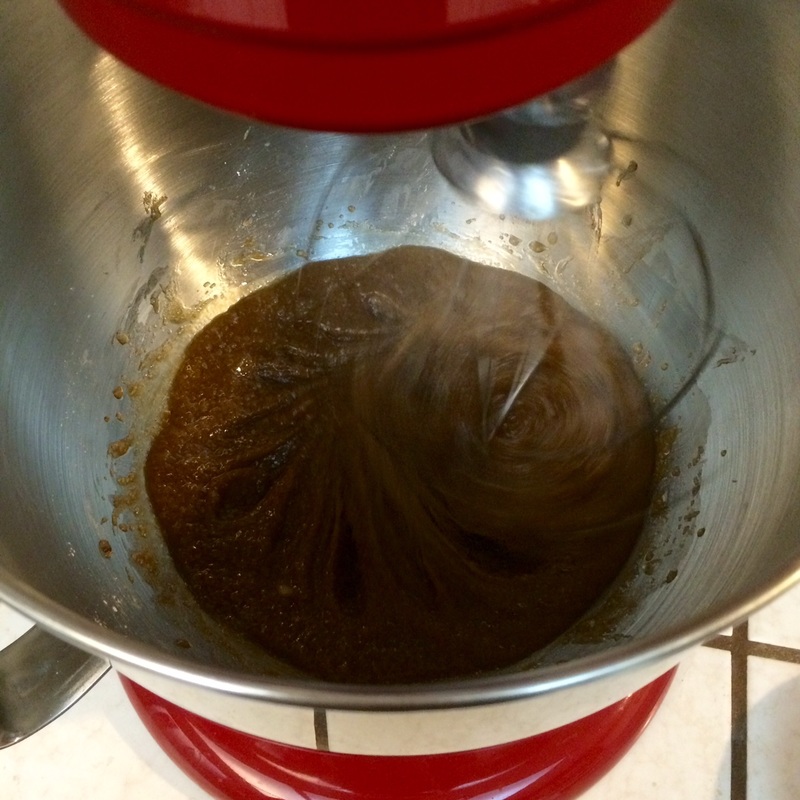
Picture
  • 5 tbsp flour
  • 1 cup sugar
  • 1 cup milk, warm
  • 1.5 tsp vanilla
  • pinch of salt
  • 1 cup unsalted butter
  • chocolate option: 1/4 cup cocoa powder, unsweetened
Thickening roux:
  1. Place flour and sugar in a large saucepan over medium heat. Cook, stirring constantly, for 30 seconds.
  2. While whisking constantly, slowly pour the milk in (this ensure it's lump free).
  3. As the milk gets hotter, it will start to thicken - stir constantly so the base doesn't catch.
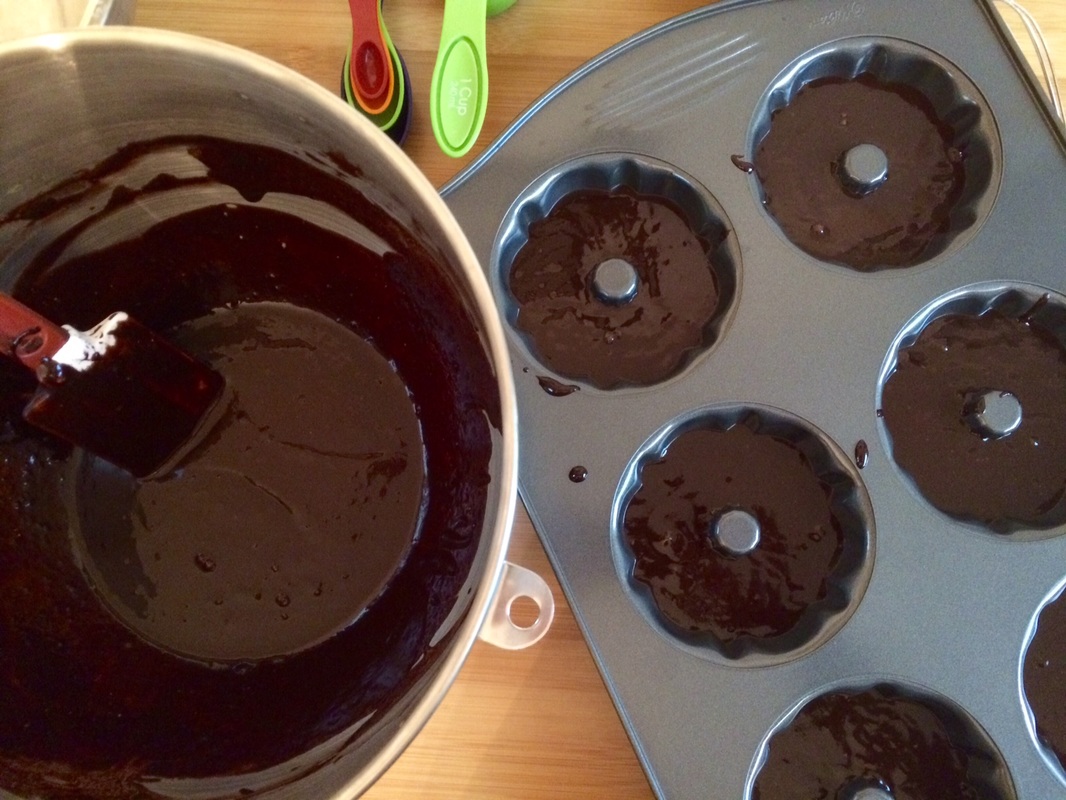
  4. Cook until the mixture thickens in a thick, dolloping custard - see video for texture. TIP: Thicker texture = thicker frosting texture but won't make the frosting dense, it's still fluffy and spreadable but it just makes it "sturdier" with sharper edges when piped.
  5. Remove from heat and scrape into a bowl. Cover with cling wrap, pressing down onto the surface to prevent a skin from forming.
  6. Cool completely (I leave on counter for 20 min or so then refrigerate 30 min to speed up but don't let it get chilled, best at room temp to beat into butter). You can leave in fridge overnight but take it out 1 hour prior to using (to dechill - otherwise it won't mix well with softened butter).
Making frosting:
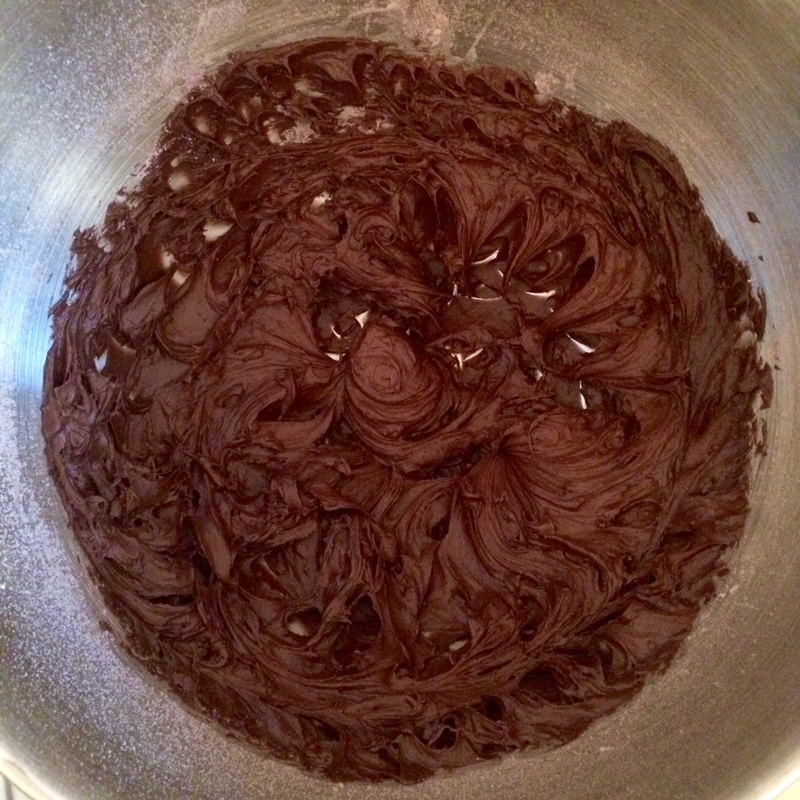
  1. Place butter in a bowl and use either a handheld beater or stand mixer (with whisk attachment) to beat for 3 minutes until it's smooth and changes from yellow to very pale yellow, almost white.
  2. Now start whipping in the Thickening Roux. On speed 5 (medium), start adding the thick roux one heaped tablespoon at a time. Take about 1 minute to add it all.
  3. Once all added, add vanilla and salt, then whip for 2 to 3 minutes until you can see that it is still enough to hold peaks. Then it's ready to use!
  4. For chocolate option: Beat in the cocoa powder at the end, just until mixed through.
0 Comments

Extraordinary Cakes: Decadent Yogi

5/12/2016

0 Comments

 
This is from Extraordinary Desserts' bake book Extraordinary Cakes, which I've replicated here as an easy reference to myself since I always bake from my phone. I would highly recommend picking up their book - as complicated as many of the recipes may seem, once I wrapped my mind around the ingredients lists and components, they haven't taken me more than 3 hours to both make and do ongoing clean-up (and as you can see, results in some seriously beautiful and decadent desserts!). Even better, they're not to the usual saccharinely American-sweet standards - I would suggest making it to the letter first and then adjust from there to your own taste.

As for this particular recipe, I've seriously made it 3 times in less than 2 weeks - that's how quickly it's been disappearing. The cake is wonderfully moist, even after sitting out overnight with no cover, and the chocolate crisp is a huge hit amongst all age groups. Even the frosting is quickly becoming my favorite - I'm usually not a huge fan of frosting (especially the infamous buttercream) but this didn't have nearly as much cloying butter and the 100% cocoa powder helped to cut the sweetness to something that complements the cake.

Picture
Chocolate Cakes
  • 1 10" bundt pan or a 6-cup bundt pan
  • Vegan butter stick, room temperature (for greasing)
  • 2 tbsp coconut flour
  • 2 cups all-purpose flour or (gluten-free) 1 cup brown rice flour + 1 cup sorghum flour
  • 1-1/2 tsp baking powder
  • 1 tsp baking soda
  • 1/2 tsp salt
  • 2 tbsp instant coffee granules
  • 2/3 cup cocoa powder, sifted
  • 1/3 cup grapeseed or vegetable oil
  • 3/4 cup (packed) brown sugar
  • 3/4 cup turbinado sugar
  • 1/3 cup pureed banana (about 1 small banana)
  • 2 tsp corn starch or potato starch
  • 2 tsp vanilla extract
Chocolate Frosting
  • 1/4 cup + 2 tbsp (3/8 cup) vegan butter, room temperature
  • 2-1/4 cups sifted powdered sugar
  • 1/4 cup + 2 tbsp sifted cocoa powder
  • 3 tbsp soy milk
  • 1 tsp vanilla extract
Chocolate Crunch
  • 2 oz (1/3 cup) vegan chocolate chips
  • 2 tsp grapeseed or vegetable oil
  • 1 cup puffed brown rice cereal
Chocolate Cakes
  1. ​Preheat oven to 300 F. Generously grease the cavity or cavities of the bundt pan with the softened butter stick.
  2. Sift together both flours, baking powder, baking soda, and salt.
  3. Bring 1-3/4 cups water to a boil in a saucepan over medium-high heat. Remove from heat and whisk in instant coffee. When fully combined, whisk coffee mixture into cocoa powder.
  4. In a stand mixture with a whisk attachment, combine oil, both sugars, banana, potato starch, and vanilla. Whip on medium until very well combined, 3-5 mins. Remove bowl from mixer and, using rubber spatula, fold in sifted dry ingredients in 3 additions, alternating with coffee-cocoa mixture.
  5. If using a 10" bundt pan, pour batter into pan. If using 6-cup bundt pan, use a 1/2 cup dry measure to fill each cavity with 1/2 cup of batter.
  6. Place cake pan on rack in center of oven and bake until an inserted knife comes out clean, about 30 mins for smaller cakes, 50 mins for 10" cake. Cakes should appear moist and spongy. Allow cakes to cool completely.
  7. When fully cooled, remove cakes from pan and wrap tightly in plastic wrap. Can be made 1 day in advance and stored at room temperature.
Chocolate Frosting
  1. Whip the butter on medium-high speed for about 3 mins. It will appear fluffier.
  2. Combine the powdered sugar and cocoa powder and add to the butter. Whip on medium speed for about 2 mins. Add the soy milk and vanilla and whip until well combined.
  3. Cover the bowl with plastic wrap and hold at room temperature until ready to frost the cakes, but for no longer than 3 hours before using.
Chocolate Crunch
  1. Line a baking sheet with parchment paper or Silpat.
  2. Melt the chocolate chips in a heatproof mixing bowl set over a pan of simmering water (do not allow the bowl to touch the water), stirring occasionally. Remove from heat, and using a rubber spatula, mix in oil until smooth and homogeneous. While chocolate mixture is warm but not hot, fold in cereal until well incorporated.
  3. Using a metal spatula, spread mixture as thinly as possible onto prepared baking sheet. Place Chocolate Crunch in refrigerator until firm, about 15 mins. Break up crunch into larger pieces and reserve in refrigerator until ready to use, or for up to 4 hours.
After cake assembly:
  1. Refrigerate the decorated cakes for 2 hours to set. When ready, place frosted cakes on a serving platter, and allow to come to room temperature for 1-2 hours before serving.
0 Comments

Sour Cream Cheese Frosting

12/20/2015

 
I love the extra tang the sour cream gives this version of the common cream cheese frosting. While the sour cream may not be evident if you sample the frosting by itself, when garnishing something else - such as the pumpkin bread/cupcake - the sour tang becomes much more evident.
Picture
  • 1 (8 oz) package cream cheese, softened
  • 1/4 cup butter, softened
  • 2 tbsp sour cream
  • 2 tsp vanilla extract
  • 1.5 - 2.5 cups confectioners' sugar, sifted
    ​(less sugar for a slightly less sweet but softer spread, more sugar for a stiffer spread that will hold its shape - the photo used 2 cups for the frosting)

  1. Beat cream cheese, butter, sour cream, and vanilla in large bowl until light and fluffy.
  2. Gradually beat in confectioners' sugar until smooth. Add more sugar for stiffer frosting, leave some out for softer frosting.

Chinese Bakery-Style Whipped Cream Frosting

4/8/2015

3 Comments

 
This style is used by Chinese bakeries to frost their cakes. It is much lighter and much less sweet than Western style frostings. As a result, it's often a favorite in my family, and it took quite a bit of research before I finally found this recipe - but it was totally worth it! My mother in particular was ecstatic with the results when I made her birthday cake using this.
Picture
  • 2 tbsp cold water
  • 1 tsp unflavored gelatin - can be found in the supermarket in the Jello section.
  • 2 cups (1 pint) of chilled heavy cream
  • 2.5 tbsp of confectioner’s sugar
​​Flavor options:
  • Plain: 1 tsp vanilla
  • Strawberry: 4 oz pureed strawberries + 1 tbsp strawberry powder or extract

  1. Place your mixing bowl and wire whisk(s) into the freezer for about 5 to 10 minutes before using them to prepare the whipped cream. This will ensure that the cream stays as cold as possible. 
  2. Add the unflavored gelatin to a small bowl with the 2 tbsp of cold water. Let it soak for about 5 minutes and then dissolve the gelatin into the water by holding the bowl (carefully) over a pot of simmering water to slowly heat it while continuously stirring. Once dissolved, the gelatin and water should be almost clear. Set aside and let cool to a luke warm temp, but do not let the gelatin cool or sit too long or it will harden.
  3. Take your chilled mixing bowl and wire whisks out of the freezer and add the 1-pint of chilled heavy cream to the mixing bowl. Beat the cream in your mixer or with your hand mixer in the following manner:
  4. Beat the cream slowly until it just starts to form bubbles (30 sec.).
  5. Increase the mixing speed to medium until the wire whisk leaves some trails in the cream (30 sec.).
  6. Increase the mixing speed to high and mix the cream until it becomes billowy. Add the sugar and your flavor option of choice carefully while continuing to mix until the cream becomes just stiff. The cream will begin to stiffen within a minute of adding the sugar. As soon as the cream is just becoming stiff, add the dissolved gelatin while continuing to mix. Once the gelatin is added, the cream will further stiffen and dry out. After adding the gelatin, continue beating the cream for about 30 more seconds or until you are satisfied that it is stiff enough, but not too dry or clumpy.
  7. Once you are finished with beating the whipped cream, use it immediately for frosting the cake, or refrigerate it for later use. If refrigerating the cream for later use, be mindful of the fact that the cream may stiffen slightly when refrigerated, but it will loosen up again once you start working with it.
3 Comments

Chocolate Frosting

1/1/2015

0 Comments

 
Can go with the Guinness Stout Chocolate Cake
  • 1 cup butter, softened
  • 3 cups confectioner's/icing sugar
  • 2 tablespoons milk
  • 1 teaspoon vanilla extract
  • 1 cup semi-sweet chocolate chips, melted.
  1. Beat butter until smooth and creamy, then gradually beat in sugar, milk and vanilla, combining until smooth. Stir in melted chocolate until fully incorporated. Frost cake, or eat directly from bowl. *g*
0 Comments

ARCHIVE: Buttercream Frosting

1/1/2015

0 Comments

 
  • 1 cup (8 oz/250 g) unsalted butter, at room temperature
  • 2 egg yolks
  • 1 tbsp vanilla extract
  • 1/4 tsp salt
  • 2 cups (8 oz/250 g) confectioners' sugar
  1. Using an electric mixer on high speed, beat the butter until fluffy, 3-4 minutes. Add the egg yolks and beat until fluffy. Beat in the vanilla, salt, and confectioners' sugar. Remove the cupcakes from the pan and spread the buttercream evenly over the top of each cupcake.
0 Comments

ARCHIVE: French Buttercream

1/1/2015

0 Comments

 
From Epicurious
  • 1 cup water
  • 2 cups sugar
  • 2 tablespoons corn syrup
  • 1/4 teaspoon cream of tartar
  • 5 egg yolks
  • 1 whole egg
  • 1/8 teaspoon xanthan gum
  • 1 1/2 pounds cold butter, preferably European
  1. In a heavy nonreactive saucepan, add water, then add sugar, corn syrup, and cream of tartar. The last 2 help keep the sugar from crystallizing. (Candy thermometer. Non-negotiable!)
  2. Put the pot on high heat. It's going to be there for a while. Be patient and keep your eye on it. Don't go walking away and watching TV or something.
  3. Put yolks and eggs in a stand mixer with the whisk attachment and turn to high. Just let it go! Eggs will triple in volume and go to "ribbons stage." You can't overwhip!
  4. Wait on the sugar—looking for 230°F, aka "soft ball." When it happens, be ready to move quickly. Turn off the mixer and add the xanthan gum, turn back up to medium.
  5. Remove the thermometer from hot sugar. Lift with two hands. Rest the lip of the saucepan on the edge of the mixer bowl.
  6. Slowly tilt and pour sugar in a sloooow steady stream down the side of the bowl. Don't go too fast! If you do there will be chunks of scrambled eggs in your buttercream.
  7. Once sugar is all in, turn the mixer to high. Beat until cool. Gauge this by putting the inside of your wrist to the outside of the bowl. It's more accurate than your hands. Switch out the whisk for the paddle. Next we're adding the butter. It's too heavy for the whisk and you'll end up breaking your stand mixer if you stay with the whisk.
  8. Start cutting the butter into thin pieces—you could shave it with a cheese slicer if you'd like. Add butter piece by piece—pain in the derriere, yes, but we're making an emulsion.
  9. See, if you dump all the butter in at once, the butter and eggs will never combine properly, and you'll have a "broken" buttercream. You'll be able to identify this easily—it'll be a chunky, watery, hot mess.
  10. If your buttercream does break, you can fix it! Turn to medium high, then add a little more butter, piece by piece, until fixed. Or try adding a little guar gum! This is very strong, so add a pinch and beat for a minute, then check.
  11. Once your butter is added, turn the mixer to medium high to add some air—10, 20 seconds at most. Quelle Magnifique! It should be fluffy and make you want to eat it with your fingers.

0 Comments

Nutella Frosting

1/1/2015

0 Comments

 
  • 8 oz soft cream cheese
  • 1_1/3 cups nutella
  • 2 cups powdered sugar
  • ~1 tbsp heavy cream
  1. In a mixing bowl cream the Nutella and cream cheese. Slowly add the powdered sugar, 1/2 cup at a time, mixing well after each addition. When all the sugar has been added, increase the speed to medium-high and mix for 1 minute.
  2. Add enough heavy cream to make it smooth and easy to pipe. Immediately frost the cupcakes.
0 Comments
    Picture

    Sweet Enough

    Part of the reason I started baking was because I like my goodies to be less obviously sweet - I want to taste the flavor, not just the sugar. So most of these recipes will have the sugar dialed down.

    This site also acts as my mobile recipe box, so instructions are often pared down to a minimum - very few frills but for some hints and suggestions!

    RSS Feed

    Categories

    All
    Alcohol
    Almond
    Apple
    Avocado
    Baklava
    Banana
    Bars
    Biscotti
    Blackberry
    Blueberry
    Bread
    Buttercream
    Cake
    Candy
    Carrot
    Cheese
    Cherry
    Chicken
    Chickpea
    Chinese
    Chocolate
    Cider
    Cobbler
    Coconut
    Coconut Milk
    Cookie
    Corn
    Cranberry
    Cream
    Cream Cheese
    Creme Brulee
    Crumb
    Crust
    Cupcake
    Custard
    Dates
    Decoration
    Dip
    Dough
    Doughnut
    Dumpling
    Easy Peasy
    Egg
    Filling
    Flowers
    Frosting
    Fruit
    Garnish
    Gelee
    Granola
    Green Tea
    Honey
    Ice Cream
    Icing
    Jam
    Lamb
    Lemon
    Lime
    Lobster
    Lotus Seed
    Macaron
    Mango
    Marshmallow
    Meringue
    Mochi
    Muffin
    Nectarine
    Nutella
    Nuts
    Oat
    Oats
    Onion
    Orange
    Pancake
    Panna Cotta
    Peach
    Peanut Butter
    Pear
    Pecan
    Phyllo
    Pie
    Pistachio
    Plum
    Popsicle
    Pound Cake
    Pumpkin
    Quiche
    Raspberry
    Red Bean
    Rhubarb
    Rice
    Ricotta Cheese
    Rugelach
    Sauce
    Savory
    Scone
    Sesame
    Shortbread
    Soup
    Sponge
    Sponge Cake
    Strawberry
    Streusel
    Tahini
    Tart
    Tofu
    Topping
    Torte
    Vegetable
    Vinaigrette
    Walnut
    Watermelon
    Yogurt
    Zucchini

    Archives

    September 2021
    March 2021
    February 2021
    December 2020
    November 2020
    October 2020
    July 2020
    May 2020
    April 2020
    March 2020
    October 2019
    December 2018
    October 2018
    August 2018
    April 2017
    July 2016
    May 2016
    March 2016
    February 2016
    January 2016
    December 2015
    November 2015
    October 2015
    September 2015
    July 2015
    June 2015
    May 2015
    April 2015
    February 2015
    January 2015
    November 2014

© 2019 Jacqueline Teng | DragonWarden