While all my memories of this candy are very fond - drawn as they are from a childhood of mahjong parties, when the adults would lay out trays of snacks and candies for easy munching while they played and the kids would gleefully filch more from the stashes than the adults did - I hadn't thought of them in literally decades. But a couple weeks ago while I was escorting my mother at 99 Ranch Market, I happened to glimpse some very pretty packaging for black sesame candy and had a sudden craving for them. Except, of course, why not make my own?
I tried this recipe and it was not only an amazingly fast and easy assembly, earning the easy-peasy rating, but the candy was honestly more delicious than any store-bought one from my memories and each batch disappeared literally within an hour or two of making. I ended up making double-batches three times in one week!
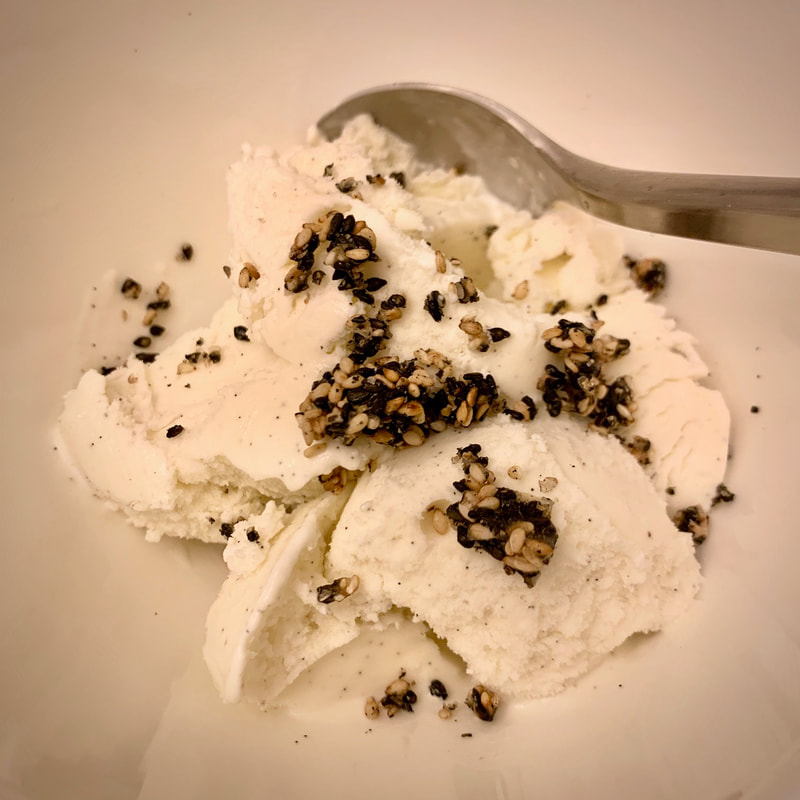
Bonus points - my boyfriend had a truly inspired suggestion and the crumbled bits of semi-smoky slightly-sweet sesame seed turned out to be an amazing topping for vanilla bean ice cream. ^_^ Yum!
I tried this recipe and it was not only an amazingly fast and easy assembly, earning the easy-peasy rating, but the candy was honestly more delicious than any store-bought one from my memories and each batch disappeared literally within an hour or two of making. I ended up making double-batches three times in one week!
Bonus points - my boyfriend had a truly inspired suggestion and the crumbled bits of semi-smoky slightly-sweet sesame seed turned out to be an amazing topping for vanilla bean ice cream. ^_^ Yum!
 |
|
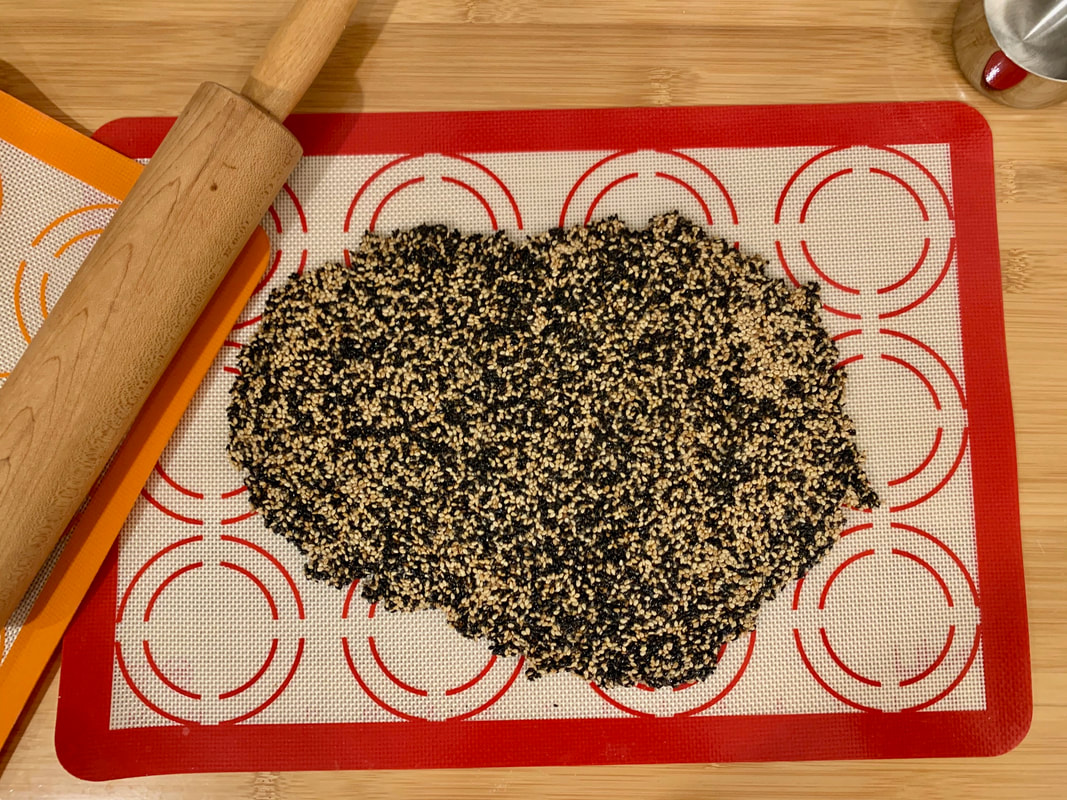
- Lay a silicone mat on your work surface. You will use this for rolling out the sesame candy.
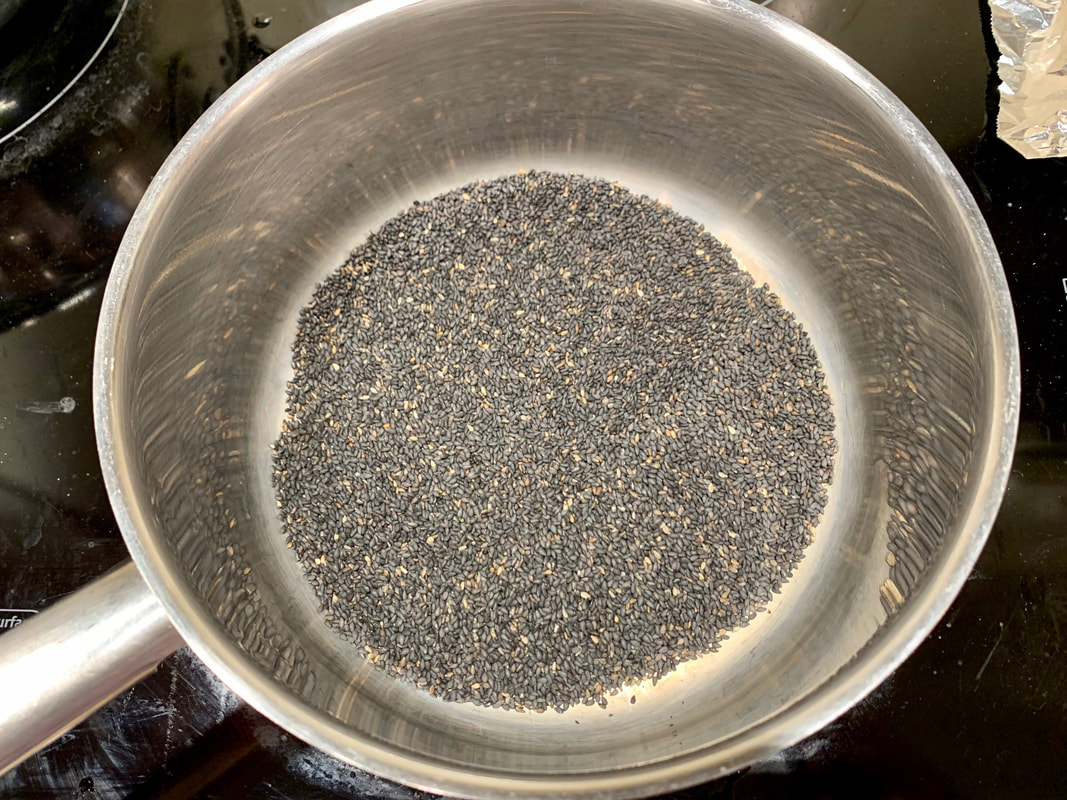
- Pour the black sesame seeds into a large pan and toast them on medium-high heat for about 3 to 4 minutes, stirring frequently. Because of their black color, it may be difficult to tell when the sesame seeds are done toasting. The sesame seeds usually release a faint aroma when they are ready. You can also see wisps of smoke coming from the sides of the pan. Turn off the heat and transfer the sesame seeds to a bowl.
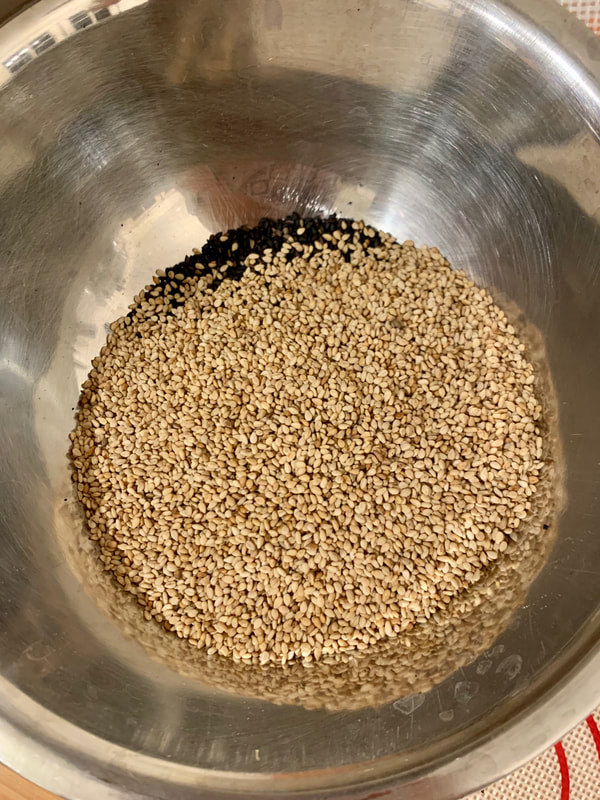
- Next, toast the plain sesame seeds for 3 to 4 minutes, stirring occasionally. Transfer the toasted seeds to the bowl with the black sesame seeds. Mix the two types of seeds together.
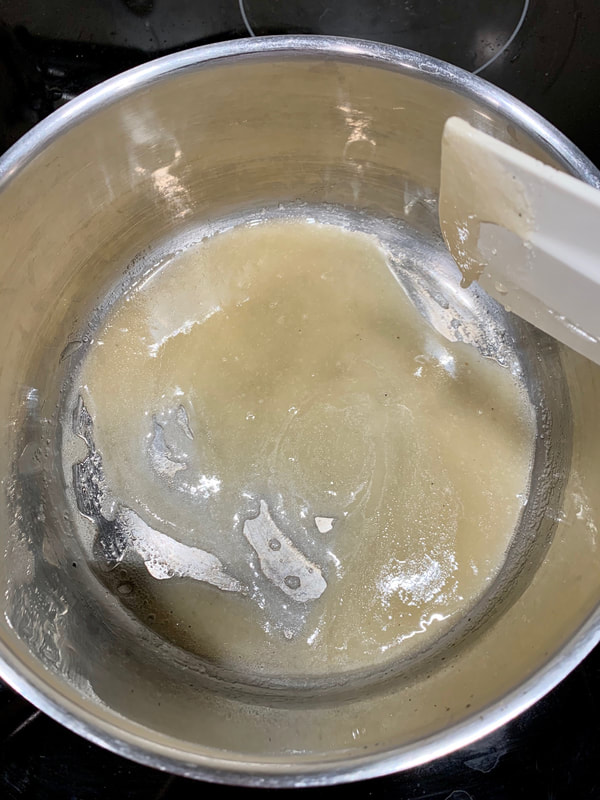
- In a large stainless steel pan, add the oil, honey, and sugar over medium-high heat. Stir everything together and wait for the sugar to dissolve completely and the resulting syrup takes on a golden color and is runny. Make sure to stir frequently to keep the sugar from burning.
- Once the sugar dissolves, turn off the heat. Add the sesame seeds and stir to coat the seeds with the syrup.
- Working quickly, pour the sesame seeds onto the silicone mat. Try to pile all the seeds into one mass. Lay the other silicone mat over the seeds and press down gently. Use a rolling pin to roll out the sesame candy. You want to make sure to be quick here so that you can roll out the candy into a thin layer.
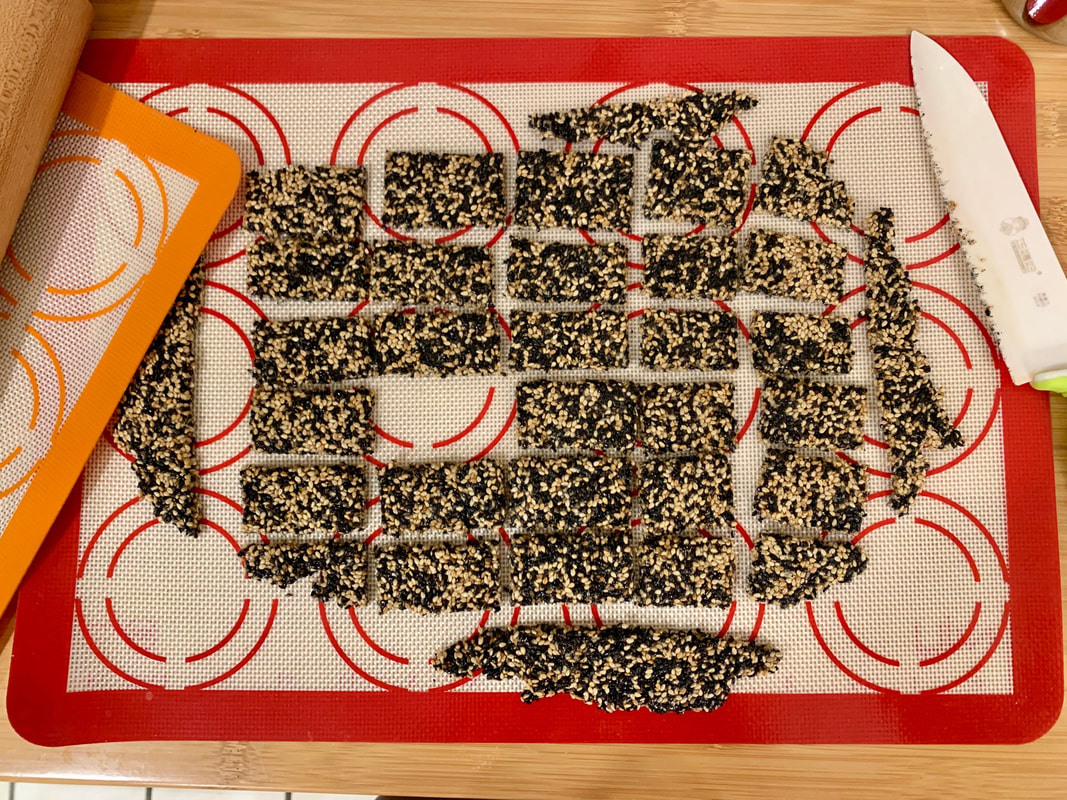
- Take off the top silicone mat and lay a chopping board over the candy. Carefully flip the candy onto the chopping board. Remove the second silicone mat.
- Use a sharp knife to trim the sides of the sheet of sesame candy so that you get straight edges. Cut the candy sheet into 1-inch strips of candy. Cut each strip into candies about 1 1/2 to 2 inches long. Don’t worry if your candy isn’t uniform in size. Mine are never perfect.
- You can enjoy the candy immediately. The candy will continue to harden as it cools to room temperature. Once cooled, store the candy in an airtight container for several weeks. (A ziploc baggie is sufficient - if it is not stored in a container, the candy will soften into a crumbly mess.)

 RSS Feed