DragonWarden
  • Adventures
  • The Oven
  • The Un-Tea Party
  • Secret Ingredients
  • About

Cardamom-Walnut Crescents

12/4/2018

0 Comments

 
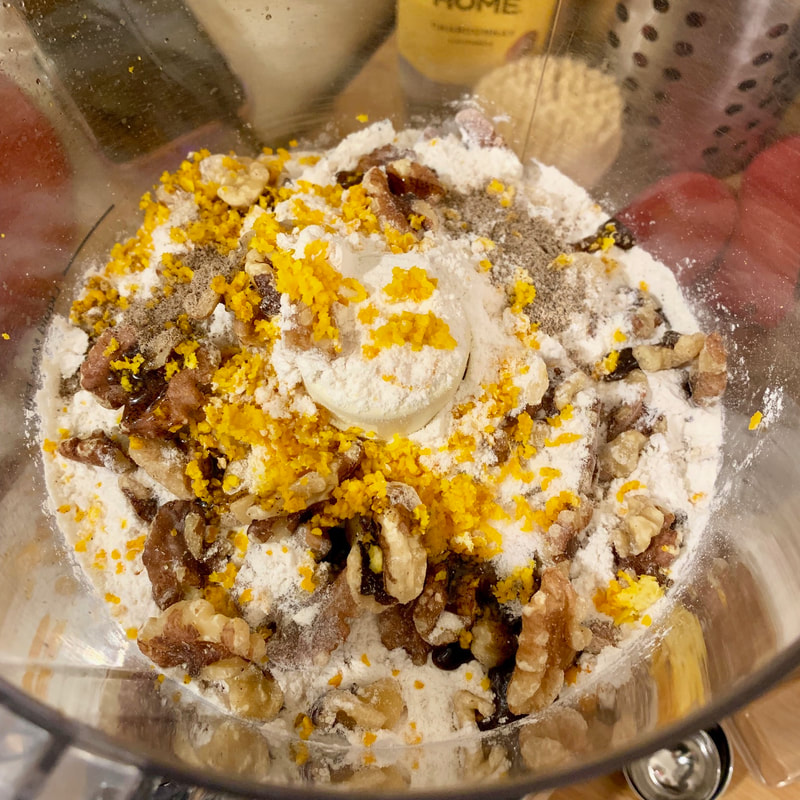
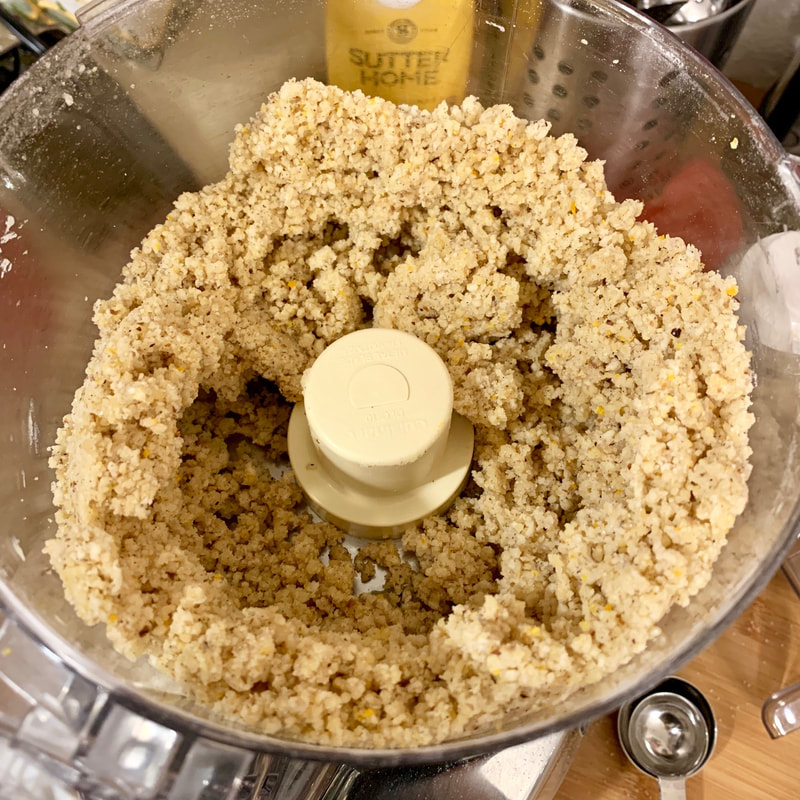
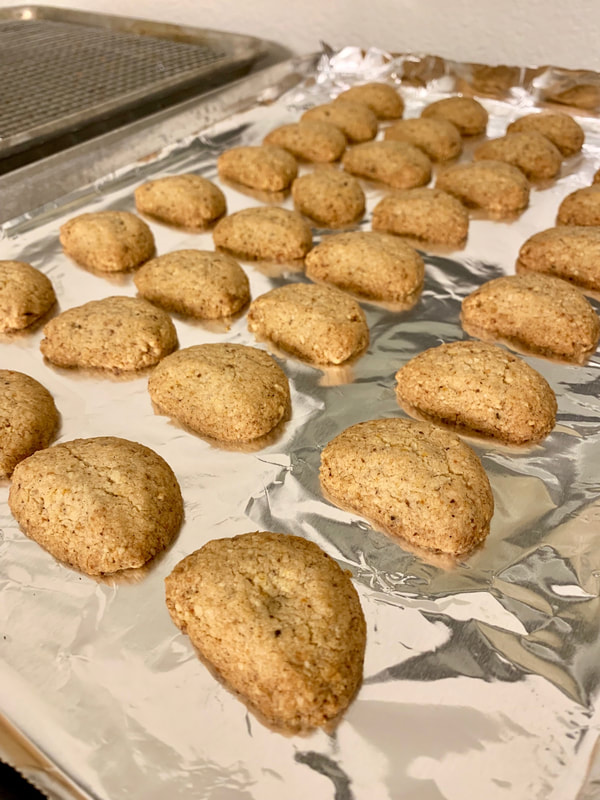
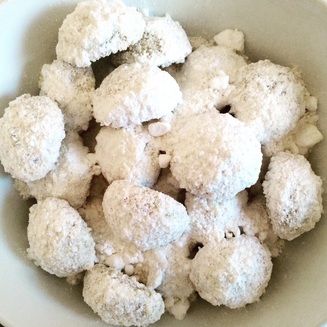
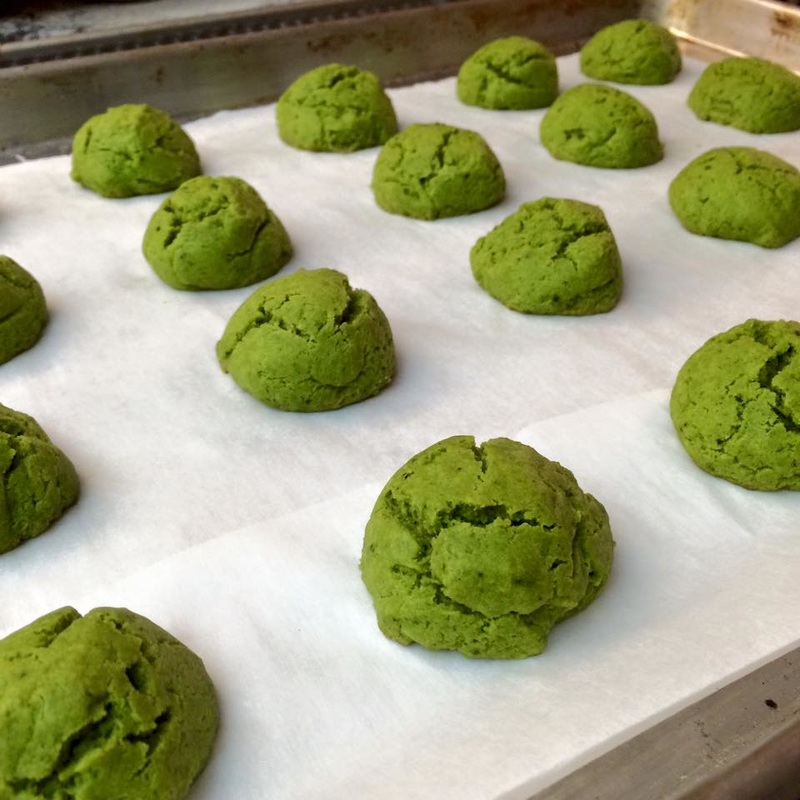
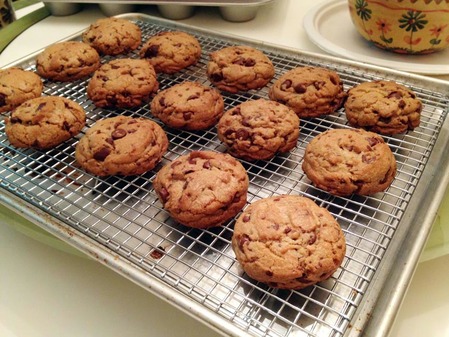
Taken from this recipe, in terms of ingredients and method, this was not so different from the perennial favorite Mexican Wedding cookies. But the texture was quite different once baked, because the fat (butter, in this case) wasn't creamed evenly throughout the batter. I had joked to my mother that it looked like I was making a batch of mini-croissants; it turns out I wasn't too far off, because even though the dough came together, the food processor maintained little granules of the cold butter so that they baked into very lightweight cookies that crumbled in your mouth.
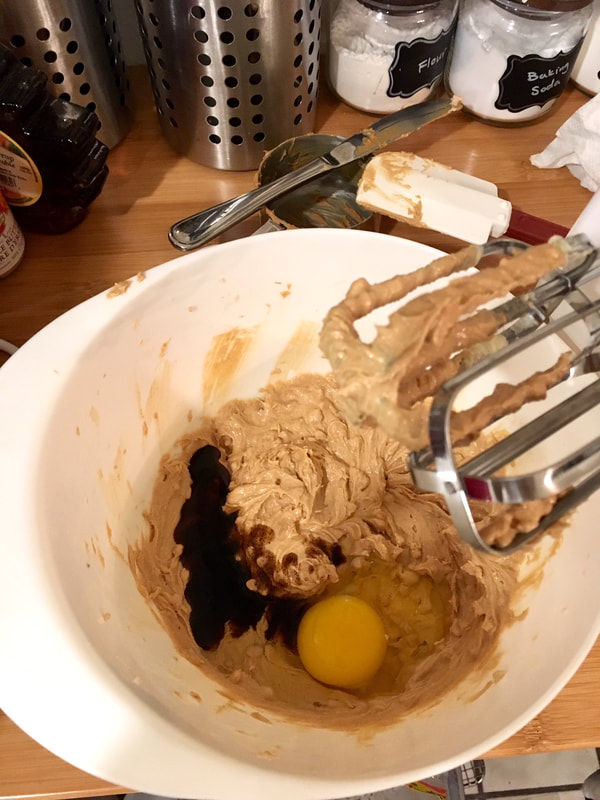
Picture
For the dough:
  • 1/4 cup sugar
  • 1 cup all-purpose flour
  • 3/4 cup walnuts halves
  • 1/4 pound unsalted butter, chilled and cut in to 1/2-inch pieces
  • 1 teaspoon vanilla extract
  • 1/2 teaspoon ground cardamom
  • 1/2 teaspoon grated orange zest
  • 1/8 teaspoon salt
For the vanilla sugar:
  • 1/3 cup sugar
  • 1/4 vanilla bean
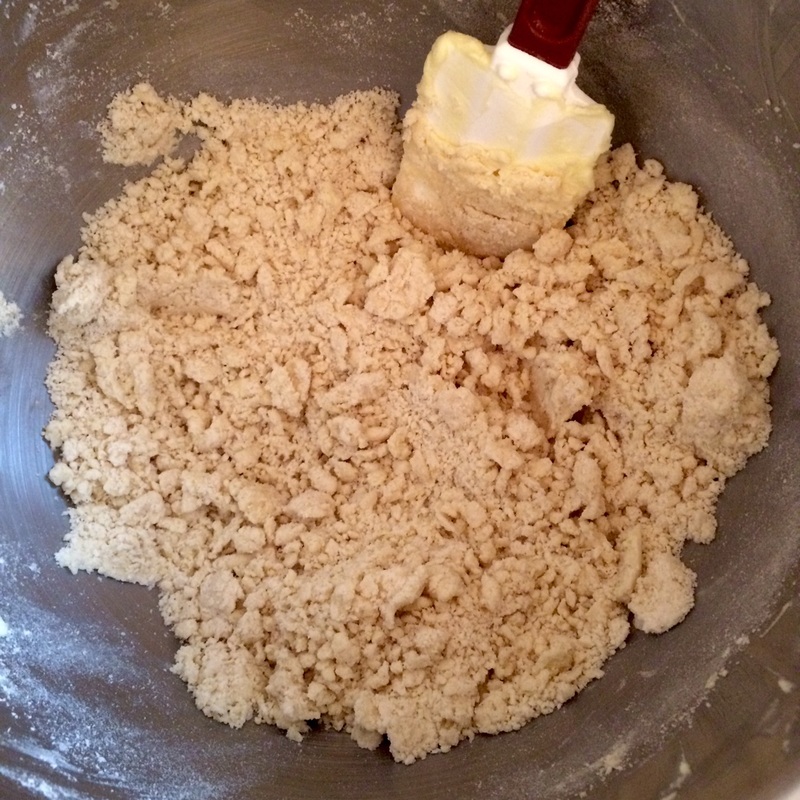
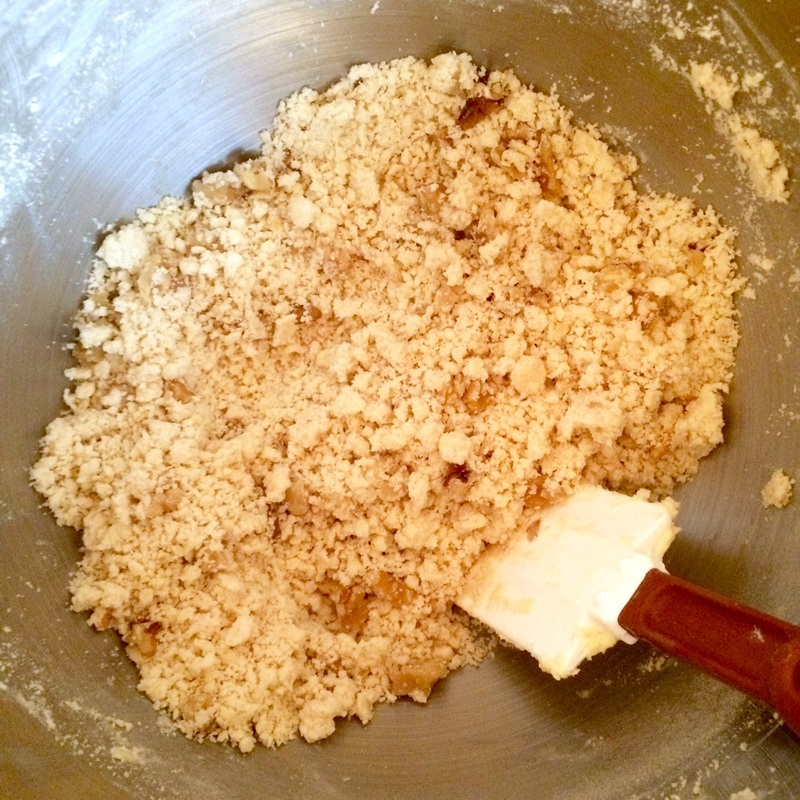
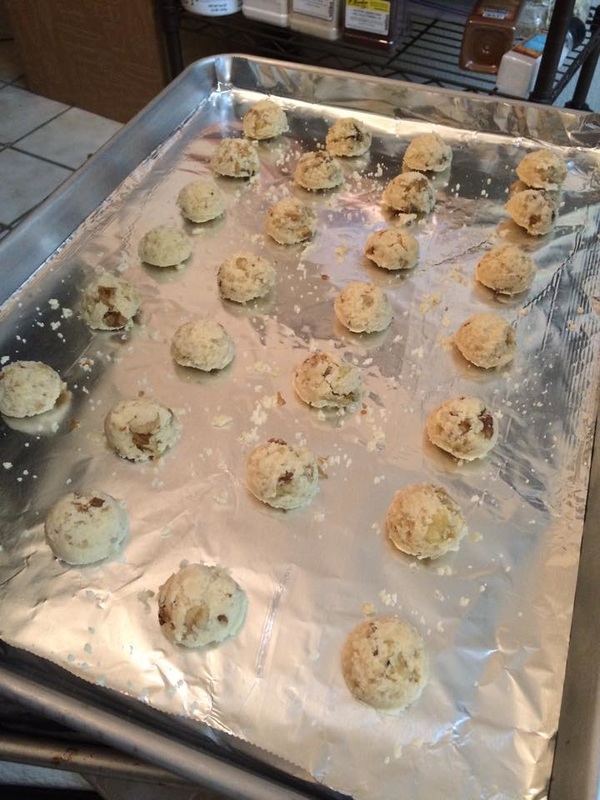
  1. Heat oven to 325 degrees. Combine all dough ingredients in a food processor. Pulse until the dough resembles coarse meal. Then process continuously until it begins to gather together.
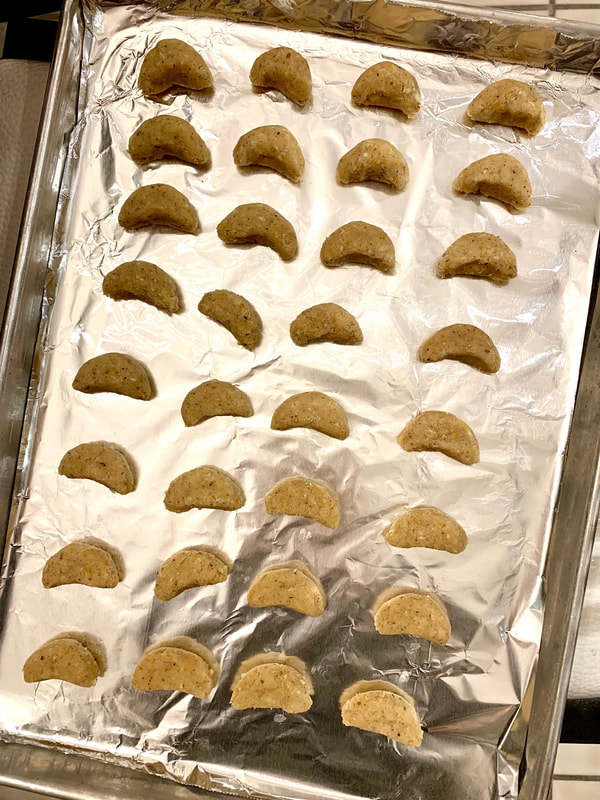
  2. Roll 2 teaspoons (or a little over half a tablespoon) dough at a time into half moon shapes. Arrange on an ungreased baking sheet, 1 inch apart. Bake until firm to touch, about 18 to 20 minutes.
  3. Meanwhile, combine the vanilla sugar ingredients in a food processor until the vanilla bean is pulverized.
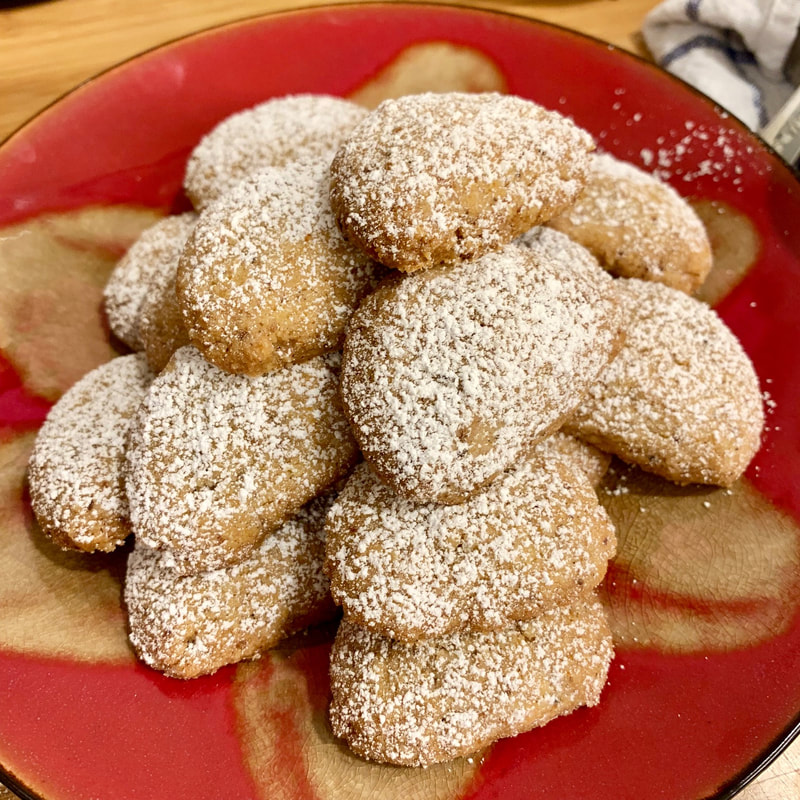
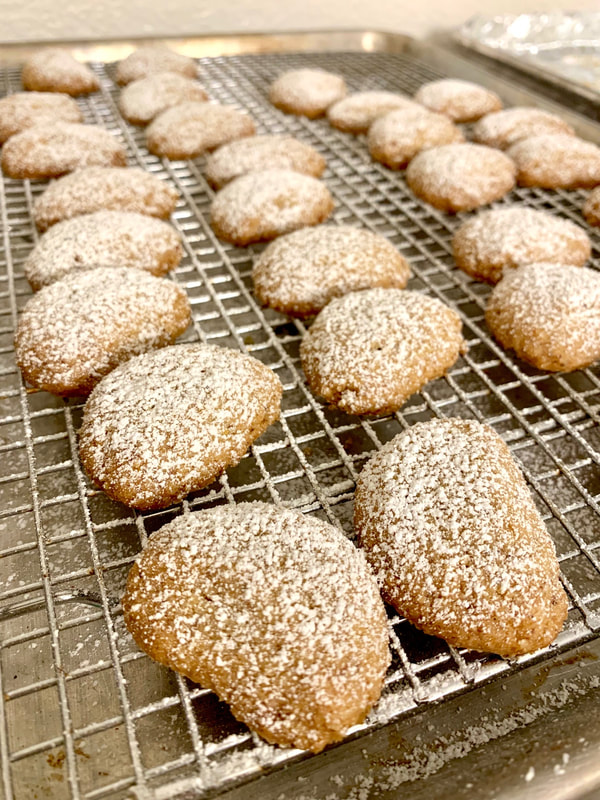
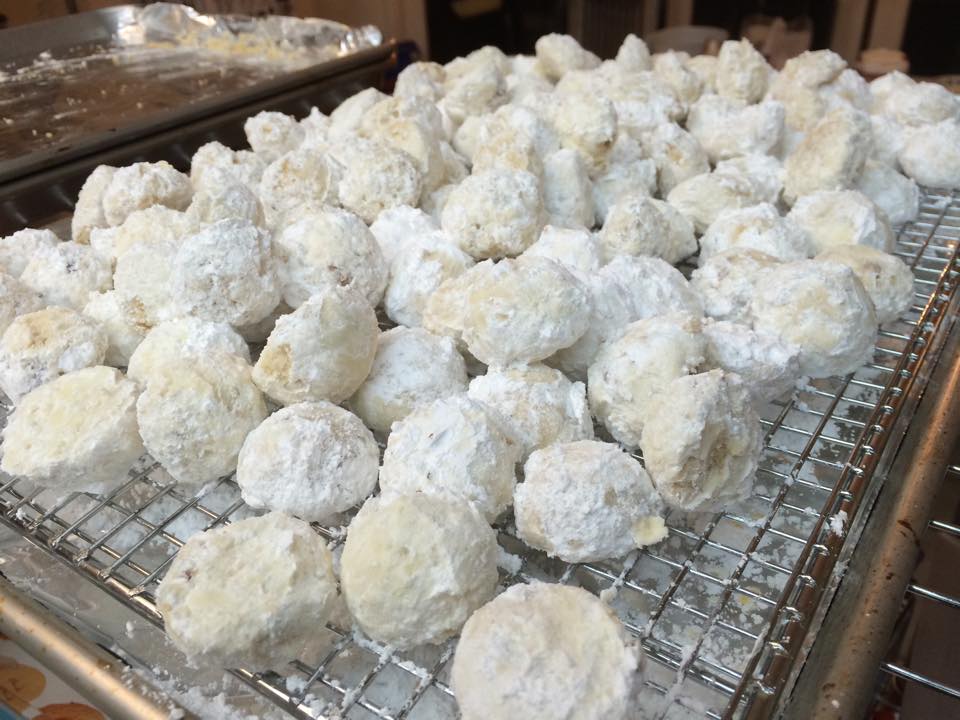
  4. When cookies are done, let them cool in the pan for 5 minutes before transferring to a rack. Sift the vanilla sugar over them immediately. Continue cooling for 15 minutes. The cookies may be stored in an airtight container up to 5 days.

If you are lazy like me, you can just substitute powdered sugar for the vanilla sugar. Be aware, though, that this cuts down on the sweetness. This was perfectly fine for me, though. If you want to be even more super-lazy, forget about the crescent shapes and just form little half-domes like the mexican wedding cookies.

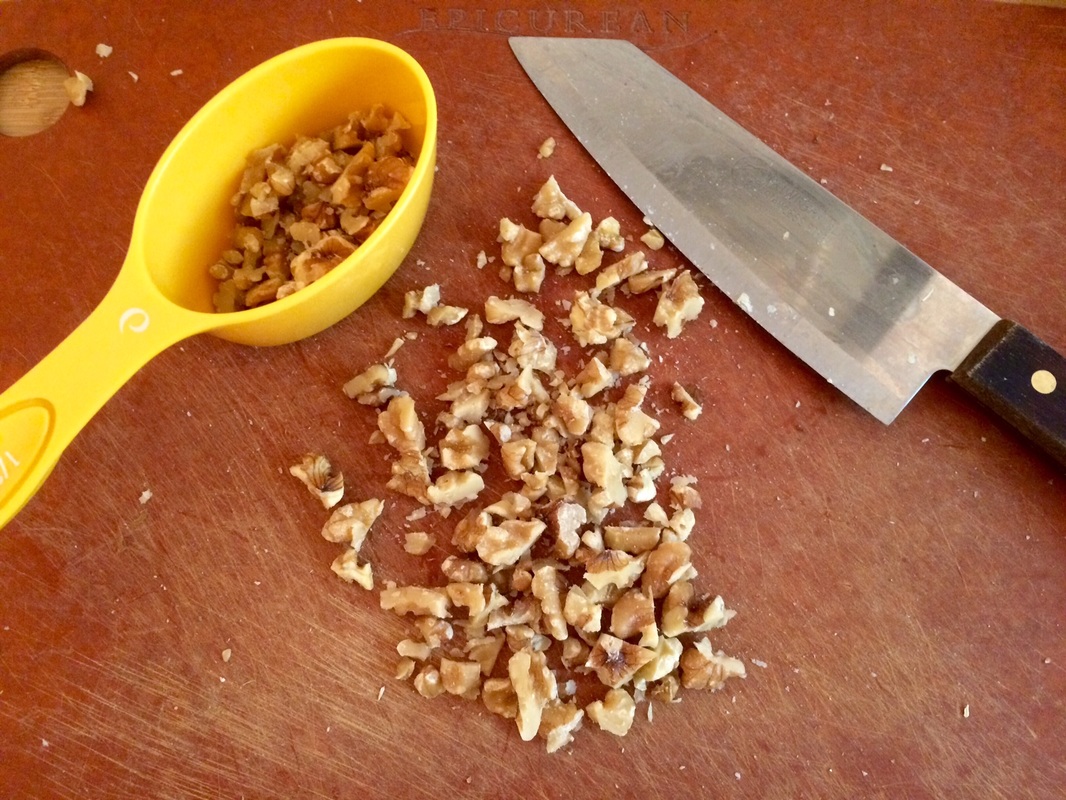
I also liked to up the cardamom and orange zest amounts, but you can certainly adjust to your taste. To help with the spreading, you can chill the cookies after they're formed on the baking sheet in the fridge for a half hour before putting in the oven.

0 Comments

Peanut Butter Cookies

8/21/2018

0 Comments

 
I have my tried and true big fat chewy chocolate chip cookies recipe when I need to whip up a batch for friends, but as good as it is, I was getting a little bored of making it all the time. So, what's a natural complement to chocolate? Peanut butter.

So when the time came to make a batch for someone as a favor, I decided to do some research on peanut butter cookie recipes. The below is an adaptation from this recipe - as the recipe described, the original was indeed quite soft. But, I felt, it needed just a little more chewiness and oomph to it ... in short, it needed to be just like the big fat chewy chocolate chip cookie, except peanut-butter flavored. This was only further supported when I left some of the PB cookies out for a week and my brother said they were getting better as they hardened a bit on the outside. Thus, I threw in a little bit of this and that and came up with the below recipe.
Picture
  • 1 cup peanut butter
  • 3/4 cup butter softened
  • 1/2 cup white sugar
  • 1/2 cup brown sugar
  • 1 egg + 1 egg yolk
  • 1 tablespoon vanilla extract
  • 1 1/2 cups flour
  • 1 teaspoon baking soda
  • 1/4 teaspoon salt
  1. Preheat the oven to 350 F. Line 2 baking pans with parchment paper, if desired.
  2. In a large mixing bowl, cream together the peanut butter, butter, sugar and brown sugar. Beat together until smooth & creamy best if using a stand mixer or hand mixer.
  3. Add the egg and vanilla extract and continue to mix until well combined.
  4. In a small mixing bowl, whisk together the flour, baking soda and salt. Stir in the flour mixture to the butter and sugar mixture and mix until well combined.
  5. Using a cookie dough scooper or making the dough into 1 inch balls. Roll in white granulated sugar if you desire and place on to baking sheet. 
  6. Using a fork, press down on each ball of dough to slightly flatten and creating a criss-cross pattern.
  7. Bake for 8-9 minutes. Let cool on the baking sheet for a few minutes and then transfer to a wire rack.
  8. These keep well for a couple of days in an airtight container.
0 Comments

Mexican Wedding Cookies

12/19/2015

0 Comments

 
These are a definite hit among family and friends - one batch makes like a million little cookies, but they're always gone in just a few days (depending on how many people are in the house at the time). Even though I would ordinarily label this an "easy-peasy" recipe, but it's a little labor/time-intensive when you use a 1/2 tbsp scoop like suggested. I lowered the sugar in the cookie itself so that it's balanced by the powdered sugar coating.
Picture
  • 3/4 cup vegetable shortening
  • 1/4 cup granulated sugar
  • 1 tsp vanilla extract
  • 2 cups all-purpose flour
  • 1/2 cup walnuts, chopped
  • powdered sugar for rolling
​Yield: about 60

  1. Preheat oven to 325 degrees and place rack in the bottom 1/3 of the oven. Line 2 baking sheets.
  2. In a large bowl, cream the shortening and sugar together. Beat in the vanilla extract. Gradually blend in the flour (the dough should be crumbly). Fold in the walnuts.
  3. Pinch off pieces of dough and roll into balls (or pack into a 1/2 tbsp scoop to shape half-dome pieces). Place 1" apart on the prepared baking sheets.
  4. Bake for 12 minutes. (They may still be tacky on the surface - this is okay. They will harden as they cool, and that tackiness will help the powdered sugar to stick and set.)
  5. While still warm, roll in powdered sugar and transfer to wire racks to cool. (Note that the powdered sugar sticks best when the cookies are warm, so that the sugar melts a little. After they've cooled, you can dump them in a container with more powdered sugar so that they look nice and Christmas-y.)
Note: I've made these in both 1 tbsp size, and 1 tsp size, and I've found that the 1/2 tbsp is really the best compromise. The 1 tbsp sized cookies never really created the tacky surface that was needed to make the powdered sugar adhere well, and the 1 tsp size was just way too small - it took forever to finish up the dough that way. In the end, I can get through the whole bowl of dough using a 1/2 tbsp in about 15-18 minutes.
0 Comments

Matcha Tea Cake Cookies

4/11/2015

0 Comments

 
The cookies themselves were very mild in flavor, so it's easy to over-eat! Careful of the caffeine! I found the almond scent lovely, but I think next time I will put a little less in. The cookies cracked a bit because I used the 2-spoons method of scooping, which don't make perfectly smooth balls - but I'm not against this more "rustic" look as opposed to the perfect full-moon shapes.
Picture
  • 2 cups all-purpose flour
  • 2 tsp baking powder
  • 1/2 tsp kosher salt
  • 1/8 tsp ground cardamom
  • 3/4 cup granulated sugar
  • 2/3 cup canola oil
  • 2 large eggs
  • 1/2 tsp pure vanilla extract
  • 1/4 tsp pure almond extract
  • 2 tbsp + 1 tsp matcha tea powder
  • 1/4 cup confectioners' sugar
Servings: 40

  1. In a medium bowl, whisk flour, baking powder, salt, and cardamom. In another bowl, whisk granulated sugar, oil, eggs, and vanilla and almond extracts. In a small bowl, stir 2 tbsp of matcha powder with 2 tbsp of water, then stir into the wet ingredients. Stir the wet ingredients into the flour mixture just until combined.
  2. Using a 1 oz ice cream scoop or 2 tbsp, scoop 1" balls of dough at least 2" apart onto 2 baking sheets lined with parchment paper. Refrigerate for at least 20 mins.
  3. Preheat oven to 350 F. Bake the cookies for about 10 mins, until set at the edges and very lightly browned on the bottoms. Let the cookies cool for 10 mins, then transfer to a rack to cool completely.
  4. Arrange cookies on a baking sheet. In a sieve, combine the confectioners' sugar with the remaining 1 tsp of matcha. Dust over the cookies and serve.
  5. The cookies can be stored in an airtight container for up to 3 days. Dust with the matcha sugar before serving.
0 Comments

Best Big, Fat, Chewy Chocolate Chip Cookie

4/9/2015

0 Comments

 
These cookies were both humongous and unaccountably cute. I just loved the fact that they were these fat little mounds, and I may never pick up a flat cookie again. They were a big hit - lightly crisped on the outside, chewy on the inside without being too dense, and of course, PLENTY of chocolate with two cups of it stuffed inside.
Picture
  • 2 cups all-purpose flour
  • 1/2 teaspoon baking soda
  • 1/2 teaspoon salt
  • 3/4 cup unsalted butter, melted
  • 1 cup packed brown sugar
  • 1/4 - 1/2 cup white sugar
  • 1 tablespoon vanilla extract
  • 1 egg + 1 egg yolk
  • 2 cups chocolate chips or 1 cup chips and 1 cup chopped chocolate (if using chopped, sift out the powdered chocolate)
  1. Grease cookie sheets or line with parchment paper. Measure out flour using the scoop-and-level method (should be about 120-125 grams).
  2. Sift together the flour, baking soda and salt; set aside.
  3. In a medium bowl, cream together the melted butter, brown sugar and white sugar until well blended. Beat in the vanilla, egg, and egg yolk until light and creamy.
  4. Mix in the sifted ingredients until just blended. Stir in the chocolate chips by hand using a wooden spoon.
  5. Drop cookie dough 1/4 cup at a time onto the prepared cookie sheets. Cookies should be about 3 inches apart. Refrigerate the cookies for at least 30 minutes, ideally 3 hours or longer.
  6. Preheat the oven to 325 F. Bake for 15 to 17 minutes, or until the edges are lightly toasted. Cool on baking sheets for a few minutes before transferring to wire racks to cool completely.
0 Comments

Butter Pecan Cookies

4/9/2015

0 Comments

 
Picture
  • 1 cup butter, softened
  • 2/3 cup packed brown sugar
  • 1 tsp vanilla
  • 1 egg
  • 2 cups all-purpose flour
  • 1/2 teaspoon salt
  • 1 cup chopped/minced pecans
  • 1 1/2 cups pecan halves
Servings: who the heck knows (a million cookies depending on how big you make them)

  1. In a large bowl, cream butter and brown sugar. Add the egg and vanilla, mix until well blended.
  2. Sift together the flour and salt. Add these slowly to the liquid mix. Once everything is well blended, mix in the chopped pecans.
  3. Cover and refrigerate for at least one hour (though it will be better if it can be left overnight).
  4. Preheat oven to 375 degrees F.
  5. Roll one inch pieces of dough into balls and place 2 inches apart on cookie sheets. Flatten balls with the bottom of a glass dipped in flour or just using your fingers. Press a pecan into top of dough.
  6. Bake about 9-10 minutes, until lightly golden.
There’s a bit of lore that cookie batter that’s been allowed to rest for a significant time in the refrigerator will bake into better tasting cookies. The longer the better - 24 hours, even 36 - 48 hours. While there is a page that claims a blind taste test supported this theory, I didn’t quite believe it until my father piped up after tasting one batch one day (left in the fridge for 1 hour) and tasted another batch 2 days later (this one left in the fridge for 30 hours). He noted without prompting that the second batch was better - the taste richer and more even. The handling of the second batch’s batter was a bit different though - it was far stickier and malleable once it reached warmer temperatures. They also took less time to burn - the first batch took 10 minutes, but I had to adjust it down to 9 for the second, so keep an eye on those cookies while they bake!
0 Comments

Nutella Irish Cream Cookies w/ Sea Salt

1/1/2015

0 Comments

 
  • 1/2 C all purpose flour
  • 1 C whole wheat flour
  • 1 tsp baking powder
  • 1/3 C cocoa powder (I used Hershey's Special Dark)
  • 1/2 C unsalted butter, softened
  • 1/2 C sugar
  • 1 tsp vanilla extract
  • 1/3 C Nutella
  • 1/3 C Irish cream liqueur
  • Sea salt, for sprinkling
  1. Whisk together the flour, baking powder, and cocoa powder. Set aside.
  2. Using an electric mixer or stand mixer, cream together the butter and sugar. Add in the vanilla extract and Nutella, mixing until smooth.
  3. Add the dry ingredients half at a time alternately with the Irish cream until well-combined. Wrap the dough in plastic wrap and let chill in the refrigerator 15 minutes before baking.
  4. When ready to bake, preheat the oven to 325 degrees. Line a baking sheet with parchment paper and roll the dough into 1? balls. Place 2? apart on the parchment paper. Press down gently and sprinkle with sea salt.
  5. Bake 10-12 minutes until just starting to set. Let cool for a few minutes on the baking sheet before removing to a cooling rack to cool completely.
0 Comments

ARCHIVE: Breton Shortbread Cookies or Tart Crust (from The French Market Cookbook)

1/1/2015

0 Comments

 
  • 1/2 cup/70g unrefined blond sugar (also sold as evaporated cane juice) or caster sugar
  • 6 tbsp/85g high quality unsalted butter, softened
  • 1 small fresh vanilla bean or 2 tsp pure vanilla extract
  • 1 large organic egg
  • 1 cup/130g all purpose flour
  • 1 tsp baking powder
  • 1/2 tsp fine sea salt
  1. In the bowl of a stand mixer fitted with the paddle attachment, combine the sugar and butter. (Alternatively, do this by hand in a bowl with a wooden spoon.) Split the vanilla bean lengthwise with a sharp knife, scrape the seeds from the inside of the bean with the dull side of the blade, and add them to the sugar and butter. Beat the sugar and butter at low speed until pale an fluffy, about 3 minutes. Add the egg and beat for 2 minutes.
  2. In another bowl, combine the flour, baking powder and salt, stirring with a whisk to remove any lumps. add to the mixer and mix at low speed for a few seconds, just until no trace of flour remains. The dough will be quite soft.
  3. Transfer the dough to a container and refrigerate for at least 2 hours, and preferably overnight.
  4. Preheat the oven to 350F/175C and line a baking sheet with parchment paper or a silicone baking mat.
  5. Remove the dough from the fridge and roll it out between two sheets of parchment paper to a thickness of 1/3 in / 8mm. Peel off the top sheet gently and use a round cookie cutter, about 2 in /5cm in diameter, to cut out circles of dough.
  6. Transfer to the prepared baking sheet, giving them a little room to expand.
  7. Gather the scraps of dough and repeat to cut out more cookies. As the dough warms to room temperature, it may become to soft to work with; place it in the freezer for 10 minutes to firm up before cutting out circles again.
  8. Bake the sables until golden brown, 15-20 minutes.
  9. Transfer to a rack to cool completely. The sables will keep for a few days in an airtight container at room temperature.
0 Comments

Chocolate-Cherry Biscotti

1/1/2015

0 Comments

 
  • nonstick cooking spray
  • 1/4 cup butter, softened
  • 1/2 cup sugar
  • 1/4 cup unsweetened cocoa powder
  • 1 tsp baking powder
  • 1/4 tsp baking soda
  • 2 eggs
  • 1/2 tsp vanilla
  • 1-2/3 cups all-purpose flour
  • 1/3 cup finely chopped dried tart cherries
  • 1 cup bittersweet or semisweet chocolate pieces (6 ounces) (optional)
  • 2 tsp shortening (optional)

Servings: 24
  1. Preheat oven to 375 degrees F. Lightly coat a large cookie sheet with cooking spray; set aside. In a large mixing bowl beat butter with an electric mixer on medium to high speed for 30 seconds. Add sugar, cocoa powder, baking powder, and baking soda. Beat until combined, scraping sides of bowl occasionally. Beat in as much of the flour as you can with the mixer. Using a wooden spoon, stir in any remaining flour and the dried cherries.
  2. Divide dough in half. Shape each portion into an 8" loaf. Place loaves about 3" apart on the prepared cookie sheet; flatten loaves slightly until about 2" wide. Bake for 18-20 minutes or until firm and a toothpick inserted near centers comes out clean. Cool on cookie sheet for 1 hour.
  3. Preheat oven to 325 degrees F. Using a serrated knife, cut each loaf diagonally into 1/2" slices. Place slices on an ungreased large cookie sheet. Bake for 10 minutes. Turn slices over; bake for 8-10 minutes more or until crisp and dry. Transfer to wire racks; cool.
  4. If desired, in a small microwave-safe bowl combine chocolate pieces and shortening. Microwave on 50% power (medium) for 1-2 minutes or until melted and smooth, stirring twice. Dip one end of each biscotti into melted chocolate; place on waxed paper. Let stand until chocolate is set.
0 Comments

Chocolate Crinkles

1/1/2015

0 Comments

 
  • 1 cup unsweetened cocoa powder
  • 2 cups white sugar
  • 1/2 cup vegetable oil
  • 4 eggs
  • 2 teaspoons vanilla extract
  • 2 cups all-purpose flour
  • 2 teaspoons baking powder
  • 1/2 teaspoon salt
  • 1/2 cup confectioners' sugar
  1. In a medium bowl, mix together cocoa, white sugar, and vegetable oil. Beat in eggs one at a time, then stir in the vanilla. Combine the flour, baking powder, and salt; stir into the cocoa mixture. Cover dough, and chill for at least 4 hours.
  2. Preheat oven to 350 degrees F (175 degrees C). Line cookie sheets with parchment paper. Roll dough into one inch balls. I like to use a number 50 size scoop. Coat each ball in confectioners' sugar before placing onto prepared cookie sheets.
  3. Bake in preheated oven for 10 to 12 minutes. Let stand on the cookie sheet for a minute before transferring to wire racks to cool.
0 Comments
<<Previous
    Picture

    Sweet Enough

    Part of the reason I started baking was because I like my goodies to be less obviously sweet - I want to taste the flavor, not just the sugar. So most of these recipes will have the sugar dialed down.

    This site also acts as my mobile recipe box, so instructions are often pared down to a minimum - very few frills but for some hints and suggestions!

    RSS Feed

    Categories

    All
    Alcohol
    Almond
    Apple
    Avocado
    Baklava
    Banana
    Bars
    Biscotti
    Blackberry
    Blueberry
    Bread
    Buttercream
    Cake
    Candy
    Carrot
    Cheese
    Cherry
    Chicken
    Chickpea
    Chinese
    Chocolate
    Cider
    Cobbler
    Coconut
    Coconut Milk
    Cookie
    Corn
    Cranberry
    Cream
    Cream Cheese
    Creme Brulee
    Crumb
    Crust
    Cupcake
    Custard
    Dates
    Decoration
    Dip
    Dough
    Doughnut
    Dumpling
    Easy Peasy
    Egg
    Filling
    Flowers
    Frosting
    Fruit
    Garnish
    Gelee
    Granola
    Green Tea
    Honey
    Ice Cream
    Icing
    Jam
    Lamb
    Lemon
    Lime
    Lobster
    Lotus Seed
    Macaron
    Mango
    Marshmallow
    Meringue
    Mochi
    Muffin
    Nectarine
    Nutella
    Nuts
    Oat
    Oats
    Onion
    Orange
    Pancake
    Panna Cotta
    Peach
    Peanut Butter
    Pear
    Pecan
    Phyllo
    Pie
    Pistachio
    Plum
    Popsicle
    Pound Cake
    Pumpkin
    Quiche
    Raspberry
    Red Bean
    Rhubarb
    Rice
    Ricotta Cheese
    Rugelach
    Sauce
    Savory
    Scone
    Sesame
    Shortbread
    Soup
    Sponge
    Sponge Cake
    Strawberry
    Streusel
    Tahini
    Tart
    Tofu
    Topping
    Torte
    Vegetable
    Vinaigrette
    Walnut
    Watermelon
    Yogurt
    Zucchini

    Archives

    September 2021
    March 2021
    February 2021
    December 2020
    November 2020
    October 2020
    July 2020
    May 2020
    April 2020
    March 2020
    October 2019
    December 2018
    October 2018
    August 2018
    April 2017
    July 2016
    May 2016
    March 2016
    February 2016
    January 2016
    December 2015
    November 2015
    October 2015
    September 2015
    July 2015
    June 2015
    May 2015
    April 2015
    February 2015
    January 2015
    November 2014

© 2019 Jacqueline Teng | DragonWarden