DragonWarden
  • Adventures
  • The Oven
  • The Un-Tea Party
  • Secret Ingredients
  • About

Lobster Tails

10/23/2020

0 Comments

 
Since lobster tails were always the purview of some fancy restaurant, the making of lobster tails was also associated with "fancy cooking" - or, rather, "complicated cooking" - in my mind. But nothing could be further from the truth! Even the prep work was easy peasy, as long as you have some kitchen rubber gloves to protect your hands (as I learned the hard way) and a pair of good kitchen shears. Even a Costco six-pack of lobster tails came out deliciously sweet and delicate! Adapted from this page.
Picture
  • lobster tails
  • 3 tablespoons melted butter or olive oil
  • 1 teaspoon salt
  • 1 teaspoon black pepper
  • 1 teaspoon garlic powder
  • 1 teaspoon paprika
  • 1 teaspoon fresh parsley, chopped
  • 1 teaspoon lemon juice
  • 2 wedges lemon, to serve
Note: Like a lot of cooking recipes, the ingredient amounts are highly flexible. While some ratios are given here, you can really adjust it to your taste - just make sure there's enough to drench all the lobster tails. 
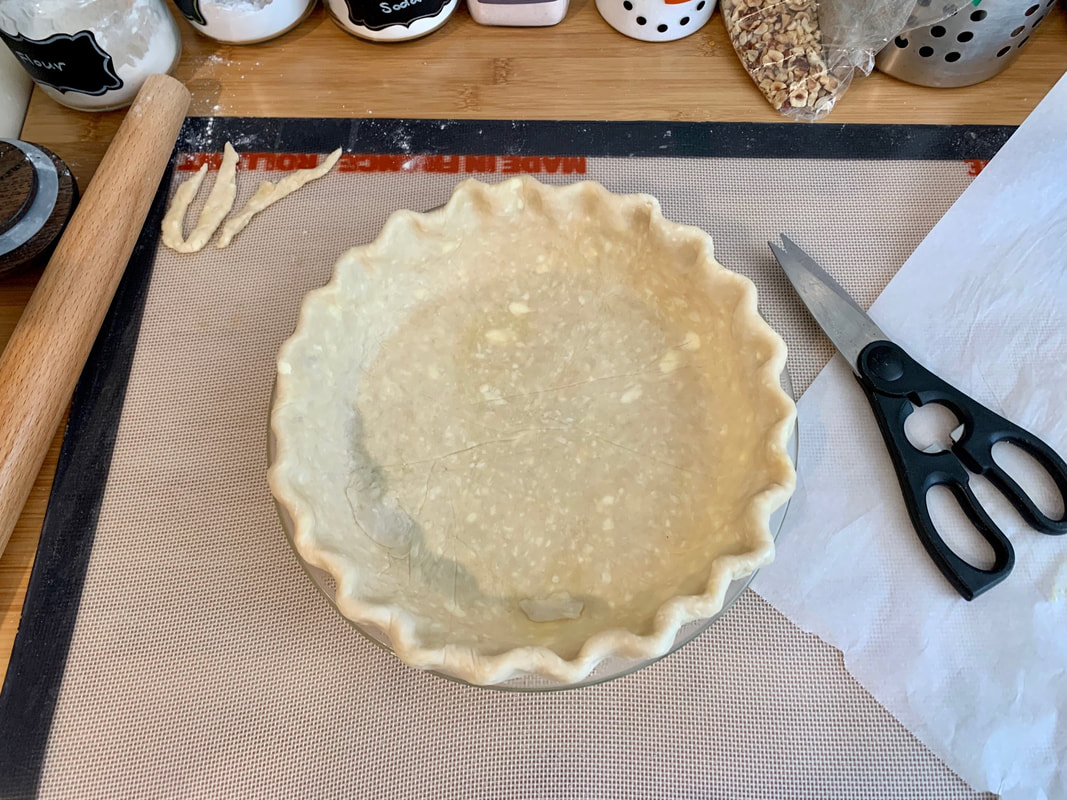
  1. Using a clean pair of scissors or kitchen shears, cut in a straight line along the middle of the top of the shell towards the fins of the tail. Cut through all of the horizontal segments, but do not cut through the end of the tail.
  2. For this step, you may wish to use a pair of kitchen rubber gloves to handle the tails if they are particularly spiny. Using a spoon or your fingers, separate the meat from the two sides of the shell, then lift the meat up and out from inside the shell. (If you are having difficulty opening the shell up to lift out the meat, flip the tail over and make cuts along the carapace where the legs meet the bottom part tail, or you can squeeze the edges of the shell together until the ribs crack. This will help break the rigid structure of the shell and allow it to be more flexible.)
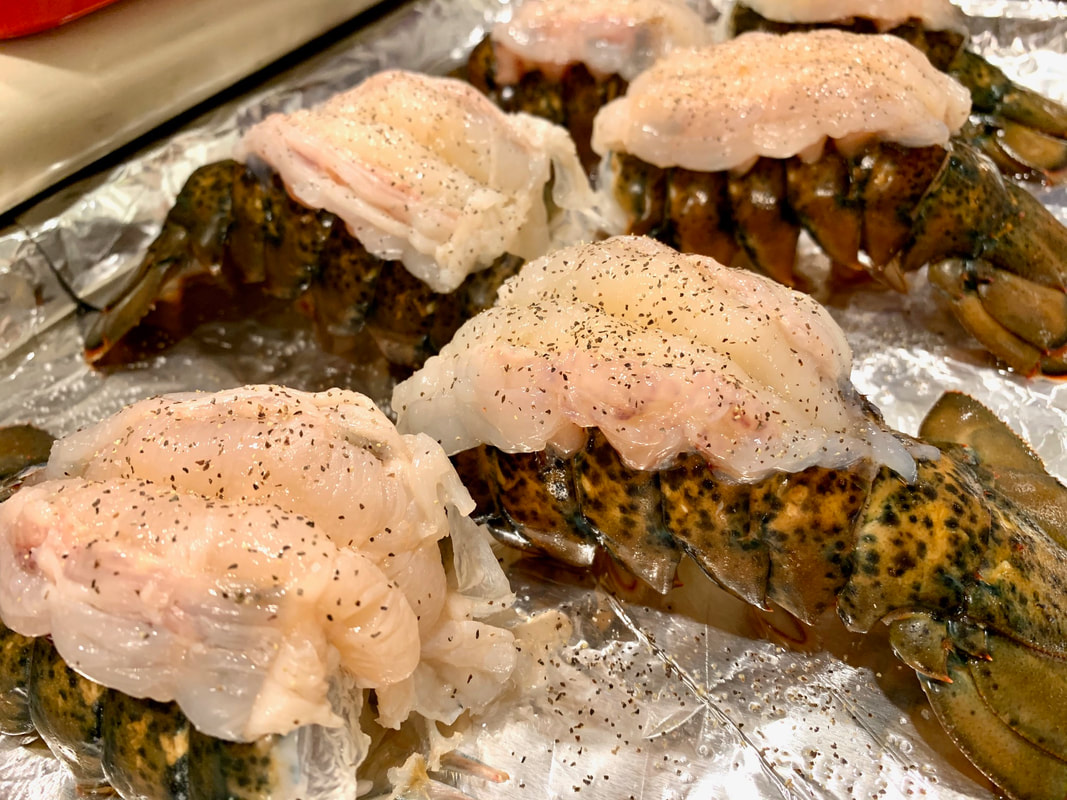
  3. Press the two sides of the shell together, then lay the meat over the seam where the two shells meet.
  4. While cutting through the shell, you may have also cut into the meat, which is perfectly okay. Make a shallow cut through the middle of the lobster meat so that you can peel down the thin layer of meat over the sides. This gives the lobster tail its signature look.
  5. Preheat oven to 425°F (230°C).
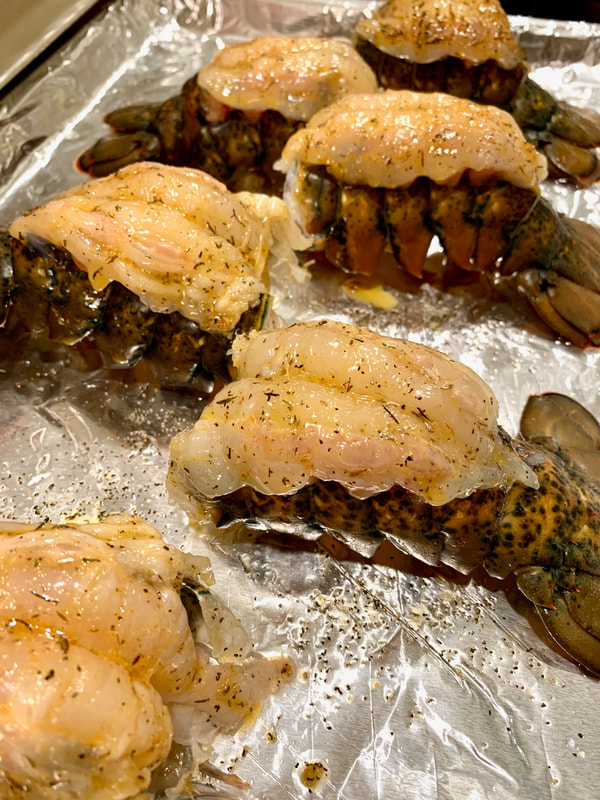
  6. In a small bowl, combine the butter, salt, pepper, garlic powder, paprika, lemon juice, and parsley, then brush the mixture evenly over the lobster meat.
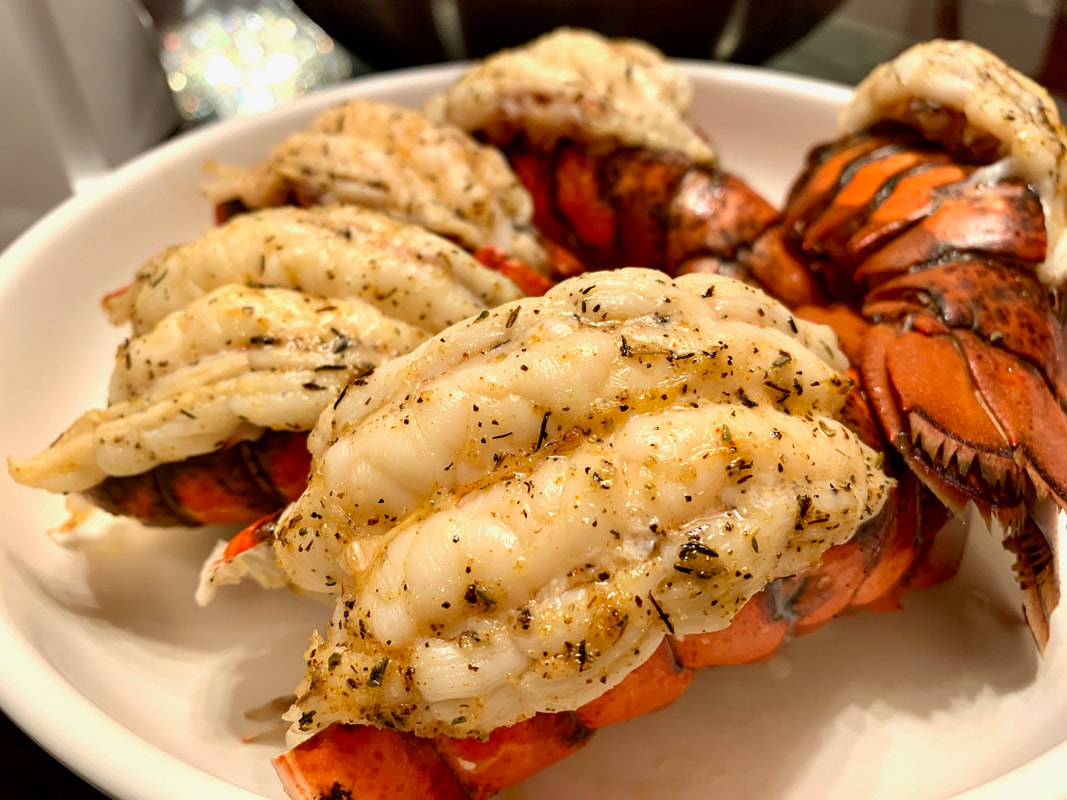
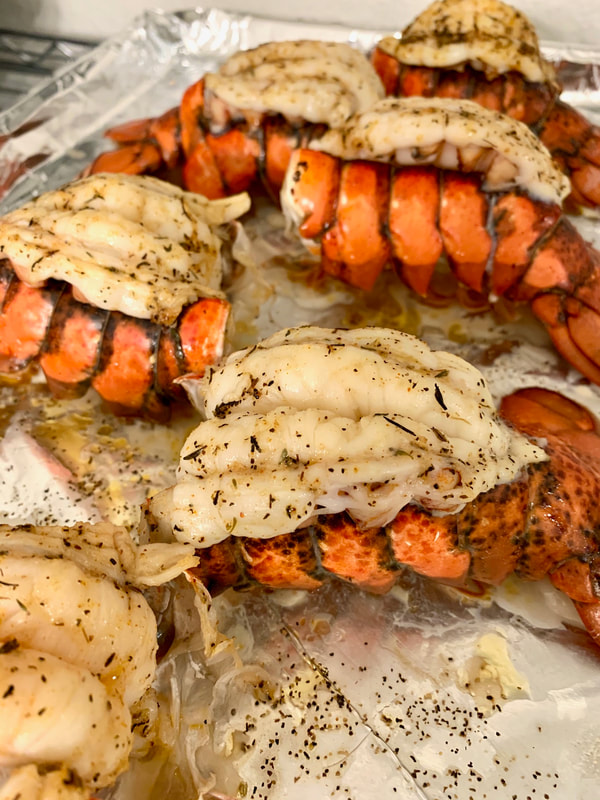
  7. Place the tails onto a baking sheet, then bake for approximately 12-15 minutes for larger tails, or 7-10 minutes for smaller tails, until the lobster meat no longer has any translucency throughout. If you have an instant thermometer, you can check that the internal temperature reaches 140°F. The key here is you never want to overcook them - when in doubt, take them out to check their middle, and then put them back into the oven 1-2 minutes at a time depending on how well done they are by that point. 
  8. Serve with a side of lemon wedges.
0 Comments

Pie Crust

10/22/2020

0 Comments

 
This dough needs to sit overnight in the fridge, so plan ahead, but it's totally worth it. Out of the half dozen different recipes of piecrust I've made for my family, they've always voted this one as consistently the best. Other than that overnight stay, it's a very simple recipe and easy to work, especially if you have a food processor to help.

While the ingredients list is exactly the same, the steps to mix the piecrust are slightly different, as I've mixed in some of my own experience working with it. I highly recommend you use the weighed measurements instead as they will provide the most consistent ratios.
Picture
  • 130 grams (1/2 cup + 1 tbsp) warm water
  • 28 grams (2 tbsp) granulated sugar
  • 6 grams (1 tsp) fine salt
  • 312 grams (2.5 cups) all-purpose flour
  • 170 grams (3/4 cup) cold unsalted butter, cut into 1/4-inch cubes and frozen
  • 60 grams (1/4 cup) vegetable shortening, preferably in baking stick form, cut into 1/4-inch pieces, frozen​
  1. Keep some butter and shortening in the freezer as a ready supply whenever you wish to make piecrust. Otherwise, make sure you put some in the freezer far enough in advance of when you want to make the piecrust that the butter can freeze solid (the shortening won't freeze solid, but it should become very very cold).
  2. ​In a large bowl or cup, mix the sugar and salt with the water and stir until they have all melted into the water. Place the water mixture into the freezer; you will want it to be ice cold by the time you use it.
  3. Measure the flour out and also place this in the freezer.
  4. Measure out the required amounts of butter and shortening and cut them up. I don't usually bother going down as much as a 1/4-inch when using a food processor; usually 1/2-inch chunks or smaller are okay.
  5. Take the flour out of the freezer and pour it into the food processor's bowl. Add the butter to it. Turn on the processor for several seconds (don't pulse - if you do, you'll get flour flying everywhere with each pulse) and then stop it to check on the size of the butter pieces. You'll want them to be roughly pea-sized, so continue processing them if necessary.
  6. Add the shortening, then process. Because shortening is so much softer, it will take much less time to get them cut down to size. They should be mostly pea-sized also, but if you find just a few larger pieces, you can smoosh them between your fingers instead of over-processing.
  7. Pour everything into a large bowl. Take the water mixture out of the freezer and drizzle it over the dough. Using a plastic bowl/bench scraper, fold the mixture until the water is roughly mixed throughout, then switch to your hands. Working quickly so that the heat from your hands don't warm up the dough too much, lightly gather the clumps with your fingers and use your palm to fold over and press the dough into the bottom of the bowl a few times (don't knead it, just give it a few quick squishes) until the dough just starts to come together into one large mass. Divide into two equal discs of about 1-inch thickness (mine turn out to be roughly 320 grams each if you want something more precise than just eyeballing). 
  8. Double-wrap them in plastic wrap and then let them rest in the fridge for at least 8 hours. They can stay in the fridge for up to 3 days this way, or you can freeze them for up to a week. When taking them out of the freezer, let them defrost in the refrigerator overnight.
To prebake:
  1. Roll out the dough and pan and flute the piecrust. Chill it in the freezer until firm, 15-20 minutes.
  2. Preheat the oven to 375 F with a rack in the center. Prepare a square of parchment about 13" on each side. Set the pan on a baking sheat and set the square of parchment in the pie shell, gently smoothing it into place and pleating as needed to fit against the bottom and sides of the shell. The edges will project beyond the rim of the pan.
  3. Fill the shell to the top with dried beans or uncooked rice. Gently stir the beans around to ensure there are no air pockets down in bottom edges. Top up as needed so that the beans/rice are level with the top of the piecrust edges.
  4. Bake the shell for 25 minutes. Take the piecrust out and set on a cooling rack. Set a heat-proof mixing bowl nearby, and then carefully bringing together the points of the parchment, lifting the beans/rice out and transfering them to the mixing bowl.
  5. Using a fork, pierce the bottom of the piecrust a few times, then slide the piecrust back into the oven and bake for another 7 minutes for prebaked, or 10 minutes for fully prebaked. Cool on a wire rack.
0 Comments

Fresh Pumpkin (Puree)

10/19/2020

0 Comments

 
This might seem a weirdly simple item to have its own "recipe", but it's precisely because it's so simple that it deserves a call-out! It used to be that I depended solely upon canned pumpkin - which, don't get me wrong, there's nothing wrong with that. But, ever since I found out how easy it was to simply pop a fresh pumpkin into a pie or any other baked good looking for it, I couldn't resist buying up all those pie pumpkins in the supermarket whenever they came in season. (And they'll back you up if there's ever a repeat of the great canned pumpkin shortage of 2019!) Be aware that fresh pumpkin is also super moist - keep that in mind if your recipe is very sensitive to moisture content! I've so far not had any issues with just doing a straight ounce-for-ounce substitution of canned pumpkin (in fact, that extra moisture has been very welcome in some recipes) but forewarned is forearmed.
Picture
  • one or two pumpkins
    Note: Pie pumpkins are smaller and sweeter. You can usually fit two on a baking sheet and it wouldn't change the baking time. Larger pumpkins work just as well for a lot of baking projects, but you probably won't want to try and stuff more than one in the oven at a time.
  • Set the oven to 425 F. Punch a few slits or holes into the pumpkin(s) with a knife for venting while it cooks.
  • Line a baking sheet with foil and fold up the edges a little in case juices vent or leak from the pumpkin. Set the pumpkin in the middle of the foil and then bake in the oven for 1 hour. The pumpkin skin will look slightly burnt but is easy to peel, and the inside should be totally soft (you can test if you're uncertain by sticking a knife or skewer through the side - it should be VERY easy to poke through).
  • Take it the pumpkin out and let it cool. To help it cool more quickly, you can peel back the skin and quarter it with a spoon (be very careful, it will be very hot and as soon as you open it probably a lot of super-heated steam will puff out).
  • Once cooled, scoop out the seeds and guts, then throw the meat of the pumpkin into a food processor. Process for a few seconds, pause to mix it up a little with a spoon, then process again. After two or three rounds of this, it should have released enough moisture that you can just leave it on and it will start to circulate itself until all the bits have been pureed.
  • Scoop out and either use immediately, refrigerate, or freeze for later use. (Note: you can also let it drain a little first by dumping it into a collander and letting it sit for a few hours.)
0 Comments
    Picture

    Sweet Enough

    Part of the reason I started baking was because I like my goodies to be less obviously sweet - I want to taste the flavor, not just the sugar. So most of these recipes will have the sugar dialed down.

    This site also acts as my mobile recipe box, so instructions are often pared down to a minimum - very few frills but for some hints and suggestions!

    RSS Feed

    Categories

    All
    Alcohol
    Almond
    Apple
    Avocado
    Baklava
    Banana
    Bars
    Biscotti
    Blackberry
    Blueberry
    Bread
    Buttercream
    Cake
    Candy
    Carrot
    Cheese
    Cherry
    Chickpea
    Chinese
    Chocolate
    Cider
    Cobbler
    Coconut
    Coconut Milk
    Cookie
    Corn
    Cranberry
    Cream
    Cream Cheese
    Creme Brulee
    Crumb
    Crust
    Cupcake
    Custard
    Dates
    Decoration
    Dip
    Dough
    Doughnut
    Dumpling
    Easy Peasy
    Egg
    Filling
    Flowers
    Frosting
    Fruit
    Garnish
    Gelee
    Granola
    Green Tea
    Honey
    Ice Cream
    Icing
    Jam
    Lamb
    Lemon
    Lime
    Lobster
    Lotus Seed
    Macaron
    Mango
    Marshmallow
    Meringue
    Mochi
    Muffin
    Nectarine
    Nutella
    Nuts
    Oat
    Oats
    Onion
    Orange
    Pancake
    Panna Cotta
    Peach
    Peanut Butter
    Pear
    Pecan
    Phyllo
    Pie
    Pistachio
    Plum
    Popsicle
    Pound Cake
    Pumpkin
    Quiche
    Raspberry
    Red Bean
    Rhubarb
    Rice
    Ricotta Cheese
    Rugelach
    Sauce
    Savory
    Scone
    Sesame
    Shortbread
    Soup
    Sponge
    Sponge Cake
    Strawberry
    Streusel
    Tart
    Tofu
    Topping
    Torte
    Vegetable
    Vinaigrette
    Walnut
    Watermelon
    Yogurt
    Zucchini

    Archives

    November 2020
    October 2020
    July 2020
    May 2020
    April 2020
    March 2020
    October 2019
    December 2018
    October 2018
    August 2018
    April 2017
    July 2016
    May 2016
    March 2016
    February 2016
    January 2016
    December 2015
    November 2015
    October 2015
    September 2015
    July 2015
    June 2015
    May 2015
    April 2015
    February 2015
    January 2015
    November 2014

© 2019 Jacqueline Teng | DragonWarden