DragonWarden
  • Adventures
  • The Oven
  • The Un-Tea Party
  • Secret Ingredients
  • About

Lotus Seed Paste

11/28/2015

0 Comments

 
I browsed a good half dozen sites on how to make lotus seed paste and tried to adapt a balance between convenience and tastiness. As much as I would love to have "traditional" or "most flavorful", a complex recipe usually means it never gets made, and I like my lotus seed-flavor way too much to miss out on a chance of having it in homemade mooncakes.
Picture
  • 12 oz dried lotus seeds
  • for a softer paste: 1/4 cup neutral oil, such as vegetable or canola
  • for a stiffer paste (such as for mooncakes filling): 1/4 cup butter
  • 1/2 to 3/4 cups sugar
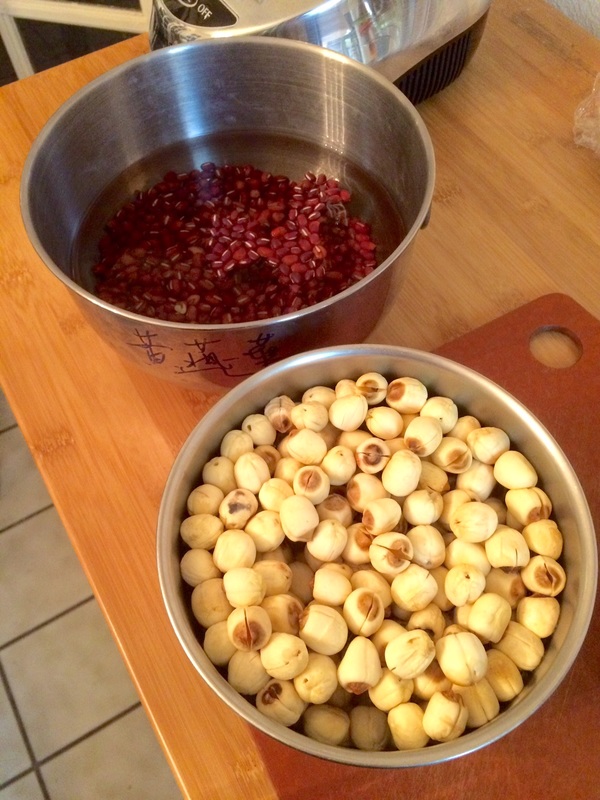
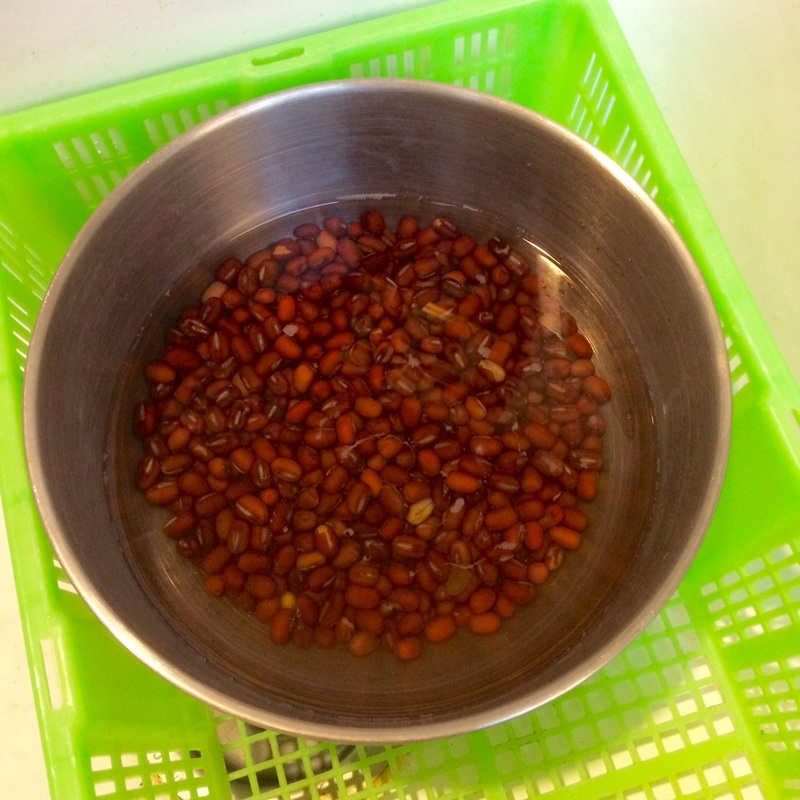
  1. Rinse lotus seeds and soak in a bowl of water until softened, at least 4 hours or overnight.
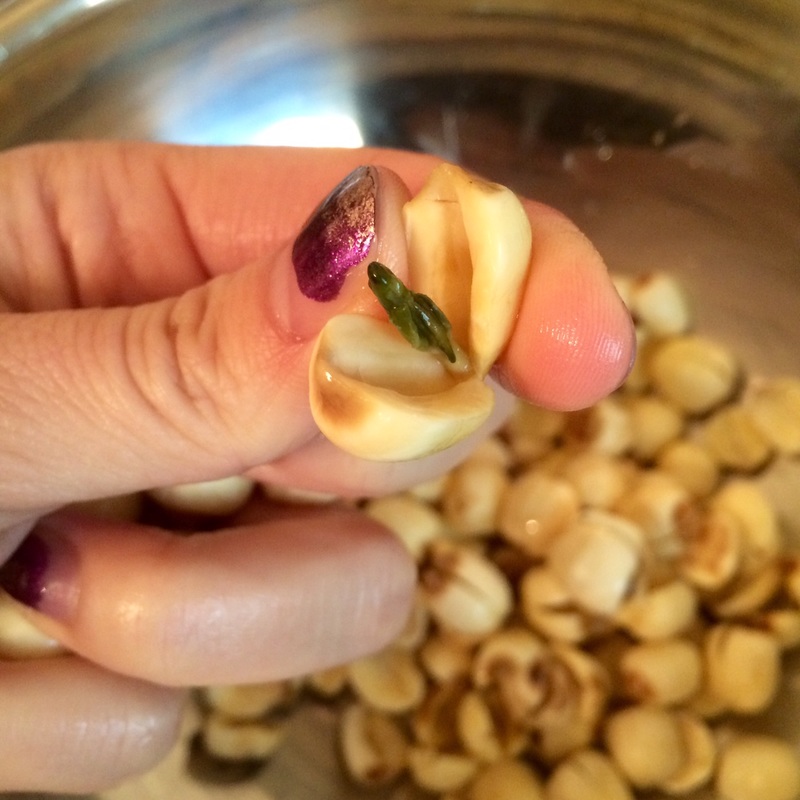
  2. Split each seed in half and remove the small bitter sprout/germ in the center. (Note: Some dried seed packets will have already done this for you - the ones I got had been pretty thorough. There had been only a handful of seeds in which I found the germ still inside. I went through all of the seeds for the sake of thoroughness, but it's not clear to me that the few that still remained would have made that much difference.)
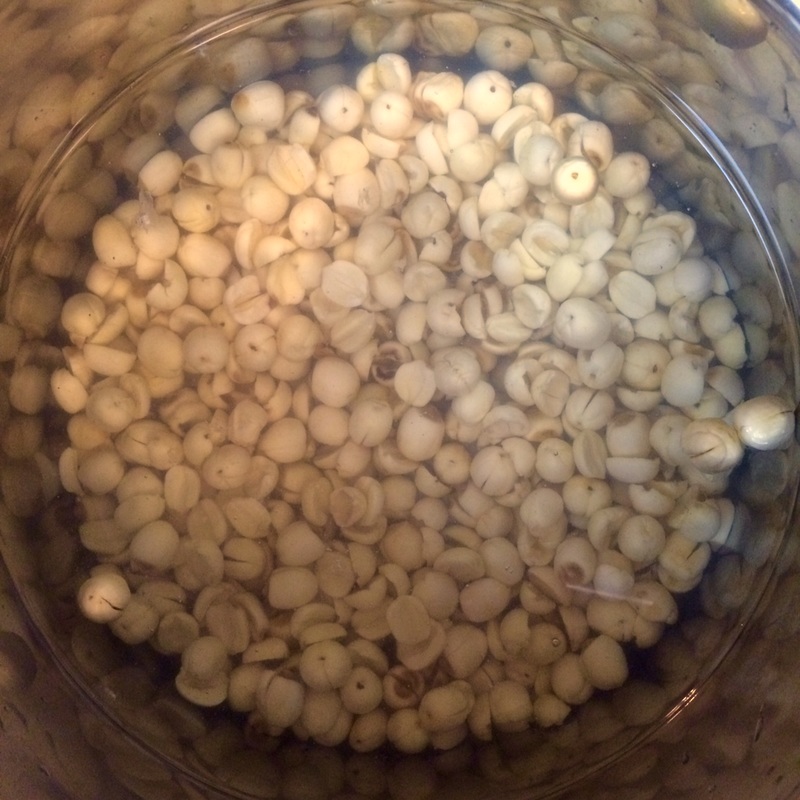
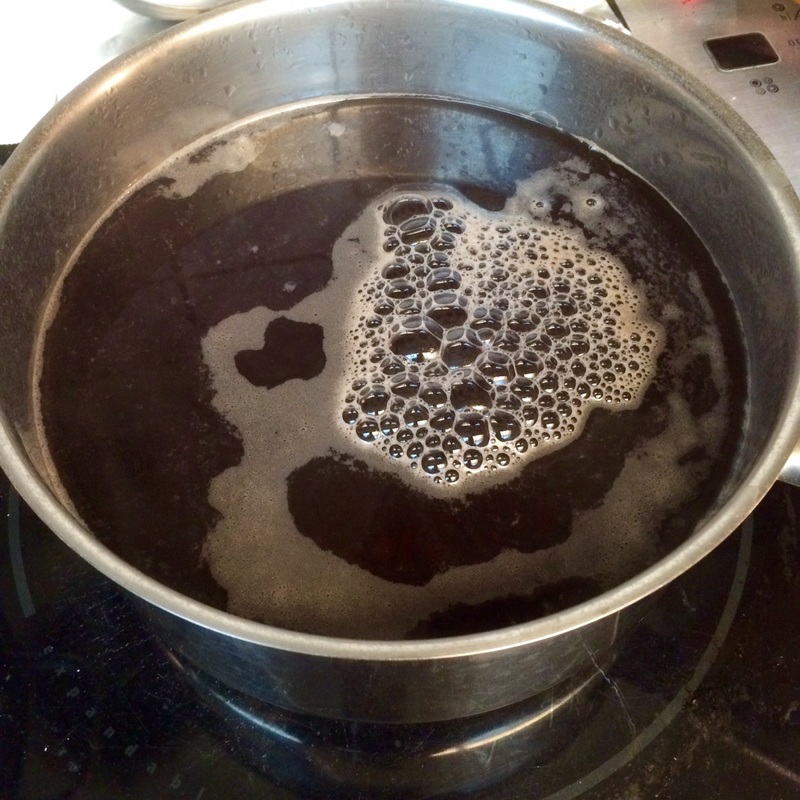
  3. In a large pot on the stove, cover lotus seeds completely with water and bring to a boil. Then lower heat to a simmer until tender, adding water if necessary to keep seeds covered (about 1.5 hours).
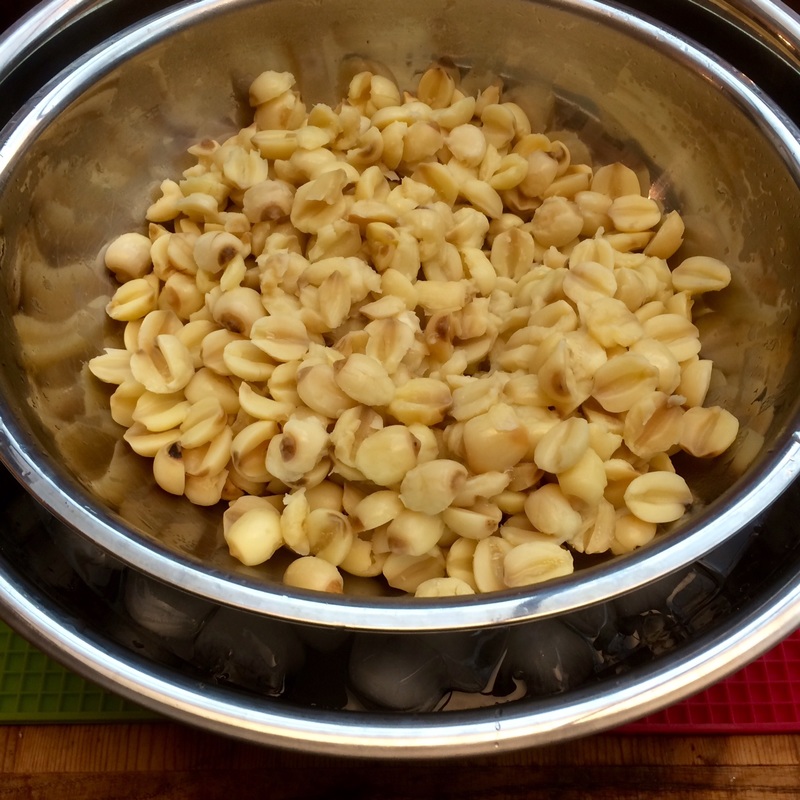
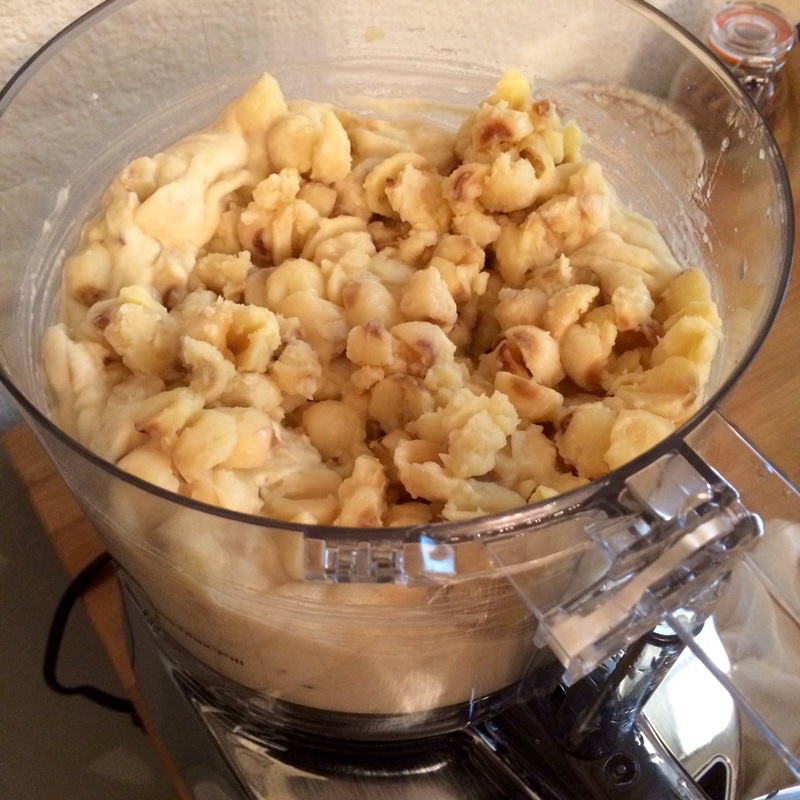
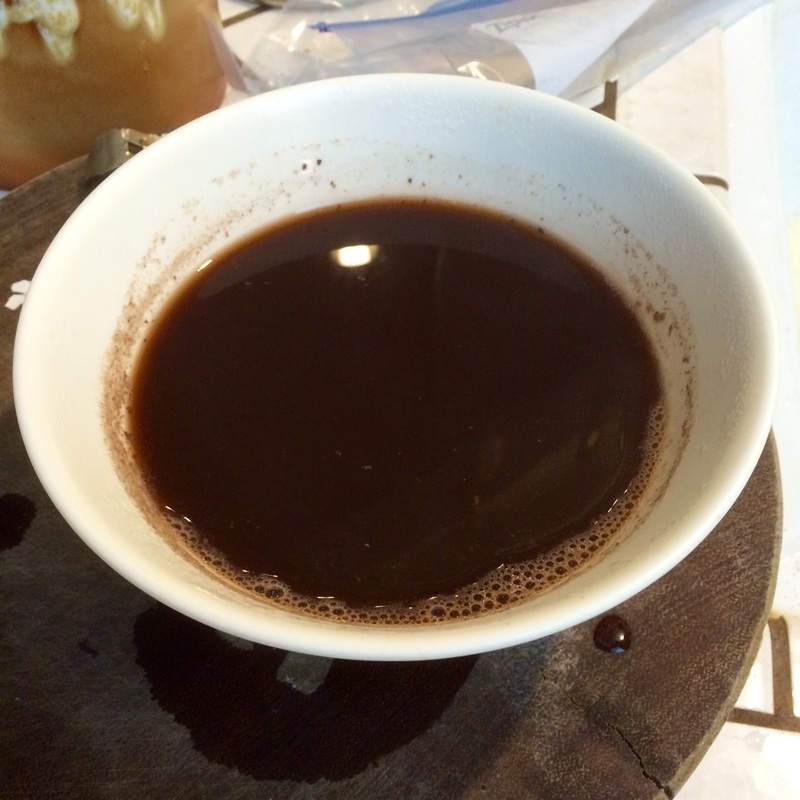
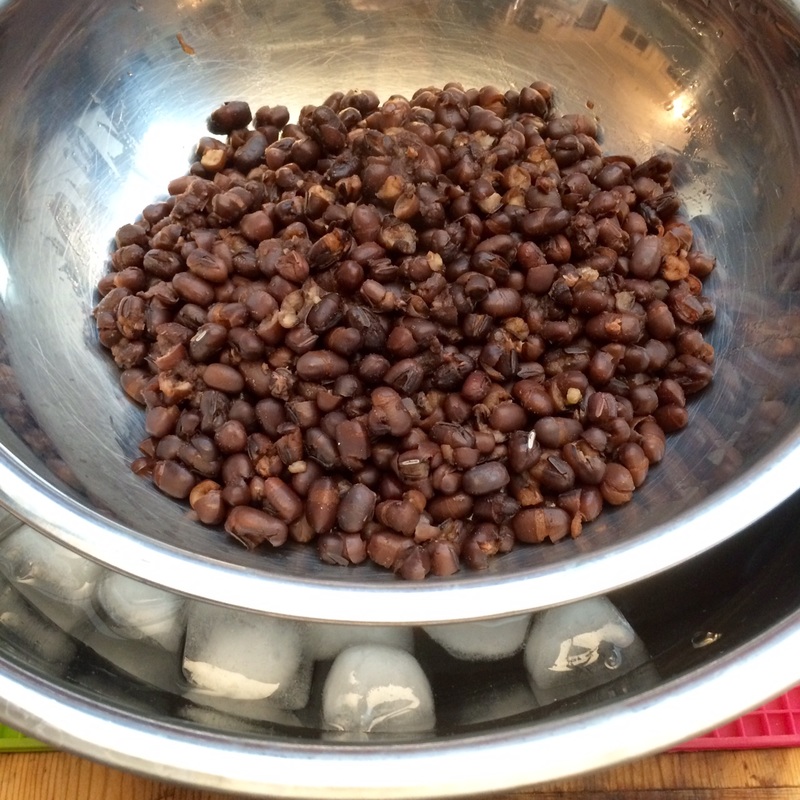
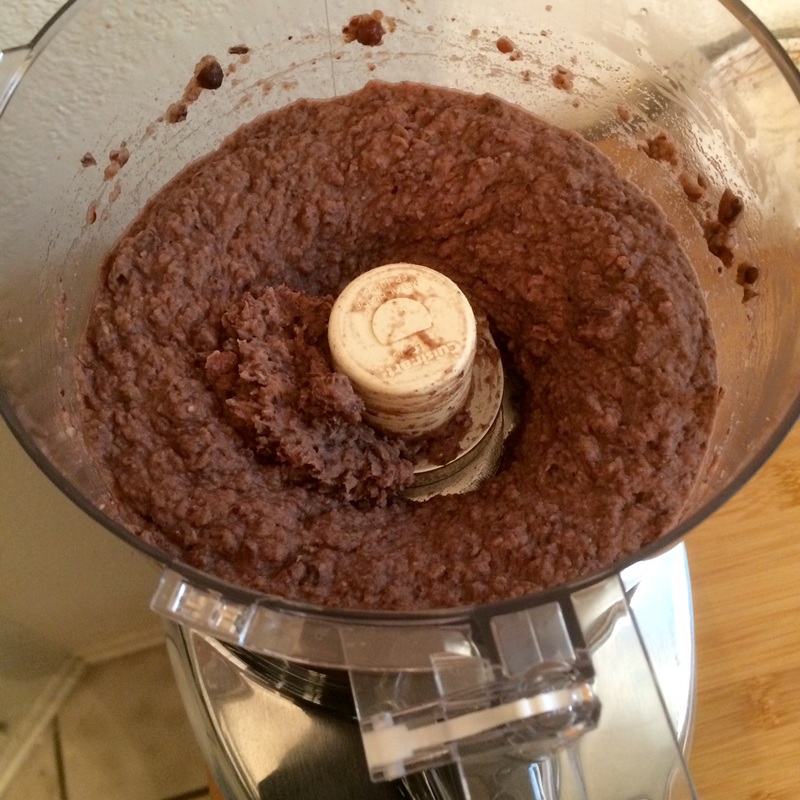
  4. Reserve 1 cup of the lotus-seed cooking water. Drain the seeds and set aside to cool (if you wish to speed up the process, put the pot they're in into an ice bath). Transfer seeds to a food processor or blender. Process to a smooth paste (adding a splash of the reserved lotus-seed cooking water when necessary). Optionally, for a finer texture, press the paste through a fine sieve.
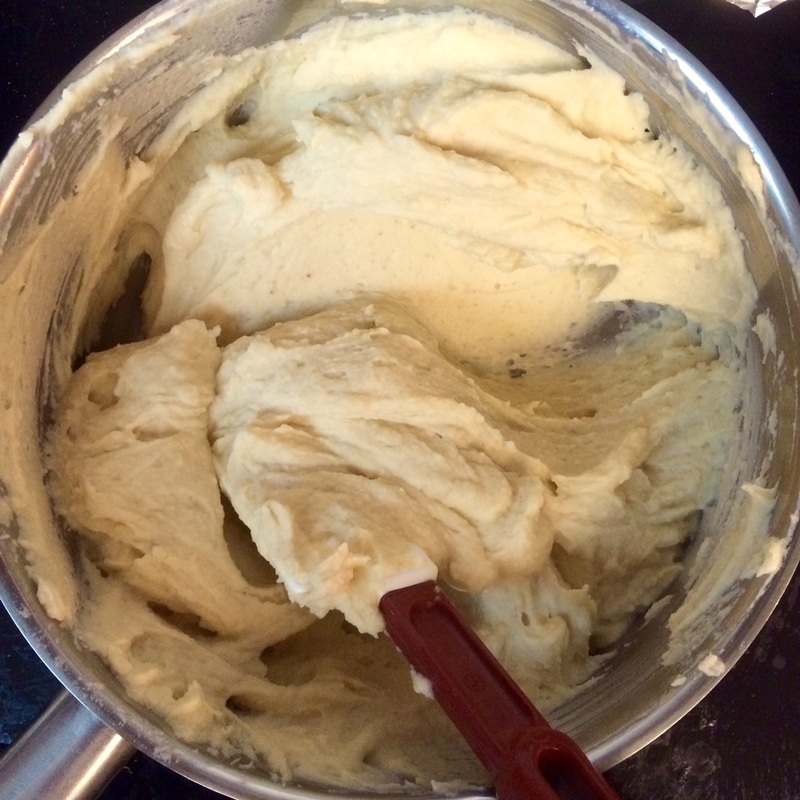
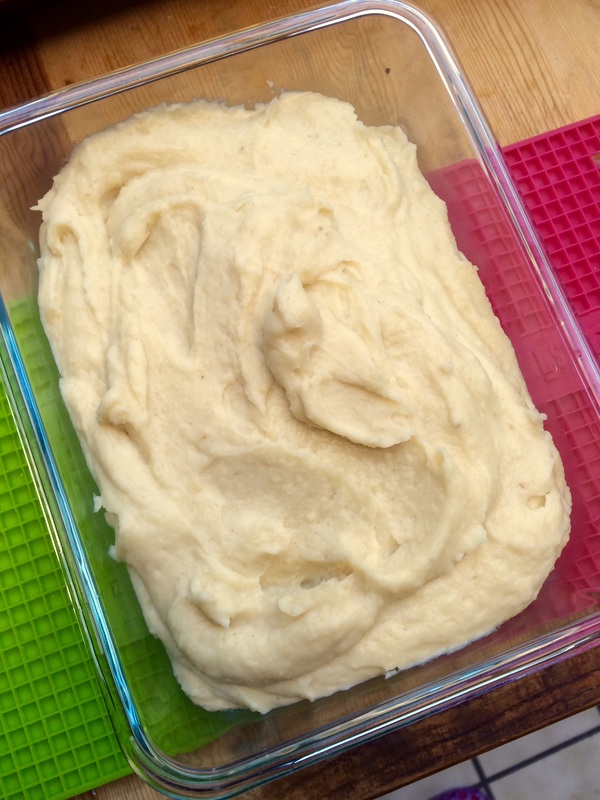
  5. In a non-stick pan, combine lotus-seed paste and oil and cook over medium heat, stirring constantly until oil is incorporated. Add the 1/2 cup of sugar and stir until incorporated. Taste, and add more sugar if you wish, one tablespoon at a time. Remove from heat and set aside to cool.
Note: For using in mooncakes, the paste has to be dry enough that it can more or less retain its shape when it is cooled, or else it will become a mess when you try to mold the cake around it. Continue to stir and let the heat dry out the paste for an additional five minutes on the stove. Also, I find that the paste should be made slightly sweeter than I prefer in order to compensate for the neutral flavor of the cake portion.
0 Comments

Red Bean Paste

11/28/2015

0 Comments

 
I ran across this while looking up how to make moon cakes - one of my favorite Chinese traditional desserts - from the site China Sichuan Food. I had to read quite a bit between the lines on some instructions, and making it the first time was definitely an experiment, but it was all worth it. Not only do I get to tailor exactly how sweet my red bean fillings should be (the original recipe called for 2 cups - way too much for my taste!) but the leftover red bean "soup" can then be lightly sweetened and drunk as a separate dessert soup. Win-win!
Picture
  • 8 oz dried red beans
  • 1 cup sugar
  • 1 tbsp butter, lard, or vegetable oil
  • pinch of salt
  • (optional) 1/2 tsp vanilla
  1. Wash the red beans and soak in water for at least 8 hours.
  2. Rinse, then boil them with fresh water (make sure the water level remains above the beans) in a pot or a high-pressure cooker until they are soft (about 1.5 hours for a pot, 40 minutes for a high-pressure cooker).
  3. Pour out the water and reserve for a red bean dessert soup. Set the beans aside to cool (or if you want to speed things along, put the pot in an ice bath). Once the beans have cooled, you can optionally filter out the skins if you wish by pushing the beans through a sieve. Blend everything in a food processor.
  4. Transfer the resulting paste to a saucepan and add the sugar, butter, and salt. Cook at a simmer while continuously stirring the paste, until any excess water has been cooked off. Let the paste cool before using.
Note: The original recipe called for 2 tbsp of fat/oil, but I found the resultant paste too soft to use easily for a mooncake recipe. However, if you wish for a softer consistency, such as in a red bean bun, then you should use the original 2 tbsp.
0 Comments

Post-Thanksgiving Scraps Turkey Shepherd's Pie

11/27/2015

 
This is the Frankenstein of all frankenstein mash-ups, and was born literally out of the seemingly incompatible states of being both restless and lazy at the same time. This took up the last of the Thanksgiving scraps, and though it initially was supposed to include marinara sauce and some crescent roll sheets on top, when I discovered the marinara sauce had gone bad, it was an abrupt appeal to some garlic herb butter and an egg to make it a sort of reverse shepherd's pie instead of the original pizza pot pie I had imagined. And it turned out AMAZING.

Yes, I did not include a whole lot of concrete portions, but that's the beauty of using leftovers. Everything's already been cooked and don't really need extra fussing with, and you're totally free to put more or less of anything according to taste (or what you want to get rid of).
Picture
However-many-ramekins-you-have's worth of:
  • stuffing
  • turkey
  • garlic herb butter, stock, or gravy (for moisture)
To cover (can use any one of these):
  • eggs and shredded cheese
  • crescent roll sheets
  • puff pastry
  1. Set the wire rack to the middle of the oven. Set oven temp to pre-heat to 425 F.
  2. I lined a baking sheet in case there were drippings, set the ramekins on top, then started layering the food in. You can put them in any order you want. For the cover, you can either crescent roll sheets, puff pastry, or like in this instance, an egg and some cheese. Tip - make a little well in the middle of the top layer so that the egg yolk has somewhere to sit once you've cracked it in. Otherwise, the egg white makes it slippery enough that the yolk tends to slide off toward the edges.
  3. Pop everything in the oven for about 12 minutes (which keeps the yolk runny - if you want a more solid yolk, add a few more minutes). If you'd like a nice bit of browning on top, switch the oven to broil for one minute - keep an eye on it, though, because it will burn easily at this point!

French Onion Dip

11/22/2015

0 Comments

 
I first got the serving idea on one of the food sites (I forget which one, maybe Epicurious), but cobbled together the dip recipe from research spread over half a dozen other sites. In fact, I was so casual with throwing in a bit of this, a dash of that, and adjusting things to taste that I honestly don't know if the ingredient amounts below are anywhere close to accurate. But I think that pretty much exemplifies dip recipes - pretty much anything goes, and you can experiment and never make it the same way twice, but it will all be delicious; just in different ways.
Picture
  • 2 tbsp butter
  • 4 onions (for variety, you can use multiple types - sweet, yellow, red, etc)
  • 2-3 large shallots
  • 4 cloves garlic
  • 1 1/2 cups sour cream
  • 3/4 cup mayonnaise
  • 1 tsp salt
  • 1 tsp celery salt
  • 1/2 tsp garlic powder
  • chips
  • (optional) paprika
  • (optional) chopped green onions

  1. Set the oven to 350 F. Cut the bottoms off the onions so that they can stand up. Set on a baking sheet and bake for 1 hour. In the meantime, chop up the shallots and mince the garlic.
  2. Slice the tops off the onions and scoop out the interior, leaving about 2-3 layers on the outside to act as a cup. Chop up the onion interiors and set aside.
  3. Melt the butter in saucepan on the stove over medium heat and cook the shallots for about 3-5 minutes. Add the garlic and cook for an additional 2 minutes. If you wish you can add the chopped up onion and continue to caramelize it in the saucepan for a few more minutes.
  4. Set the onion mixture aside to cool (or else it will melt the sour cream). To speed up the process, you can either refrigerate or spread it on the inside of a metal bowl and set it inside another bowl filled with iced water.
  5. Mix in the sour cream and mayonnaise, then add the remaining spices to taste. Stuff inside the onion cups. Add optional garnishes.
Note: You can make this a day ahead, and in theory, it's better if you let the flavors blend overnight anyway. Store the onion cups and the onion dip separately in the fridge, and make sure they are sealed tight against fridge odors creeping in.
0 Comments

Slow-Cooker Turkey Breast with Stuffing

11/21/2015

0 Comments

 
My family has traditionally not had much turkey during Thanksgiving, because the one or two times that we attempted to make our own bird had ended in hilariously disastrous results through various shenanigans that had nothing to do with the recipe or the ability to follow it. However, I was throwing a pre-Thanksgiving Friendsgiving potluck for which I vaguely didn't want to make solely dessert dishes for, and in the eleventh hour, this landed in my inbox from MyRecipes.com. So I thought I'd give it a try, because in theory, the slow cooker should trap most of the moisture in with far less danger of over-cooking. And lo and behold, it passed even my father's notoriously high bar for turkey!
Picture
  • 1 (6-oz.) package buttermilk cornbread mix
  • 1 (2 1/2-lb.) bone-in, skin-on turkey breast
  • 1 teaspoon salt
  • 1/4 teaspoon pepper
  • 1/4 cup butter
  • 1/2 cup chopped onion
  • 1/2 cup chopped celery
  • 1/4 cup chopped fresh parsley
  • 1 1/2 teaspoons poultry seasoning
  • 1 1/2 cups herb-seasoned stuffing mix
  • 2 large eggs, lightly beaten
  • 1 (14-oz.) can low-sodium chicken broth
  1. Make the cornbread according to package directions; let cool completely (about 30 minutes). Coarsely crumble cornbread (about 3 cups).
  2. Rinse turkey and pat dry. Sprinkle with salt and pepper.
  3. Melt butter in a large skillet over medium heat; add turkey to skillet, skin side down, and cook 3 to 4 minutes or until browned. Remove from skillet. Add onion and next 3 ingredients to skillet, and saute 3 to 5 minutes or until tender.
  4. Stir together onion mixture, stuffing mix, eggs, low-sodium chicken broth, and crumbled cornbread in a large bowl.
  5. Place stuffing mixture in a lightly greased 6-qt. slow cooker. Top with turkey, skin side up. Cover and cook on LOW 4 hours or until a meat thermometer inserted into thickest portion registers 170° and stuffing registers 165°. Remove turkey from slow cooker, and let stand 15 minutes before serving.
Note: Not all slow cookers are created equal. Some, you may need to set on HIGH instead of low for it to really have a chance of cooking through the thickest part of the meat. Also, if you make a double-quantity like I did, be prepared to add a few extra hours!​
0 Comments

Pecan Pie / Tart

11/21/2015

 
My brother adores pecan pie, but they almost unilaterally call for corn syrup in their recipes, which is just ... bleh. This is one of the rare ones that does not ask for corn syrup - and from the way he devoured it on his birthday (in place of a cake), I'd say it did quite well without it. 

(Though this is usually done in a pie crust, I have also substituted the pine nut tart crust for the usual pie crust. One note is that you can't just cook the tart crust first as usual; it may burn if you just put it into the oven with the rest of the filling for 30 minutes. I took the halfway road and cooked the crust for 10 minutes at 350 F, poured the filling in, covered the edges with foil, and then popped it back into the oven to finish.)
Picture
  • 1 9" pie crust
  • 1 egg wash (1 egg + 1 tsp water)
  • 2 eggs
  • 1/2 cup melted butter
  • 1 cup light brown sugar
  • 1/4 cup white sugar
  • ​1 tablespoon all-purpose flour
  • 1 tablespoon milk
  • 1 teaspoon vanilla extract
  • 1 cup chopped pecans

  1. Preheat oven to 425 degrees F.​ To prevent the filling from making the bottom crust a soggy mess, I like to blind bake the pie crust partway and help seal the bottom with an egg wash. Line the bottom and sides of the crust with foil or parchment paper and fill with pie weights or dried beans - make sure to not only cover all over the bottom but up the sides also. Bake for 12 minutes. Remove the pie weights and lining, brush egg wash all over crust, put a heat shield on the edges of the crust, then return to the oven for another 3 minutes. Remove and set aside while you make the filling.
  2. In a large bowl, beat eggs until foamy, and slowly stir in melted butter. Stir in the brown sugar, white sugar and the flour; mix well. Last add the milk, vanilla and nuts.
  3. Pour into the pie shell. Bake in preheated oven for 10 minutes. (Depending on your oven, the nuts on top might get a little burnt-looking. You may wish to cover the entire pie with foil instead of just the crust edges as a heat shield at this time. Make sure you make slits in the top of the foil to allow steam to vent.) Then reduce temperature to 350 degrees and bake for 35 - 40 minutes. Let pie cool completely before serving.
    Picture

    Sweet Enough

    Part of the reason I started baking was because I like my goodies to be less obviously sweet - I want to taste the flavor, not just the sugar. So most of these recipes will have the sugar dialed down.

    This site also acts as my mobile recipe box, so instructions are often pared down to a minimum - very few frills but for some hints and suggestions!

    RSS Feed

    Categories

    All
    Alcohol
    Almond
    Apple
    Avocado
    Baklava
    Banana
    Bars
    Biscotti
    Blackberry
    Blueberry
    Bread
    Buttercream
    Cake
    Candy
    Carrot
    Cheese
    Cherry
    Chicken
    Chickpea
    Chinese
    Chocolate
    Cider
    Cobbler
    Coconut
    Coconut Milk
    Cookie
    Corn
    Cranberry
    Cream
    Cream Cheese
    Creme Brulee
    Crumb
    Crust
    Cupcake
    Custard
    Dates
    Decoration
    Dip
    Dough
    Doughnut
    Dumpling
    Easy Peasy
    Egg
    Filling
    Flowers
    Frosting
    Fruit
    Garnish
    Gelee
    Granola
    Green Tea
    Honey
    Ice Cream
    Icing
    Jam
    Lamb
    Lemon
    Lime
    Lobster
    Lotus Seed
    Macaron
    Mango
    Marshmallow
    Meringue
    Mochi
    Muffin
    Nectarine
    Nutella
    Nuts
    Oat
    Oats
    Onion
    Orange
    Pancake
    Panna Cotta
    Peach
    Peanut Butter
    Pear
    Pecan
    Phyllo
    Pie
    Pistachio
    Plum
    Popsicle
    Pound Cake
    Pumpkin
    Quiche
    Raspberry
    Red Bean
    Rhubarb
    Rice
    Ricotta Cheese
    Rugelach
    Sauce
    Savory
    Scone
    Sesame
    Shortbread
    Soup
    Sponge
    Sponge Cake
    Strawberry
    Streusel
    Tahini
    Tart
    Tofu
    Topping
    Torte
    Vegetable
    Vinaigrette
    Walnut
    Watermelon
    Yogurt
    Zucchini

    Archives

    September 2021
    March 2021
    February 2021
    December 2020
    November 2020
    October 2020
    July 2020
    May 2020
    April 2020
    March 2020
    October 2019
    December 2018
    October 2018
    August 2018
    April 2017
    July 2016
    May 2016
    March 2016
    February 2016
    January 2016
    December 2015
    November 2015
    October 2015
    September 2015
    July 2015
    June 2015
    May 2015
    April 2015
    February 2015
    January 2015
    November 2014

© 2019 Jacqueline Teng | DragonWarden