DragonWarden
  • Adventures
  • The Oven
  • The Un-Tea Party
  • Secret Ingredients
  • About

Avgolemono Soup (Greek Lemon Chicken soup)

3/21/2021

0 Comments

 
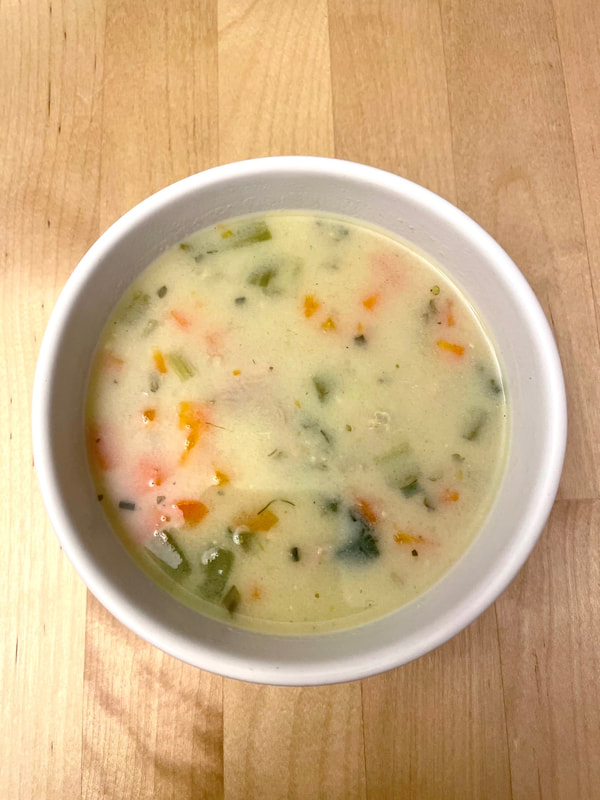
I've only been vaguely aware of a staple lemon soup in Greek cuisine but it turns out it's my boyfriend's favorite comfort food. One day his stomach wasn't feeling that great, so I tried my hand at making it using this recipe - and now it's one of my favorites too! I frequently make a big pot of it and then freeze it into blocks for anytime I need a quick something in my stomach. Since I need a high protein/fat-to-carb ratio, I also tend to load up the chicken end of the ingredients list, but really, just like any soup you can feel free to throw in or take out whatever you want in this, just keep the lemon and egg-to-liquid ratio about the same. 
Picture
  • Extra Virgin Olive Oil
  • ½ to 1 cup finely chopped carrots
  • ½ to 1 cup finely chopped celery
  • ½ to 1 cup finely chopped green onions
  • 2 garlic cloves, finely chopped
  • 8 cups low-sodium chicken broth
  • 2 bay leaves
  • 1 cup rice
  • Salt and pepper
  • Either cooked boneless, skinless chicken pieces (a store-bought rotisserie chicken shredded works) or un-cooked, skinless chicken cut into bite-sized pieces - 6-8 oz if having soup as appetizer, can be up to 30 oz if you want to have it as a meal
  • ½ cup freshly-squeezed lemon juice
  • 2 large eggs
  • Fresh parsley for garnish (optional)
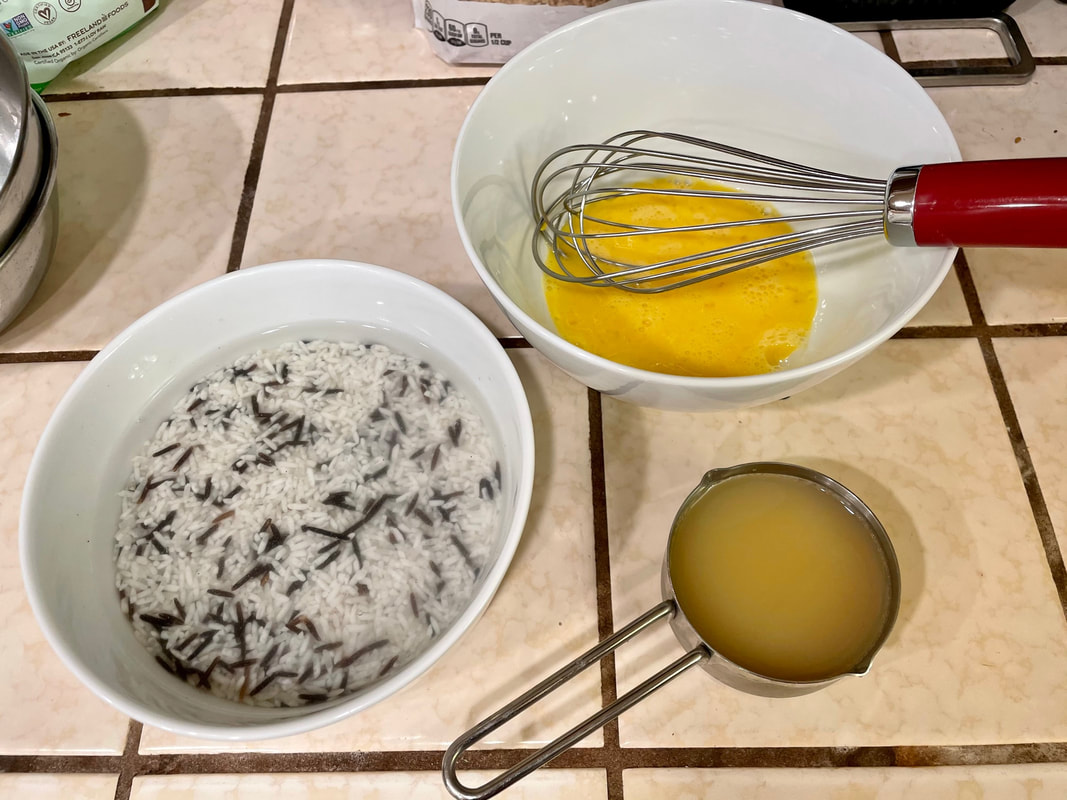
  1. In a large Dutch oven or heavy pot, heat 1 tbsp olive oil on medium-high. Add the carrots, celery and green onions, toss together to saute briefly then stir in the garlic. Add the chicken broth and bay leaves to the pot then raise the heat to high.
  2. Rinse the rice thoroughly and leave to soak in water for about 15 minutes.
  3. Once the broth has come to a rolling boil, add the rice, salt and pepper. If you're using raw chicken, put the chicken pieces in as well. Turn the heat to medium-low and simmer for 20 minutes or until the rice is tender. If you're using cooked chicken, stir in the cooked chicken now.
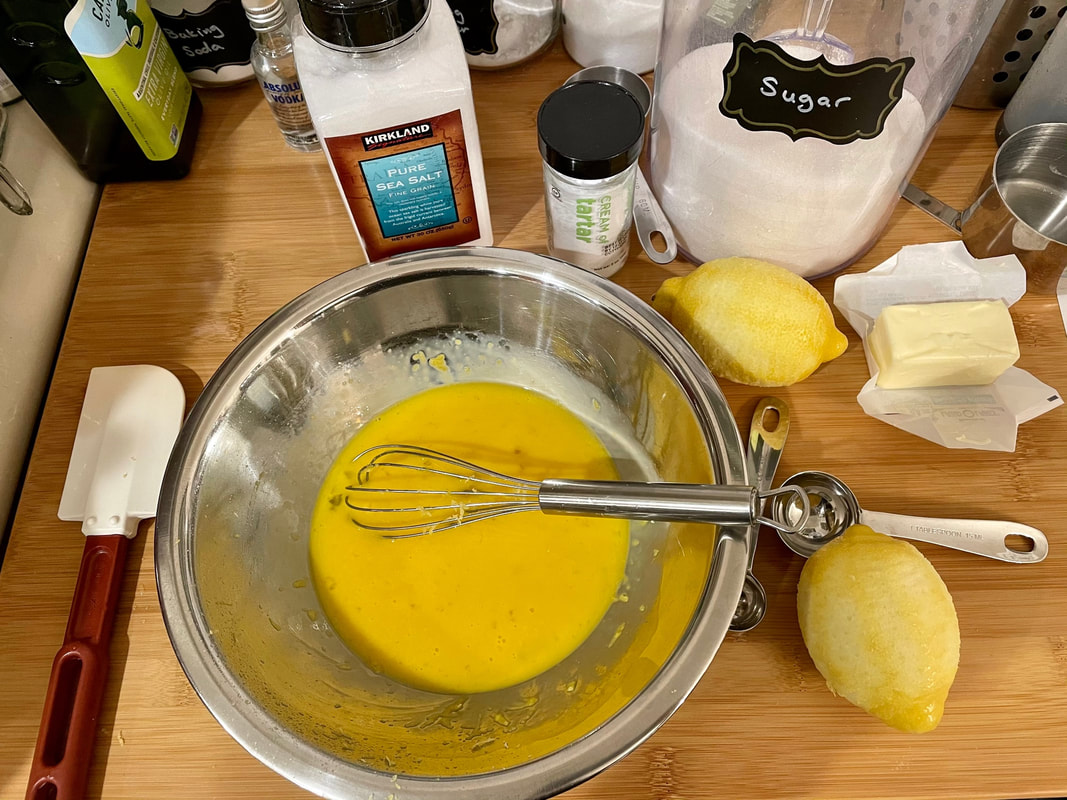
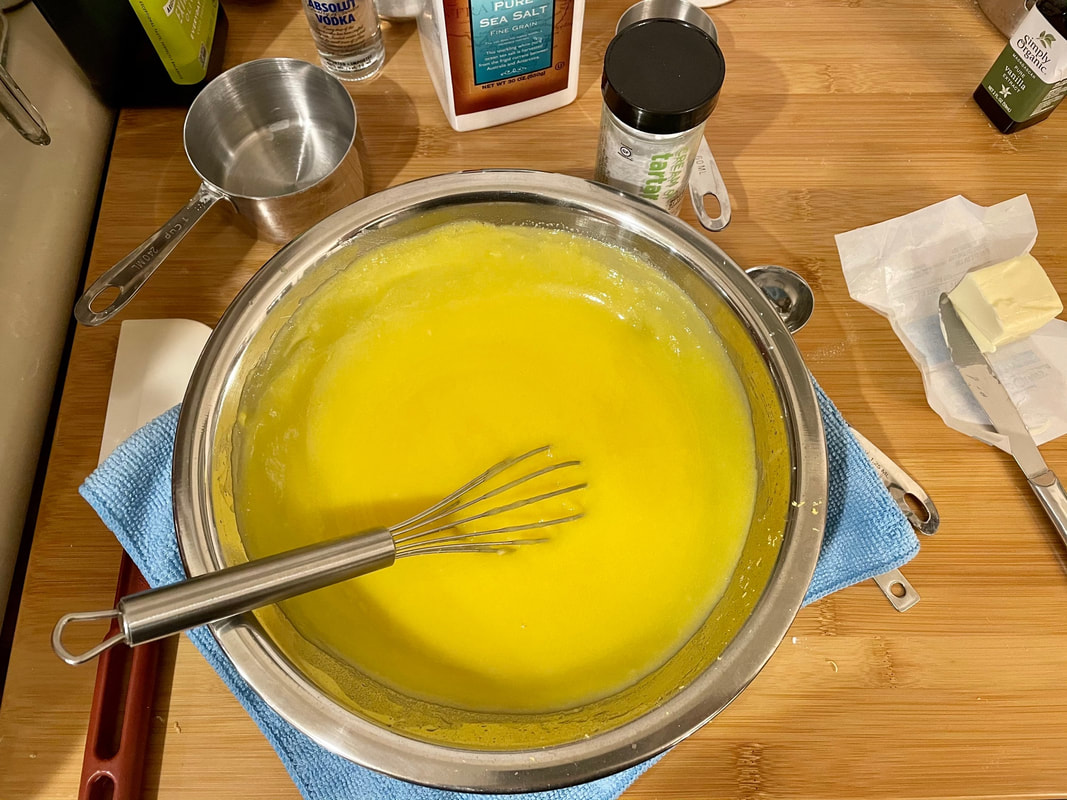
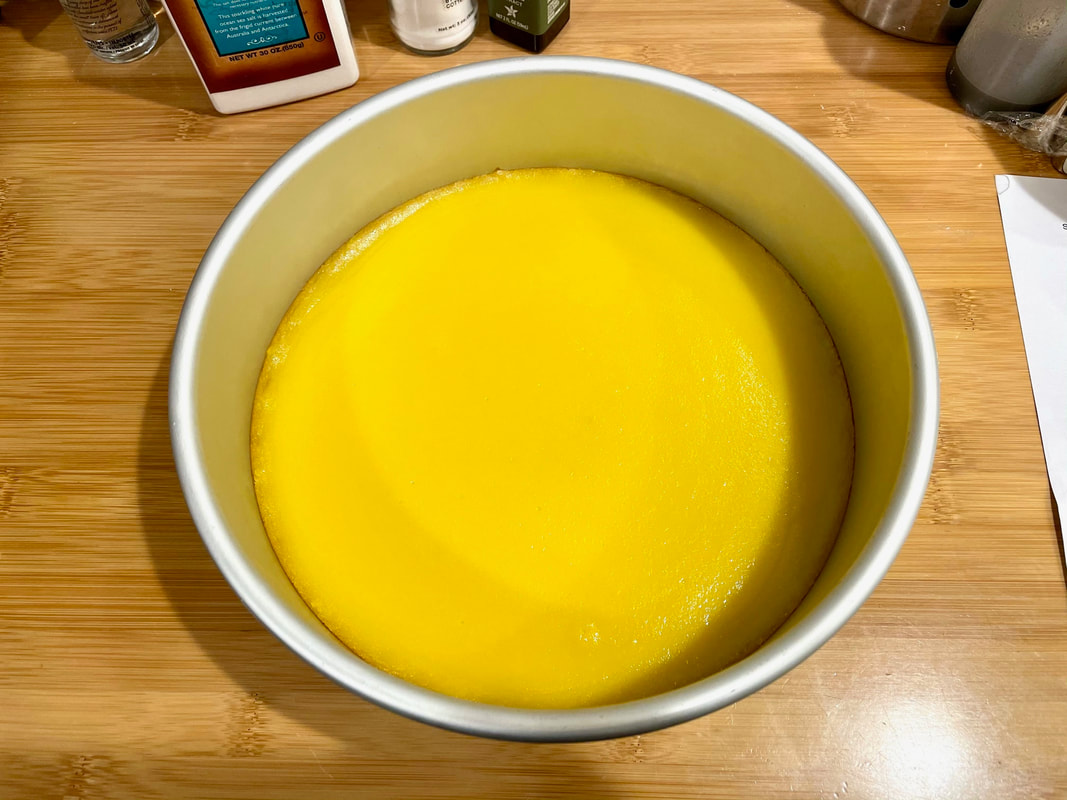
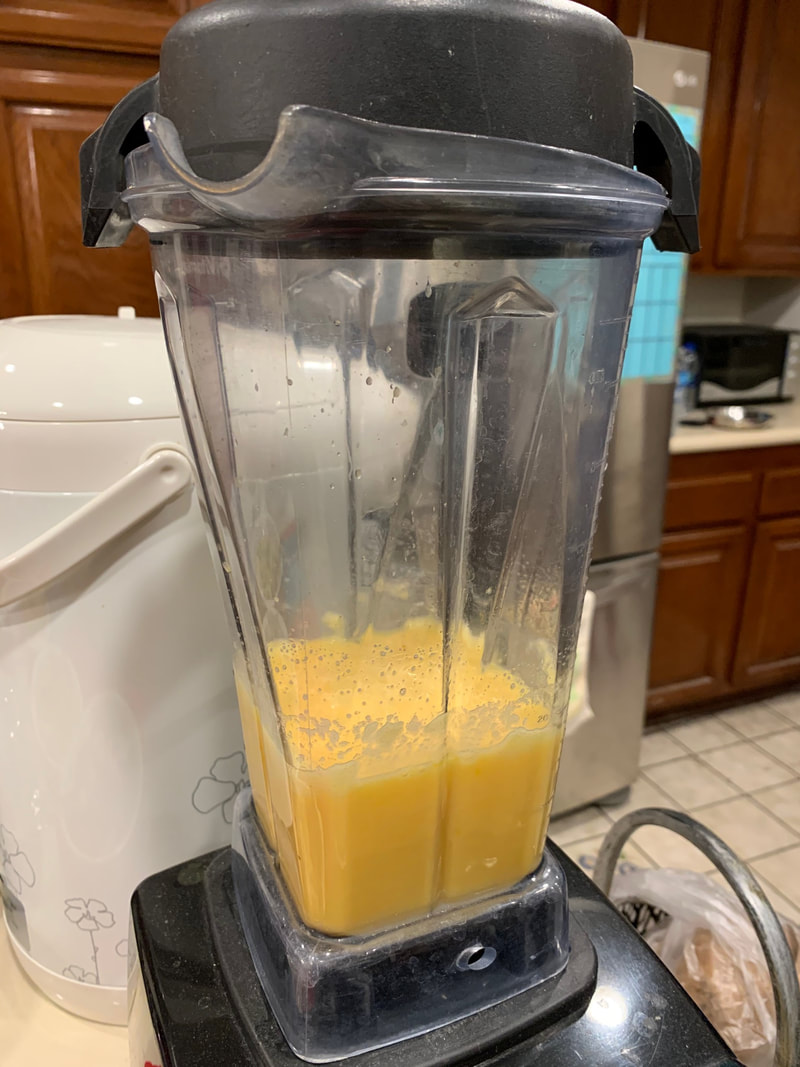
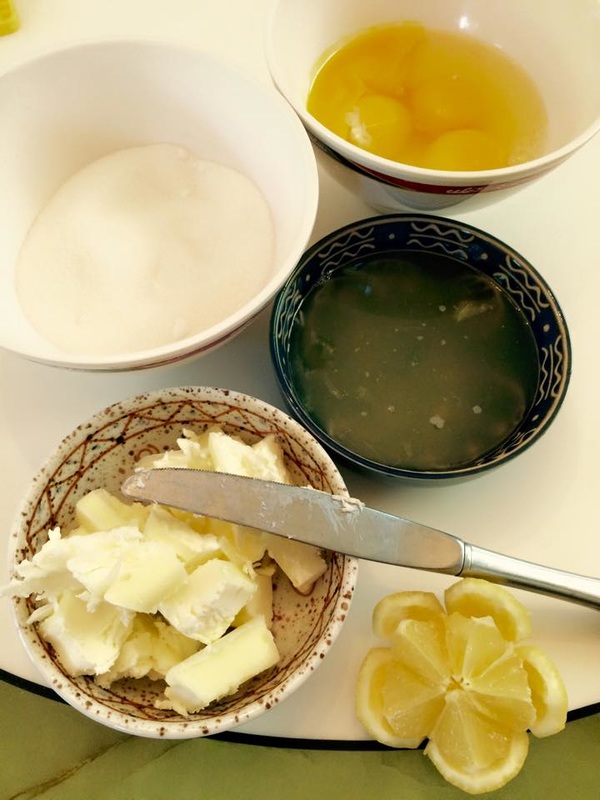
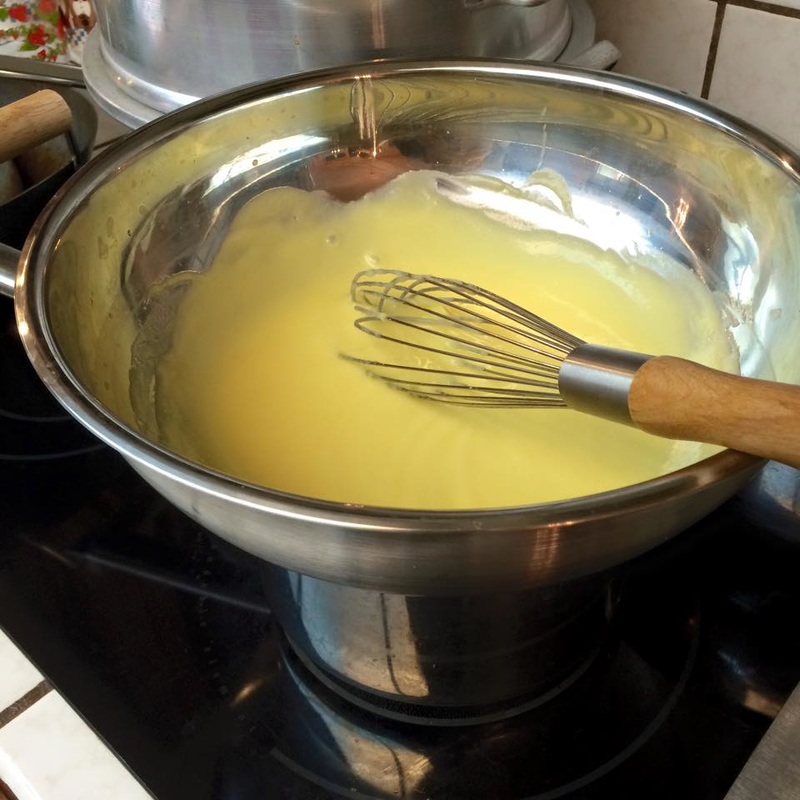
  4. To prepare the egg-lemon sauce, in a medium bowl, whisk together the lemon juice and eggs. While whisking, add 2 ladles-full of the broth from the cooking pot to temper the eggs. Once fully combined, add the sauce to the chicken soup and stir. Remove from the heat immediately.
  5. Garnish with fresh parsley, if you like. 
0 Comments

Lemon Bars

11/27/2020

0 Comments

 
This started out as an experiment as I had read a Cook's Illustrated article on how to make an intensely lemon-y lemon bar without the fillers starting to get in the way. It's a tough balance between the liquid - the lemon juice - and the dry ingredients - the flour - because you can't really increase one without increasing the other. Adding more lemon means it becomes a runny mess unless you add more flour, but adding more flour simply cuts into the lemony taste.

Unfortunately, I've since lost the link to the Cook's Illustrated article, but it talked about a secret ingredient - cream of tartar. And from its detailed descriptions, I worked backwards from a standard lemon bar recipe and reconstructed the following for a crisp, crunchy shortbread topped with a truly lemony curd.
Picture
  • one portion of shortbread crust
  • ⅔ cup lemon juice (about 3-4 lemons)
  • 3 eggs + 3 egg yolks
  • 1 cup sugar
  • ¼ tsp salt
  • 2 tsp cream of tartar
  • 2 tsp zest
  • 2 tbsp flour
  • 4 tbsp butter, cut into four 1 tbsp chunks
  1. Make one portion of the shortbread crust.
  2. While the shortbread is cooling, combine all filling ingredients except the butter in a double boiler over medium heat. Continuously whisk while the double boiler is simmering, until the mixture has thickened to about a custard consistency, with faint trails left behind by the whisk.
  3. Remove the mixture from the heat and whisk in the butter one tbsp at a time, mixing until all the butter has been incorporated. Strain through a sieve into a clean bowl.
  4. Pour over the shortbread crust in about a ½” thick layer and return to the oven for about 10 minutes. The filling should have only the slightest wobble to it when you shake it.
  5. Let cool completely, remove from pan, then cut into rectangular pieces.
0 Comments

Shortbread Lemon Tart Recipe

3/26/2020

0 Comments

 
Beautifully lemony, I found this recipe here. Even better, it achieves the easy-peasy rating because you literally throw all the ingredients into a blender and a food processor and you're done! Per usual, I've adjusted the sugar levels a bit - not only do I usually apportion only 1 cup of sugar for something cake-sized these days, but I felt it really lets the brightness of the lemon shine through. 
Picture
Lemon Filling:
  • 4 large eggs
  • 1/3 cup fresh lemon juice
  • 1 cup granulated sugar
  • 1 tablespoon lemon zest
  • 1 tablespoon orange zest
  • 1/3 cup butter, melted
  • powdered sugar, for topping
Shortbread Crust:
  • 2 cups all-purpose flour
  • 1/2 cup powdered sugar
  • 3/4 cup cold butter, cut into cubes
  1. Preheat the oven to 350ºF.
  2. In a blender, combine the eggs, lemon juice, granulated sugar, lemon zest and orange zest.  Process on high until smooth.  Add the butter, replace the cover, and blend again on high until smooth.  Set aside.
  3. In a food processor, combine the flour and powdered sugar.  Pulse a few times to combine.  Add the butter and continue to pulse until the mixture looks sandy and the butter is fully incorporated into the flour and sugar.
  4. Place an 11-inch tart pan on a baking sheet.  Pour the crust mixture into the pan.  Press the mixture firmly and evenly into the bottom and up the sides of the pan. (You can use the bottom of a cup to help press the crust more evenly on the bottom of the pan.)
  5. Pour the filing into the crust, then transfer the tart into the oven.  Bake until the center is almost set, 30-35 minutes. 
  6. Cool the tart completely.  When ready to serve, sprinkle powdered sugar over the top and cut into slices.
0 Comments

Lemon Ricotta Cake

3/26/2020

0 Comments

 
Originally from this page, this is a remarkable cake where it's neutral enough to go with just about any flavor (both sweet OR savory, to my surprise!) while still having enough character to be consumed on its own. One of my friends dumped gravy and cheese dip all over it and said it was just as good as with the macerated strawberries! I personally liked it just by itself or with a bit of strawberries, and another friend simply consumed it with some of the homemade whipped cream. Along with its simple, no-fuss recipe, this makes a fantastic staple to come back to over and over again.
Picture
Ingredients
  • 1_1/3 cups (188g) all-purpose flour (scoop and level to measure)
  • 2 tsp baking powder
  • 1/4 tsp salt
  • 1 cup (200g) granulated sugar
  • 1/2 cup (113g) unsalted butter, softened
  • 2_1/2 Tbsp lemon zest
  • 3 large eggs
  • 1 tsp vanilla extract
  • 1_1/2 cups (356g) whole milk ricotta cheese
Topping
  • 1 lb. fresh strawberries, diced or sliced
  • 3_1/2 Tbsp (42g) granulated sugar, divided
  • 1 cup (235ml) heavy cream
​For the cake:
  1. Preheat oven to 350 degrees. Butter a 9-inch springform pan, line bottom with a round of parchment paper and butter parchment.
  2. In a medium mixing bowl whisk together flour, baking powder and salt, set aside.
  3. In the bowl of an electric stand mixer fitted with the paddle attachment cream together sugar, butter and lemon zest until pale and fluffy.
  4. Mix in eggs one at a time (mixture will appear lumpy), blend in vanilla.
  5. Add in half of the flour mixture and mix just until combined, add ricotta and mix just until combined. 
  6. Add in last half of the flour mixture and mix just until combined. Gently fold batter to ensure ingredients are evenly incorporated. 
  7. Pour batter into prepared springform pan and spread into an even layer. Bake in preheated oven until cake is set (a toothpick can come out moist but no batter), about 45 - 50 minutes.
  8. Let cake cool 10 minutes then run a knife around edge to loosen any edges that may have stuck slightly, remove springform ring and continue to let cool.
  9. Once cool, slice and serve with macerated strawberries and whipped cream.
For the strawberries and whipped topping:
  1. In a medium mixing bowl toss strawberries with 2 Tbsp of the sugar. Cover and let rest in refrigerator while cake is baking and cooling.
  2. In a separate medium mixing bowl using an electric hand mixer whip heavy cream until soft peaks form. 
  3. Add 1_1/2 Tbsp sugar and whip until stiff peaks form. Store in refrigerator until ready to serve.
0 Comments

Lemon Tart (Tarte au Citron from Bouchon)

4/9/2015

0 Comments

 
I first had a taste of this at Bouchon itself, and with the pine nut crust, it was simply amazing. It's actually a relatively easy/quick thing to make; the hardest part is probably just having to stand and stir in front of the stove for 8 minutes. The original recipe has an amazingly intense lemon/tart taste, so for those who may want to be a little less overwhelmed by that, see the note at the bottom. But in its original form, it won me first place at a citrus-themed festival, so it can't have been too bad!
Picture
  • butter and flour for the tart pan
  • 1/3 recipe Pine Nut Crust
  • 2 large eggs, cold
  • 2 large egg yolks, cold
  • 3/4 cup sugar
  • 1/2 cup fresh lemon juice
  • 6 tbsp (3 oz) cold unsalted butter, cut into 6 pieces
Servings: 9" tart
  1. For the crust: Preheat oven to 350 F. Generously butter and flour a 9" fluted tart pan w/ a removable bottom and refrigerate it while the oven preheats.
  2. Remove the tart pan from the refrigerator. Use your fingertips to press the chilled pine nut dough evenly over the bottom and up the sides of the pan. Trim off any excess dough.
  3. Bake the crust for 10-15 mins, then rotate it and bake for another 10-15 mins, or until it is golden brown. Remove the crust from the oven and let it cool while you make the filling.
  4. For the sabayon: Bring about 1.5" of water to a boil in a pot that is slightly smaller than the diameter of the bowl you will be using for the sabayon. Meanwhile, in a large metal bowl, whisk the eggs, yolks, and sugar for about 1 min, or until the mixture is smooth.
  5. Set the bowl over the pot and, using a large whisk, whip the mixture while you turn the bowl (for even heating). After about 2 mins, when the eggs are foamy and have thickened, add 1/3 of the lemon juice, whisk, then continue adding another 1/3 until all the lemon juice is gone. Continue whisking vigorously, still turning the bowl, until the mixture is thickened and light in color and the whisk leaves a trail in the bottom of the bowl. (The trails should stay for a bit, instead of immediately disappearing.) The total cooking time should be 8-10 mins.
  6. Turn off the heat and leave the bowl over the water. Whisk in the butter a piece at a time. The sabayon may loosen slightly, but it will thicken and set as it cools. Pour the warm sabayon into the tart crust and place the pan on a baking sheet.
  7. Preheat the broiler. While the sabayon is still warm, place the tart under the broiler. Leaving the door open, brown the top of the sabayon, rotating the tart if necessary for even color; this will take only a few seconds, so do not leave the oven. Remove the tart from the broiler and let it sit for at least 1 hour. Serve at room temperature or cold.
This tart can be quite strong in flavor. Use 1/3 cup of lemon juice and 1/2 cup of sugar instead if you wish something less tart and sweet. Even though I made the tart successfully without adding any additional liquids after cutting out the lemon juice, you may wish to add just enough water to help bring the liquid volume back up to the original 1/2 cup that was asked for in the recipe, as then you won't need to watch so carefully for over-cooking on the stove.
0 Comments

Candied Lemons or Limes

4/8/2015

0 Comments

 
This was modified from original recipes, which for the most part, ask for equal parts sugar and water for the candy-ing process. But I simply couldn't stomach how much of a syrup it turned everything into - as one of my friends put it, they were like gummy bears - so I went for more blanching rather than sugar-preserving. The lime peels I found to be more bitter, so I blanched them for longer before chilling.
Picture
  • lemons or limes, sliced thinly but evenly
  • 1/2 cup sugar
  • 2 cups water
  • large bowl of iced water

  1. Bring the water to a low boil in a pan or large pot. Blanch the lemons or limes by laying the slices evenly across the water - one layer is ideal, do not do more than two layers. If blanching lemons, leave them simmering for about a minute. If blanching limes, leave them simmering for about 3 minutes.
  2. Fish the slices out with a slotted spoon and put them into the bowl of iced water. Mix the sugar into the still-simmering water. Once the lemon/lime slices have cooled, put them back into the simmering sugar-water. Leave for about an hour.
  3. Fish the slices out and leave on a cooling rack to drain and cool. If you would like them dry completely, set an oven to 200 F and then place the slices onto a baking sheet and bake for about 5-10 minutes.
0 Comments

Greek Lemon Cake

1/1/2015

0 Comments

 
  • 3 cups cake flour
  • 1 tsp baking soda
  • 1/4 tsp salt
  • 6 eggs (yolks and whites separated)
  • 1 cup and 1/2 cup separated white sugar
  • 1 cup butter, softened
  • 2 tsp grated lemon zest
  • 6 tbsp lemon juice
  • 1/2 tsp lemon extract
  • 1 cup plain yogurt (or Greek yogurt)
  1. Preheat oven to 350 F. Grease and flour one 10" tube pan.
  2. Sift the flour, baking soda, and salt together. Set mixture aside.
  3. In a large bowl beat the egg whites until soft peaks form. Gradually add 1/2 cup of the sguar, beating until stiff glossy peaks form. Set aside.
  4. Cream butter, 1 cup sugar, egg yolks, lemon zest, lemon juice, and lemon extract together until fluffy. Add flour mixture alternately with the yogurt to the egg yolk mixture. Gently fold in the egg whites and pour the batter into the prepared pan.
  5. Bake for 50-60 minutes. Let cake cool in pan for 10 minutes, then turn out onto a rack to finish cooling. 
0 Comments
    Picture

    Sweet Enough

    Part of the reason I started baking was because I like my goodies to be less obviously sweet - I want to taste the flavor, not just the sugar. So most of these recipes will have the sugar dialed down.

    This site also acts as my mobile recipe box, so instructions are often pared down to a minimum - very few frills but for some hints and suggestions!

    RSS Feed

    Categories

    All
    Alcohol
    Almond
    Apple
    Avocado
    Baklava
    Banana
    Bars
    Biscotti
    Blackberry
    Blueberry
    Bread
    Buttercream
    Cake
    Candy
    Carrot
    Cheese
    Cherry
    Chicken
    Chickpea
    Chinese
    Chocolate
    Cider
    Cobbler
    Coconut
    Coconut Milk
    Cookie
    Corn
    Cranberry
    Cream
    Cream Cheese
    Creme Brulee
    Crumb
    Crust
    Cupcake
    Custard
    Dates
    Decoration
    Dip
    Dough
    Doughnut
    Dumpling
    Easy Peasy
    Egg
    Filling
    Flowers
    Frosting
    Fruit
    Garnish
    Gelee
    Granola
    Green Tea
    Honey
    Ice Cream
    Icing
    Jam
    Lamb
    Lemon
    Lime
    Lobster
    Lotus Seed
    Macaron
    Mango
    Marshmallow
    Meringue
    Mochi
    Muffin
    Nectarine
    Nutella
    Nuts
    Oat
    Oats
    Onion
    Orange
    Pancake
    Panna Cotta
    Peach
    Peanut Butter
    Pear
    Pecan
    Phyllo
    Pie
    Pistachio
    Plum
    Popsicle
    Pound Cake
    Pumpkin
    Quiche
    Raspberry
    Red Bean
    Rhubarb
    Rice
    Ricotta Cheese
    Rugelach
    Sauce
    Savory
    Scone
    Sesame
    Shortbread
    Soup
    Sponge
    Sponge Cake
    Strawberry
    Streusel
    Tahini
    Tart
    Tofu
    Topping
    Torte
    Vegetable
    Vinaigrette
    Walnut
    Watermelon
    Yogurt
    Zucchini

    Archives

    September 2021
    March 2021
    February 2021
    December 2020
    November 2020
    October 2020
    July 2020
    May 2020
    April 2020
    March 2020
    October 2019
    December 2018
    October 2018
    August 2018
    April 2017
    July 2016
    May 2016
    March 2016
    February 2016
    January 2016
    December 2015
    November 2015
    October 2015
    September 2015
    July 2015
    June 2015
    May 2015
    April 2015
    February 2015
    January 2015
    November 2014

© 2019 Jacqueline Teng | DragonWarden