DragonWarden
  • Adventures
  • The Oven
  • The Un-Tea Party
  • Secret Ingredients
  • About

Peanut Butter Cookies

8/21/2018

0 Comments

 
I have my tried and true big fat chewy chocolate chip cookies recipe when I need to whip up a batch for friends, but as good as it is, I was getting a little bored of making it all the time. So, what's a natural complement to chocolate? Peanut butter.

So when the time came to make a batch for someone as a favor, I decided to do some research on peanut butter cookie recipes. The below is an adaptation from this recipe - as the recipe described, the original was indeed quite soft. But, I felt, it needed just a little more chewiness and oomph to it ... in short, it needed to be just like the big fat chewy chocolate chip cookie, except peanut-butter flavored. This was only further supported when I left some of the PB cookies out for a week and my brother said they were getting better as they hardened a bit on the outside. Thus, I threw in a little bit of this and that and came up with the below recipe.
Picture
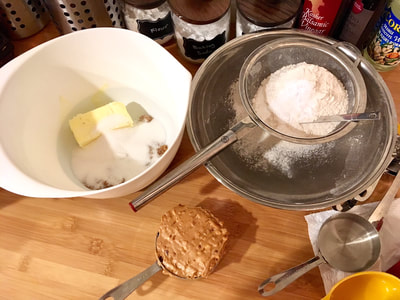
  • 1 cup peanut butter
  • 3/4 cup butter softened
  • 1/2 cup white sugar
  • 1/2 cup brown sugar
  • 1 egg + 1 egg yolk
  • 1 tablespoon vanilla extract
  • 1 1/2 cups flour
  • 1 teaspoon baking soda
  • 1/4 teaspoon salt
  1. Preheat the oven to 350 F. Line 2 baking pans with parchment paper, if desired.
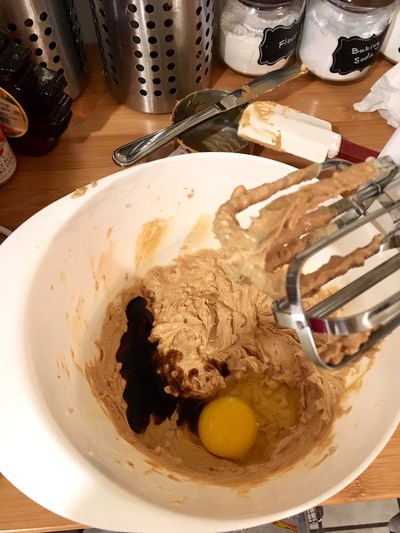
  2. In a large mixing bowl, cream together the peanut butter, butter, sugar and brown sugar. Beat together until smooth & creamy best if using a stand mixer or hand mixer.
  3. Add the egg and vanilla extract and continue to mix until well combined.
  4. In a small mixing bowl, whisk together the flour, baking soda and salt. Stir in the flour mixture to the butter and sugar mixture and mix until well combined.
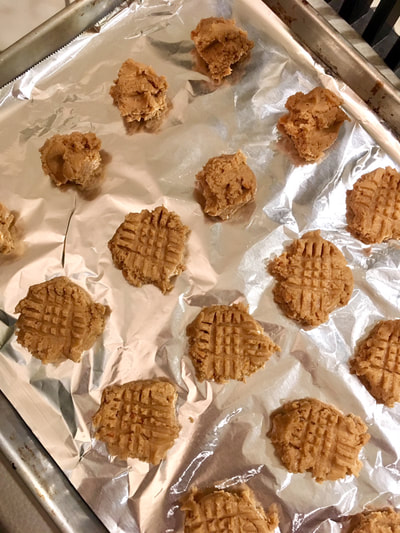
  5. Using a cookie dough scooper or making the dough into 1 inch balls. Roll in white granulated sugar if you desire and place on to baking sheet. 
  6. Using a fork, press down on each ball of dough to slightly flatten and creating a criss-cross pattern.
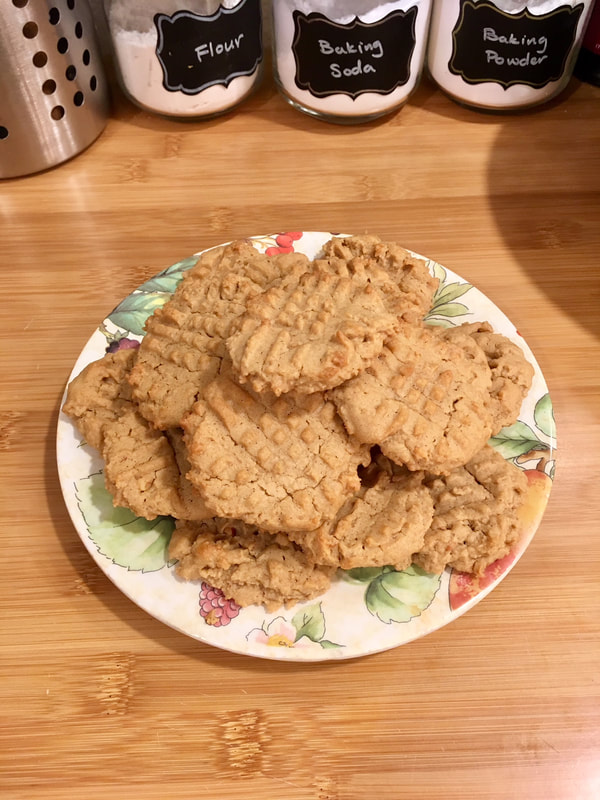
  7. Bake for 8-9 minutes. Let cool on the baking sheet for a few minutes and then transfer to a wire rack.
  8. These keep well for a couple of days in an airtight container.
0 Comments

Peanut Butter Thumbprints with Strawberry Lambic Jam

1/1/2015

0 Comments

 
From a Tasting Table recipe.
Jam:
  • 12 oz strawberries, hulled and cut into 1/4" pieces
  • 12 oz bottle strawberry lambic
  • 1/4 cup granulated sugar

Cookies:
  • 1/2 cup (4 oz) unsalted butter, at room temperature
  • 1/3 cup granulated sugar
  • 1/3 cup firmly packed light brown sugar
  • 3/4 cup creamy peanut butter
  • 1 extra-large egg, at room temperature
  • 1 tsp vanilla extract
  • 1-1/4 cups all-purpose flour
  • 1/2 tsp baking powder
  • 1/2 tsp baking soda
  • 1/2 tsp kosher salt
  • 1/2 tsp sea salt flakes
  • 1 cup roasted red-skinned peanuts
  • 1 cup strawberry lambic jam
  1. Make the strawberry lambic jam: In a medium saucepan over medium-high heat, combine the strawberries, lambic and sugar, and simmer, stirring often to prevent from boiling over, 6 to 8 minutes. Reduce the heat to medium low and cook until most of the liquid has evaporated and the jam is thick enough to coat a spoon, 20 to 25 minutes. The jam will continue to thicken as it cools.
  2. Make the cookies: In the bowl of a stand mixer fitted with the paddle attachment, mix the butter and both sugars on medium speed until the butter is light and airy, 3 to 4 minutes. Using a rubber spatula, scrape the sides and bottom of the bowl to bring the batter together. Add the peanut butter and mix on medium speed until thoroughly combined. Add the egg and vanilla to the butter mixture and mix until the batter starts to resemble cottage cheese.
  3. In a separate bowl, whisk together the flour, baking powder, baking soda and both salts.
  4. Add the dry ingredients all at once to the butter mixture and mix on low speed until the dough comes together but still looks shaggy, 20 to 30 seconds. Remove the bowl from the stand mixer. With a plastic bench scraper, bring the dough completely together by hand.
  5. Stretch out a long sheet of plastic wrap onto a work surface and place the dough on top. Pat the dough into a 6-by-8-inch rectangle, using the bench scraper to square off the sides. Wrap the dough with plastic wrap and chill in the fridge for at least 2 hours or up to 3 days.
  6. Preheat the oven to 350°. Line two baking sheets with parchment paper.
  7. In a food processor, pulse the nuts just until they are finely ground.
  8. Cut the dough lengthwise into 5 even strips. Roll the strips back and forth into logs to round out the edges. Each log should be about 9 inches long. Coat each log with the ground nuts.
  9. Cut each log into 8 equal pieces. Roll each piece with the ground nuts again to round out the edges, then place the pieces cut-side up on the prepared baking sheet. You should be able to fit 20 cookies per baking sheet.
  10. With the tip of your thumb, make an indentation into the center of each cookie and slightly flatten the cookie. Spoon the jam into the center of each thumbprint.
  11. Bake for 8 minutes. Rotate the pan and continue to bake until the cookies begin to crack a bit on the top and are just set, another 6 minutes. Remove the cookies from the oven and let cool before serving.
0 Comments
    Picture

    Sweet Enough

    Part of the reason I started baking was because I like my goodies to be less obviously sweet - I want to taste the flavor, not just the sugar. So most of these recipes will have the sugar dialed down.

    This site also acts as my mobile recipe box, so instructions are often pared down to a minimum - very few frills but for some hints and suggestions!

    RSS Feed

    Categories

    All
    Alcohol
    Almond
    Apple
    Avocado
    Baklava
    Banana
    Bars
    Biscotti
    Blackberry
    Blueberry
    Bread
    Buttercream
    Cake
    Candy
    Carrot
    Cheese
    Cherry
    Chicken
    Chickpea
    Chinese
    Chocolate
    Cider
    Cobbler
    Coconut
    Coconut Milk
    Cookie
    Corn
    Cranberry
    Cream
    Cream Cheese
    Creme Brulee
    Crumb
    Crust
    Cupcake
    Custard
    Dates
    Decoration
    Dip
    Dough
    Doughnut
    Dumpling
    Easy Peasy
    Egg
    Filling
    Flowers
    Frosting
    Fruit
    Garnish
    Gelee
    Granola
    Green Tea
    Honey
    Ice Cream
    Icing
    Jam
    Lamb
    Lemon
    Lime
    Lobster
    Lotus Seed
    Macaron
    Mango
    Marshmallow
    Meringue
    Mochi
    Muffin
    Nectarine
    Nutella
    Nuts
    Oat
    Oats
    Onion
    Orange
    Pancake
    Panna Cotta
    Peach
    Peanut Butter
    Pear
    Pecan
    Phyllo
    Pie
    Pistachio
    Plum
    Popsicle
    Pound Cake
    Pumpkin
    Quiche
    Raspberry
    Red Bean
    Rhubarb
    Rice
    Ricotta Cheese
    Rugelach
    Sauce
    Savory
    Scone
    Sesame
    Shortbread
    Soup
    Sponge
    Sponge Cake
    Strawberry
    Streusel
    Tahini
    Tart
    Tofu
    Topping
    Torte
    Vegetable
    Vinaigrette
    Walnut
    Watermelon
    Yogurt
    Zucchini

    Archives

    September 2021
    March 2021
    February 2021
    December 2020
    November 2020
    October 2020
    July 2020
    May 2020
    April 2020
    March 2020
    October 2019
    December 2018
    October 2018
    August 2018
    April 2017
    July 2016
    May 2016
    March 2016
    February 2016
    January 2016
    December 2015
    November 2015
    October 2015
    September 2015
    July 2015
    June 2015
    May 2015
    April 2015
    February 2015
    January 2015
    November 2014

© 2019 Jacqueline Teng | DragonWarden