DragonWarden
  • Adventures
  • The Oven
  • The Un-Tea Party
  • Secret Ingredients
  • About

Pavlova

7/20/2020

0 Comments

 
I've avoided meringues for most of my life as 1) I had some strange misguided prejudice against them because they reminded me of macarons (and I don't like macarons) and 2) everyone always exclaims how hard it is to make a meringue. However, I was finally tossed right into the pool and it was sink or swim when I committed to making an elaborately fancy cake that used Italian meringue in its frosting ... and I discovered that all of my preconceptions were completely false.

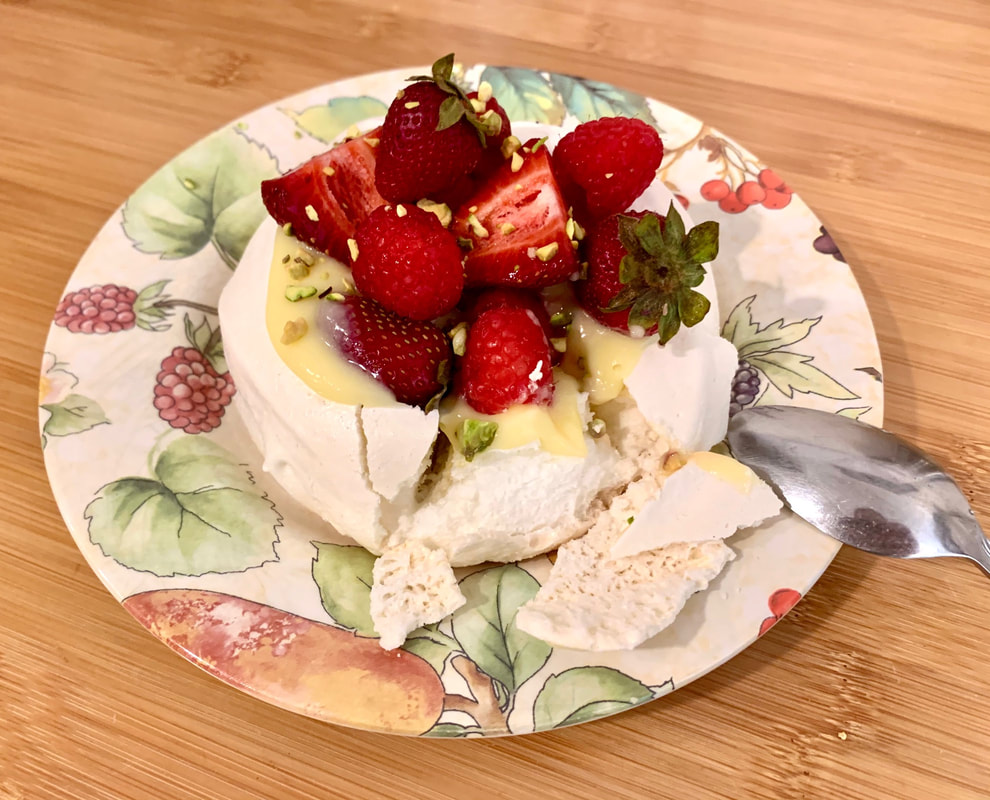
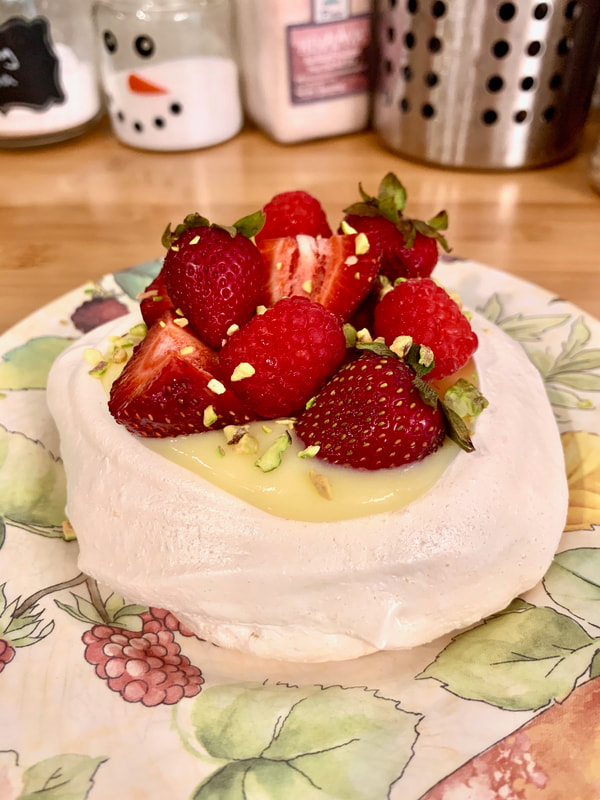
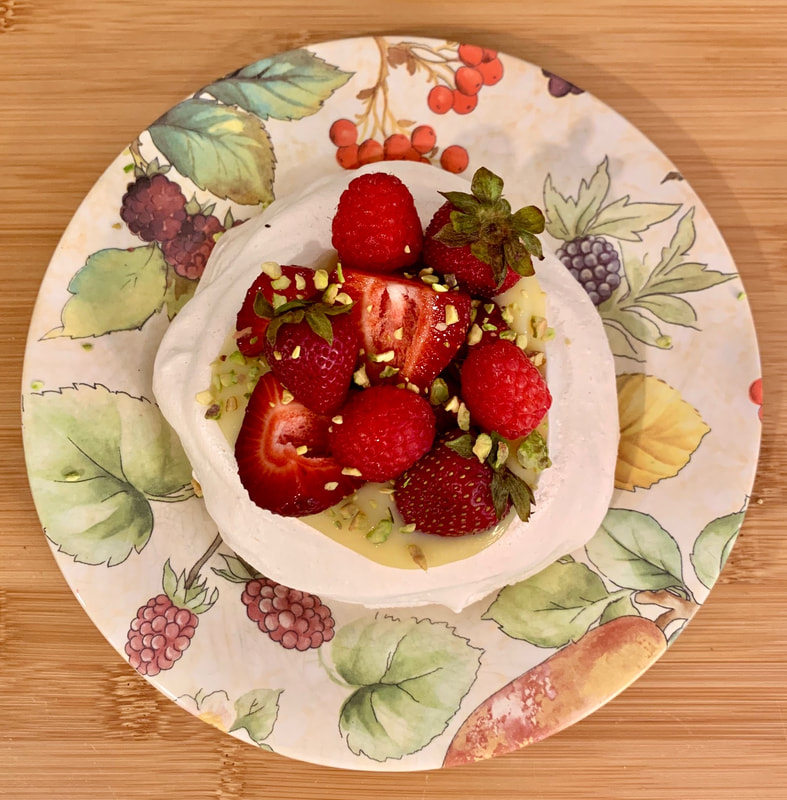
I managed to make the pavlova on the first try. It was not without a few hiccups along the way, but there were plenty of tips and tricks on the internet and I not only salvaged it but it became a week-long hit at multiple households. So, don't be intimidated by the meringue's reputation! In fact, if it wasn't for the fact that it takes a really long time of holding the beaters, I would say this was totally an easy-peasy rating, and you can dress it up with all manner of fanciful and beautiful treats, such as a tangy lemon curd and sweet strawberries.
Picture
  • 4 large egg whites
  • 1 cup sugar
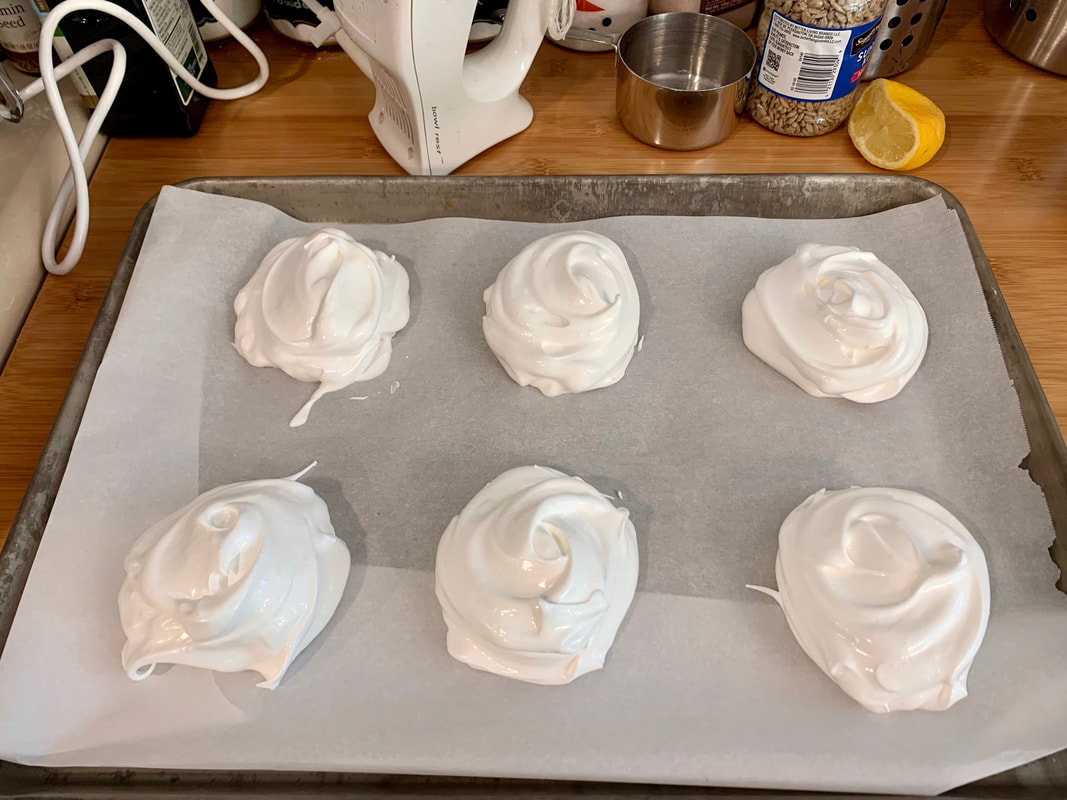
  1. Preheat oven to 250 F. Line a baking sheet with parchment paper.
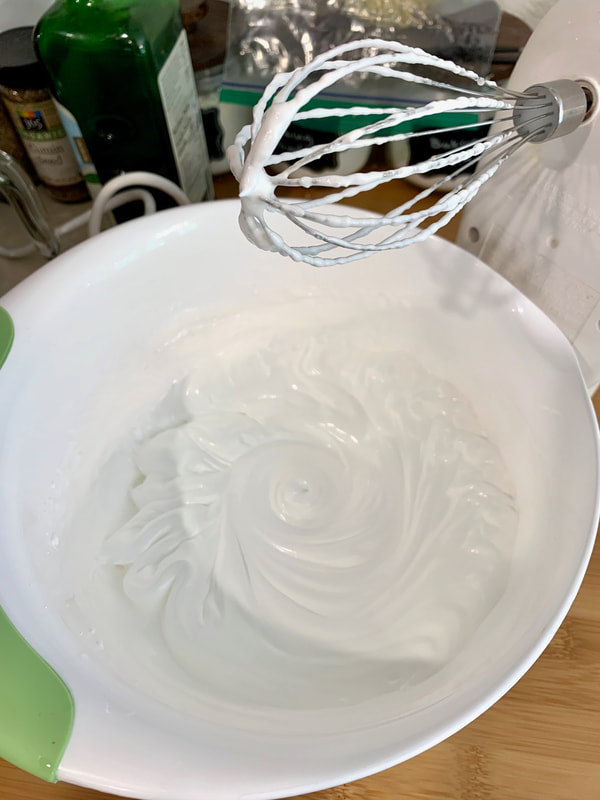
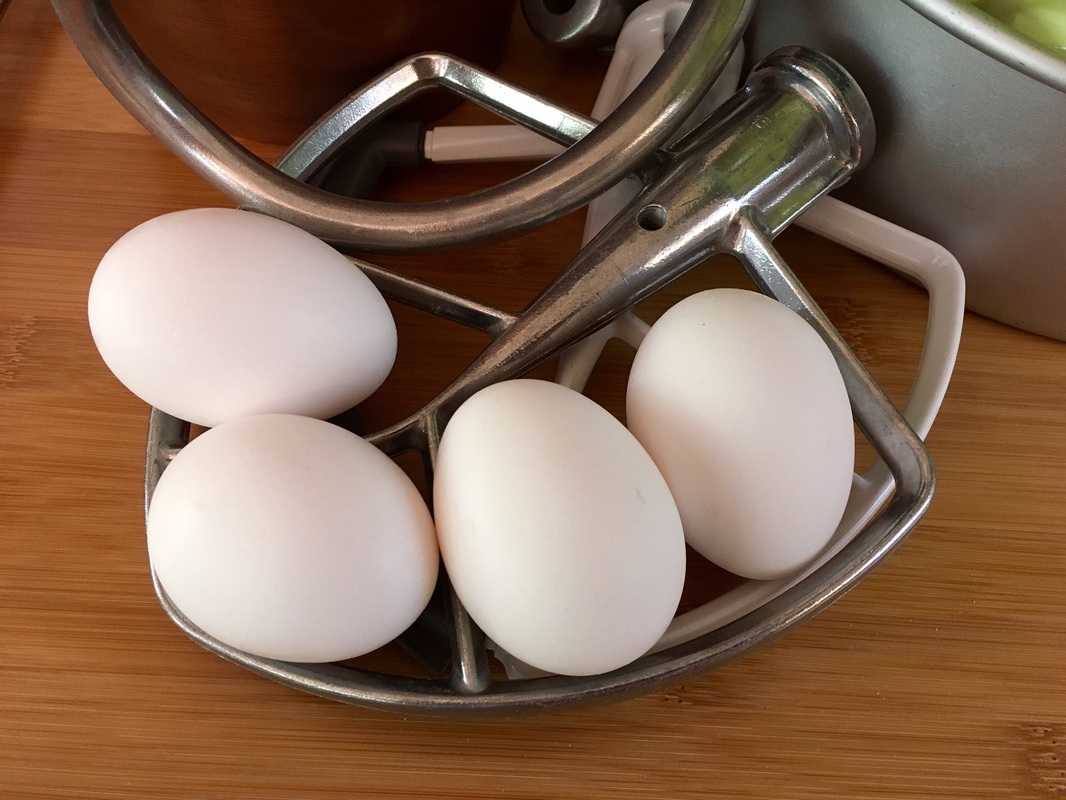
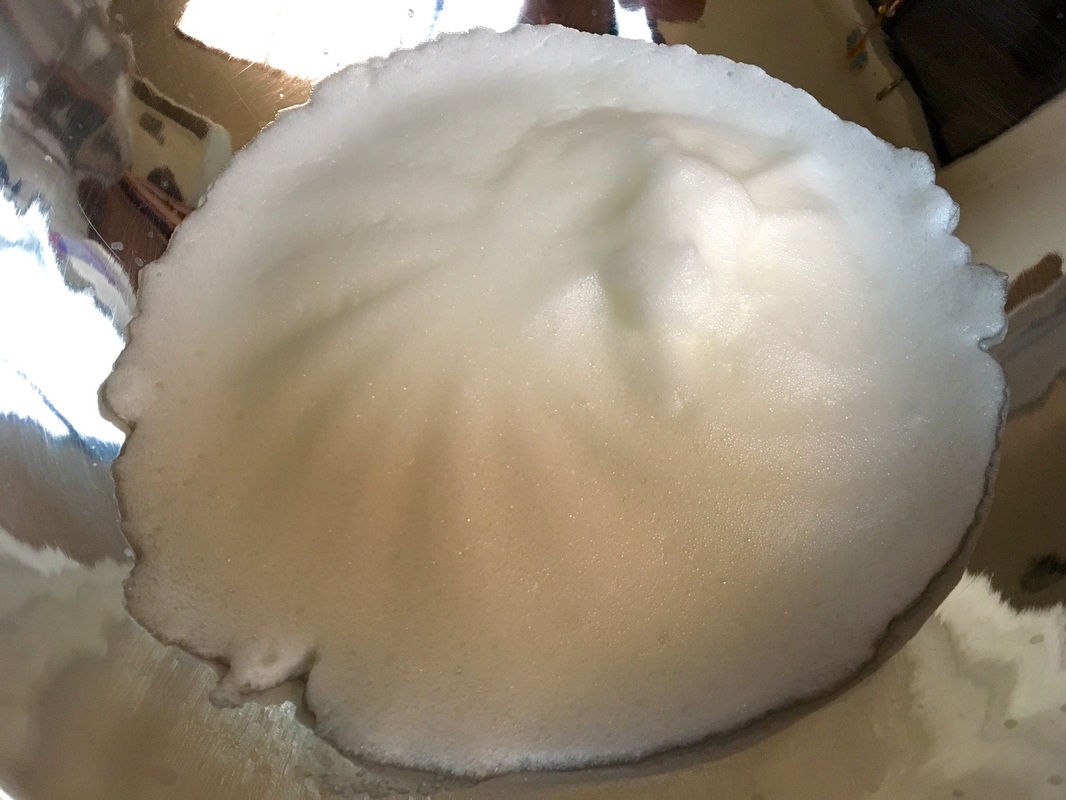
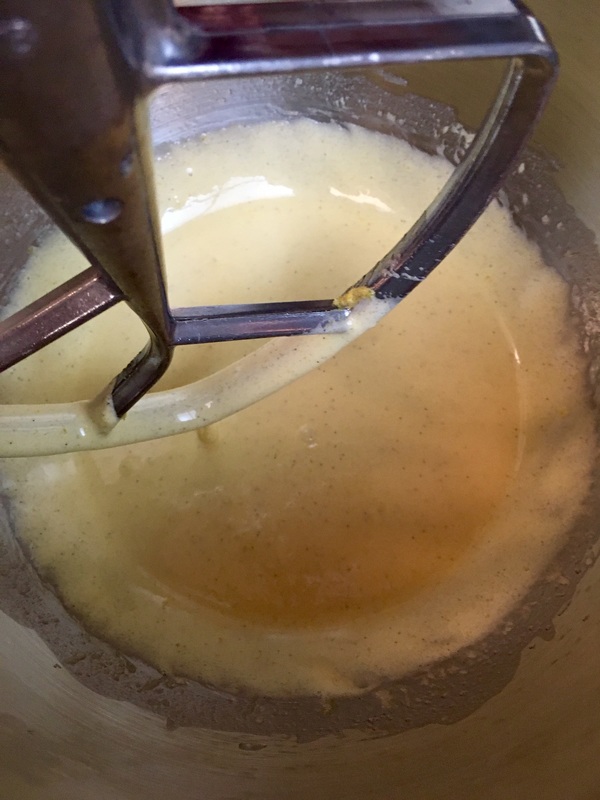
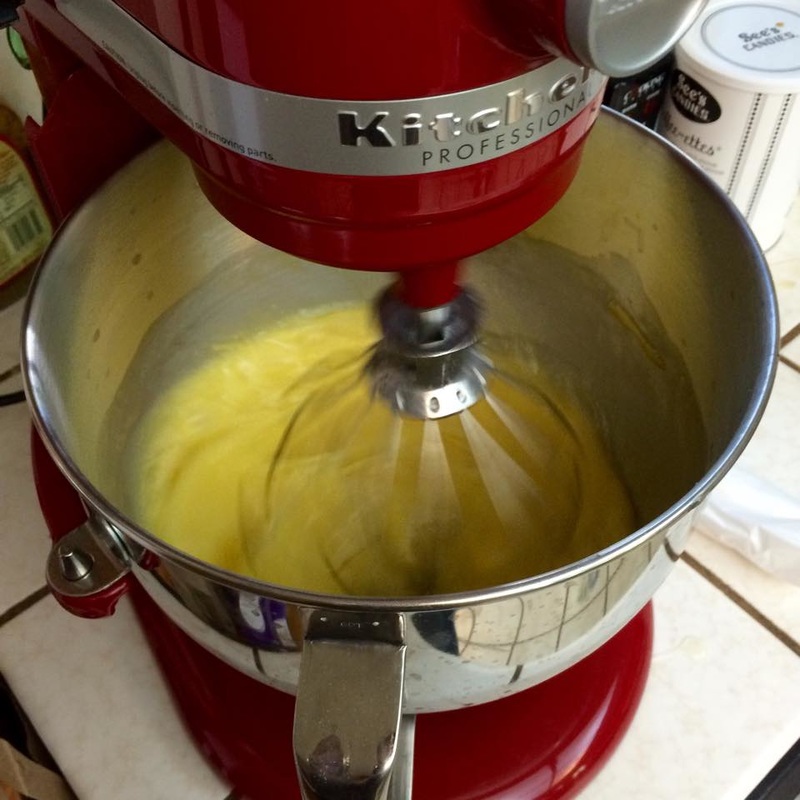
  2. Whip egg whites in a large bowl until uniformly frothy. While whipping, add a few spoonfuls of sugar. Whip until the soft peak stage, then add another few spoonfuls of sugar while whipping. Continue until all the sugar has been added, then continue whipping until the stiff peak stage and the meringue is thick and glossy.
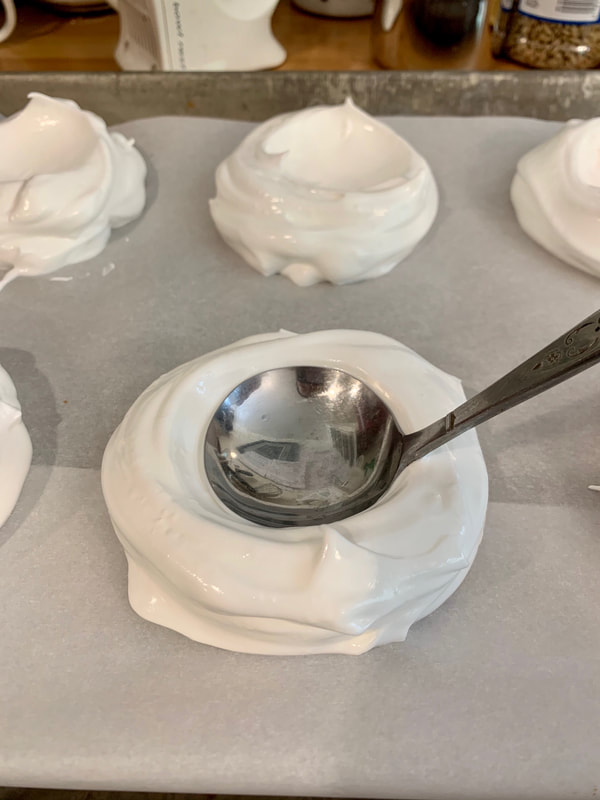
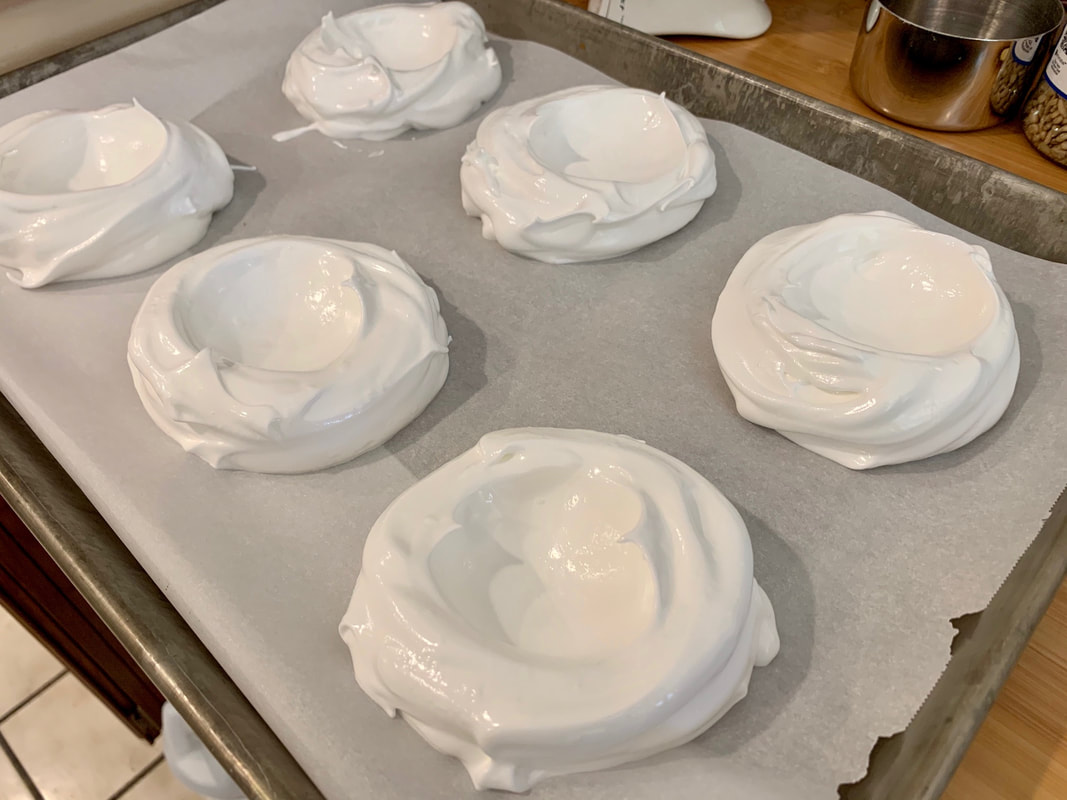
  3. Place 6 dollops of meringue on the baking sheet. Use the back of a spoon to shape the meringues and create a slight well in the centers.
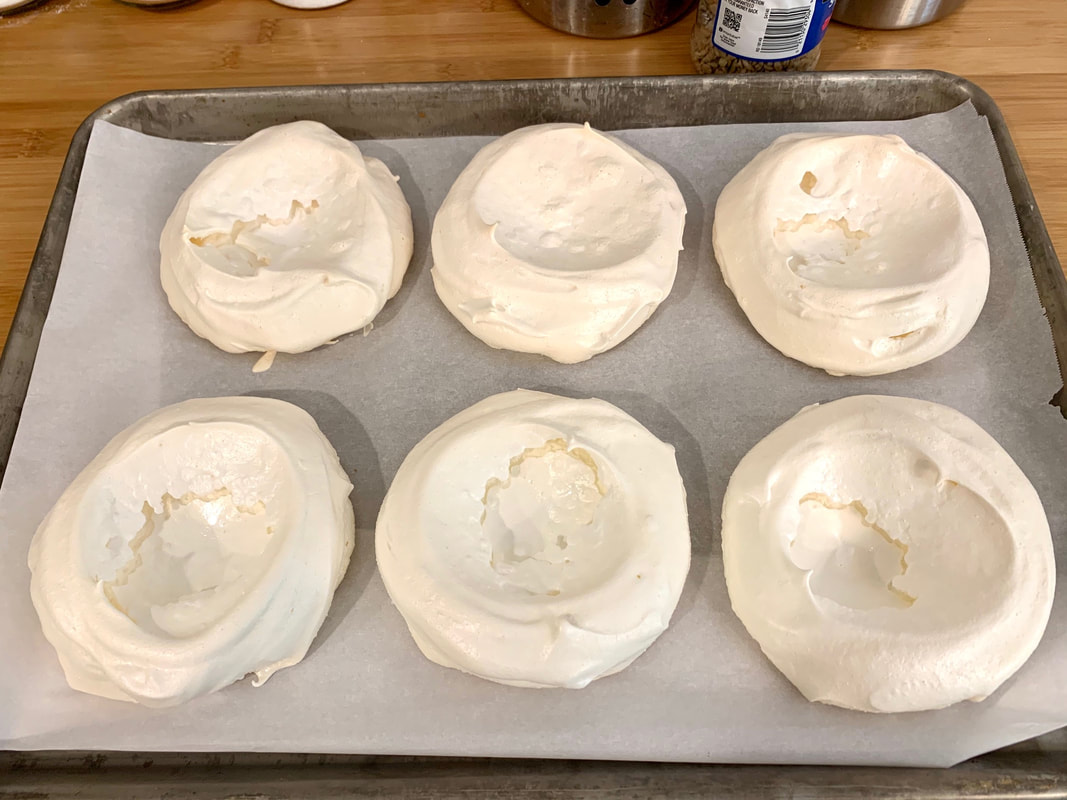
  4. Bake for one hour, turn off the oven, and then prop open the door with a wooden spoon until completely cooled.
Notes: This is one recipe where you can't get away with just reducing the sugar. The sugar is necessary to help the meringue hold its structure. There will be some inevitable cracking once the meringue starts to cool down and settle - it will crack slightly less if you let it cool down gradually by keeping it in the oven and letting the heat escape gradually.

If you add the sugar too quickly, the meringue will not firm up, so best method is to get it to the soft peak stage, add sugar, then get it back to the soft peak stage again if it has collapsed, add sugar again, etc. If it's a humid day and it seems to need a little extra help, you can add a bit of lemon juice or cream of tarter at the frothy stage. You can also separately whip one egg white to stiff peak stage, then fold it into the main bowl and then whip the entire bowl, and it should firm up better than before.
0 Comments

Chinese Sponge Cake

4/5/2020

1 Comment

 
Chinese sponge cake is an amazing, pillowy cake/bread that would have already been a delight to consume purely for its texture. But then it has a delicious eggy aroma and taste that makes this seemingly plain confection that hardly deserves the name of "dessert" into a staple of every Chinese bakery I've ever walked into. It was just by chance that a friend posted this video describing how to make a version at home, and thankfully, because of the more precise method of measurement by weight, I was able to make both a full-sized and half-sized version with very little adaptation besides trying to guess how long the smaller versions cook.
Picture
  • 9”x14” cake pan, lined with parchment paper
  • larger pan for water bath or cake strips
  • 12 large eggs
  • 133 g (130 mL) milk
  • 151 g (160 mL) oil, vegetable or corn preferred
  • 190 g flour, low-gluten preferred
  • 140 g sugar
Note: for a half portion, you can use five 2”x5” loaf pans
  1. Set oven to 300 F. 
  2. Separate the eggs. Put yolks into a smaller bowl and egg whites into a large bowl.
  3. Using a whisk, mix the milk into the egg yolks.
  4. Heat up the oil - either 2 minutes in the microwave or until it's simmering on the stovetop. In a small bowl, pour half of the oil into the flour, whisk until incorporated, then pour in the other half of the oil and continue whisking until smooth.
  5. Pour half of the egg yolks into the flour-oil mix and whisk until incorporated. Then whisk in the other half. Mixture might appear lumpy - that's okay, just make sure it is as evenly mixed as possible.
  6. Add a spritz of lemon juice to the egg whites to help them whip up. Start whipping the egg whites at medium until it is uniformly frothy (about one minute). Then, at med-high speed, add a third of the sugar. Continue beating until nearly the soft-peak stage, then gradually add another third of the sugar. Repeat until all the sugar is incorporated, then continue beating until the egg whites are at the soft-peak stage.
  7. Using the whisk, scoop a bit of egg whites into the egg yolk mixture and mix gently until fully incorporated. Then fold the egg yolk mixture into the egg whites until uniform.
  8. Pour batter into cake pan(s). If using a water bath, place into the larger pan and add water - just about an inch or so deep is fine. If using the cake strips, make sure the strips have been submerged in water for at least three minutes, squeeze out the excess water, then wrap them around the cake pan.
  9. Bake until the top is golden. If using a 9”x14” pan, this should take about 50-60 mins. If using smaller pans, start checking for doneness at about 30 mins. While warm, slice into sections.
Note: I used all-purpose flour and olive oil as that was all I had on hand, and the cake still turned out lovely! I personally wouldn't go through the trouble of acquiring the specialized ingredients unless they happened to be already on-hand.
1 Comment

Magic (Custard) Cake

7/6/2016

0 Comments

 
How could I possible resist trying something calling itself "Magic Cake"? While the supposed "magic" is in how it separates itself into layers during the baking process and maintains a soft, moist center with an almost quiche-like crust, I think the real magic is in how easy it was to make and how quickly it disappeared - a 9" round disappeared in literally less than 24 hours. Twice.
Picture
  • 4 eggs (separate yolks from whites) at room temperature
  • 3/4 cup (150 g) sugar
  • 1 stick or ½ cup (125 g) butter, melted
  • 1 tsp vanilla extract
  • 2 cups (500 ml) milk lukewarm
  • ¾ cup (4 oz or 115 g) of all purpose flour
  • powdered sugar for dusting cake
  1. Preheat oven to 325 F degrees. Grease a 8" x 8" baking dish or a 9" cake pan (either spring-form or with removable bottom).
  2. Separate eggs and beat the egg yolks with the sugar until light. Add butter and vanilla extract and continue beating for another minute or two
  3. Add the flour and mix it in until fully incorporated. Slowly start adding the milk and beat until everything is well mixed together.
  4. Whip the egg whites until they are stiff. Gently whisk (or fold with a spatula) the egg whites into the batter, a third at a time.
  5. Pour batter into baking dish and bake for 40 to 70 minutes or until the top is lightly golden. The baking time could vary greatly depending on the oven, so take a peek at around 40 minutes and see how it looks.
  6. Set on a rack to cool. If using a cake pan, after about 15 minutes, run a knife gently around the edges and then remove the cake from the pan, then allow to cool completely. 
  7. Sprinkle some powdered sugar after cake has completely cooled.
Notes: My personal oven seemed to need about 50 minutes. The middle will be a little runny when it's still warm - if you let it cool completely, it should set nicely.

​I also made a "pie" version, where I pieced together some puff-pastry from the store and used it as a rough/rustic crust. This version was much more complicated in terms of timings and what needed to be done, but roughly:
  1. Use a deep-dish pie pan. Lay out the crust in it, then keep it in the fridge until you're ready to fill it. Pre-heat oven to 400 F. 
  2. After pouring the filling in, bake it for about 12-15 mins until the crust is to the desired golden/brown shade.
  3. Turn the oven down to 325 F and bake for another 12-15 mins until the filling is the desired golden/brown shade.
  4. Cover the entire "pie" with a foil cover and continue baking about 50-60 mins. To check if it's done, lift the foil cover and give the pie a light nudge or shake - the center may shiver a bit (because the filling will have a layer of cooked custard over a pocket of hot air and steam), but it shouldn't jiggle as if it's still filled with water.
  5. Remove and let cool fully on a cooling rack. The center will deflate and settle as it cools.
0 Comments

The Puff (Quiche - from The Cypress B&B)

10/3/2015

0 Comments

 
This recipe is from the now-sadly closed Cypress B&B in Florida. A beautiful little cottage in a beautiful area, the hosts were gracious enough to give me their recipes for some of their most popular breakfast items, including the delicious glazed mango pecan muffins.

While this is called "The Puff", I liken it most to a crust-less quiche, and due to all the varieties of cheeses, stays fabulously moist in the center instead of becoming all baked-out egg. And due to the large quantity, is a great way to just get a bunch of breakfasts out of the way if you're looking forward to a busy week!
Picture
  • 12 eggs
  • 1 tsp baking powder
  • 1/2 cup flour
  • 1/2 cup melted butter
  • 1/2 tsp salt (optional)
  • 1/2 lb shredded cheddar cheese
  • 1/2 lb shredded monterey jack cheese
  • 1 pint cottage cheese
  • 2 cups of your favorite fillings (breakfast meats, rotisserie chicken, broccoli, asparagus, cauliflower, sauteed onions, etc.)

Servings: 12
  1. If you need to pre-cook any vegetables or meats, do so now and then set aside. (See note below.)
  2. Preheat oven to 350 degrees.
  3. Beat eggs until they are light and fluffy.
  4. Sift flour, salt, and baking powder together. Gently mix this and butter into eggs.
  5. Add remaining ingredients and stir gently until well blended.
  6. Pour into a 9"x13" baking dish.
  7. Bake for 35 minutes.
Note: This earns the easy-peasy rating if you go with some pre-cubed or cut up sandwich meats and throw in a bag of frozen veggies.

Also, I really, really hate soggy over-cooked veggies in my quiches. I've discovered that for certain veggies such as asparagus and cauliflower, what works great is the ice-bath after a blanching, which stops the cooking process in its tracks. I try to boil them to JUST the point before they're just-right, and then when they're in the oven, they take that last step so that there's still a little crunch left to the asparagus and the cauliflower isn't just mush when the quiche is done. Mushrooms I sometimes don't bother cooking at all - the oven takes care of them well enough.
0 Comments

ARCHIVE: Baked Eggs (from Alton Brown)

1/1/2015

0 Comments

 
  • however many eggs you want "hardboiled"
  1. Position the oven racks in the center of the oven, then arrange the eggs in a mini muffin tin or directly on a thoroughly moist kitchen towel (see video for more info). 
  2. Set the oven to 320 degrees F and bake for 30 minutes. When the eggs are done fill a large bowl with ice water and move the eggs into a bowl. Peel the eggs as soon as they are cool enough to handle, then return them to the ice bath to thoroughly chill.
0 Comments
    Picture

    Sweet Enough

    Part of the reason I started baking was because I like my goodies to be less obviously sweet - I want to taste the flavor, not just the sugar. So most of these recipes will have the sugar dialed down.

    This site also acts as my mobile recipe box, so instructions are often pared down to a minimum - very few frills but for some hints and suggestions!

    RSS Feed

    Categories

    All
    Alcohol
    Almond
    Apple
    Avocado
    Baklava
    Banana
    Bars
    Biscotti
    Blackberry
    Blueberry
    Bread
    Buttercream
    Cake
    Candy
    Carrot
    Cheese
    Cherry
    Chicken
    Chickpea
    Chinese
    Chocolate
    Cider
    Cobbler
    Coconut
    Coconut Milk
    Cookie
    Corn
    Cranberry
    Cream
    Cream Cheese
    Creme Brulee
    Crumb
    Crust
    Cupcake
    Custard
    Dates
    Decoration
    Dip
    Dough
    Doughnut
    Dumpling
    Easy Peasy
    Egg
    Filling
    Flowers
    Frosting
    Fruit
    Garnish
    Gelee
    Granola
    Green Tea
    Honey
    Ice Cream
    Icing
    Jam
    Lamb
    Lemon
    Lime
    Lobster
    Lotus Seed
    Macaron
    Mango
    Marshmallow
    Meringue
    Mochi
    Muffin
    Nectarine
    Nutella
    Nuts
    Oat
    Oats
    Onion
    Orange
    Pancake
    Panna Cotta
    Peach
    Peanut Butter
    Pear
    Pecan
    Phyllo
    Pie
    Pistachio
    Plum
    Popsicle
    Pound Cake
    Pumpkin
    Quiche
    Raspberry
    Red Bean
    Rhubarb
    Rice
    Ricotta Cheese
    Rugelach
    Sauce
    Savory
    Scone
    Sesame
    Shortbread
    Soup
    Sponge
    Sponge Cake
    Strawberry
    Streusel
    Tahini
    Tart
    Tofu
    Topping
    Torte
    Vegetable
    Vinaigrette
    Walnut
    Watermelon
    Yogurt
    Zucchini

    Archives

    September 2021
    March 2021
    February 2021
    December 2020
    November 2020
    October 2020
    July 2020
    May 2020
    April 2020
    March 2020
    October 2019
    December 2018
    October 2018
    August 2018
    April 2017
    July 2016
    May 2016
    March 2016
    February 2016
    January 2016
    December 2015
    November 2015
    October 2015
    September 2015
    July 2015
    June 2015
    May 2015
    April 2015
    February 2015
    January 2015
    November 2014

© 2019 Jacqueline Teng | DragonWarden