DragonWarden
  • Adventures
  • The Oven
  • The Un-Tea Party
  • Secret Ingredients
  • About

Pistachio-Orange Ricotta Cake

4/13/2020

0 Comments

 
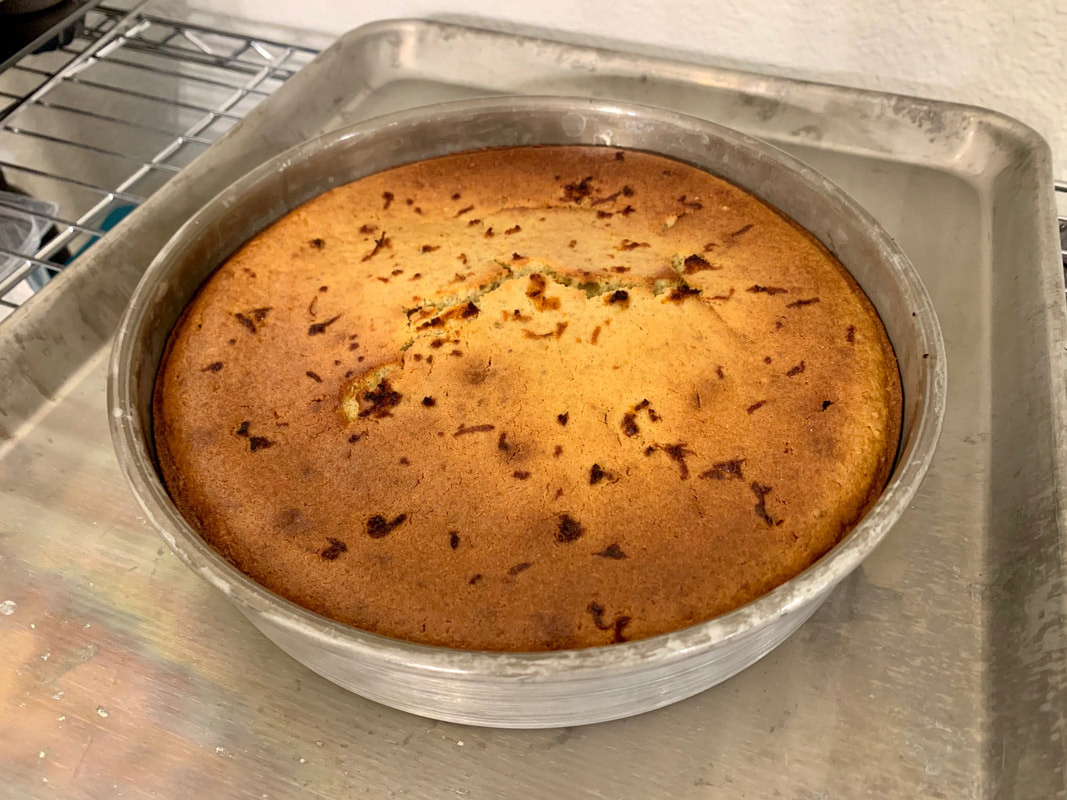
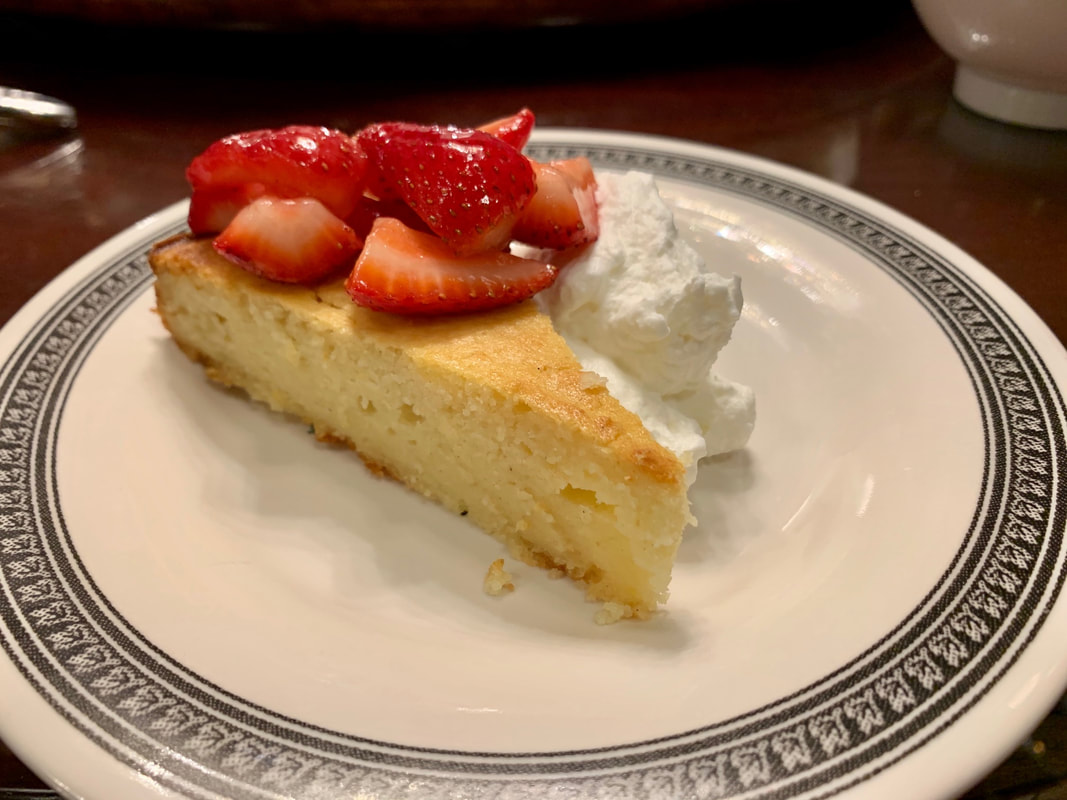
This was a surprisingly extraordinary cake considering its borderline easy-peasy status! From the Better Baking book by Genevieve Ko, it was a surprise hit as I had only made it because I had leftover ricotta in the fridge. Wonderfully fragrant, with the pistachio's nutty undertones and a density and texture reminiscent of pound cake, the cherry on top was that you can throw all the ingredients into the food processor and be done with it.
Picture
  • 8 tbsp (114 g) unsalted butter, softened (almost melting point)
  • 1_1/4 cups (180 g) white whole wheat flour
  • 2 tsp baking powder
  • 1/2 tsp salt
  • 1/2 cup (64 g) shelled roasted salted pistachios
  • 1 cup (110 g) sugar
  • 1_1/2 cups (339 g) whole-milk ricotta cheese, drained
  • 3 large eggs, room temperature
  • 1 small orange
  • 1 tsp vanilla extract
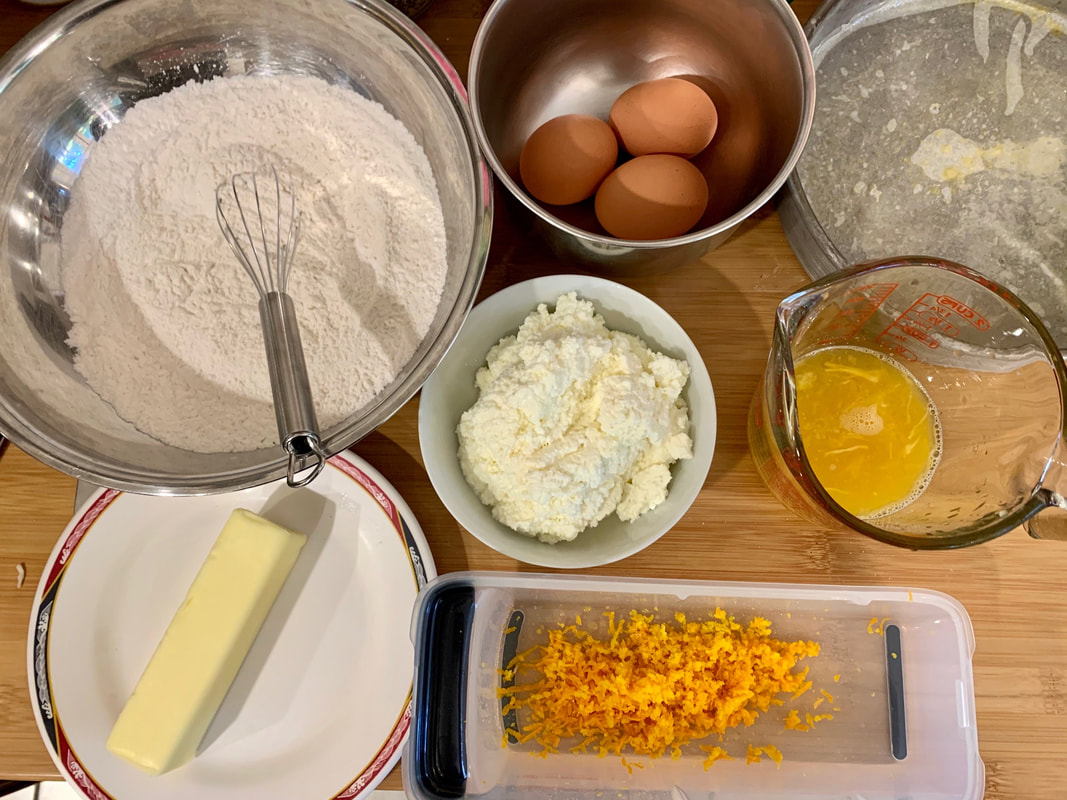
  1. Position rack in center of oven and preheat to 350 F. Butter 2" deep 9" round cake pan, line bottom with parchment paper, and butter the parchment.
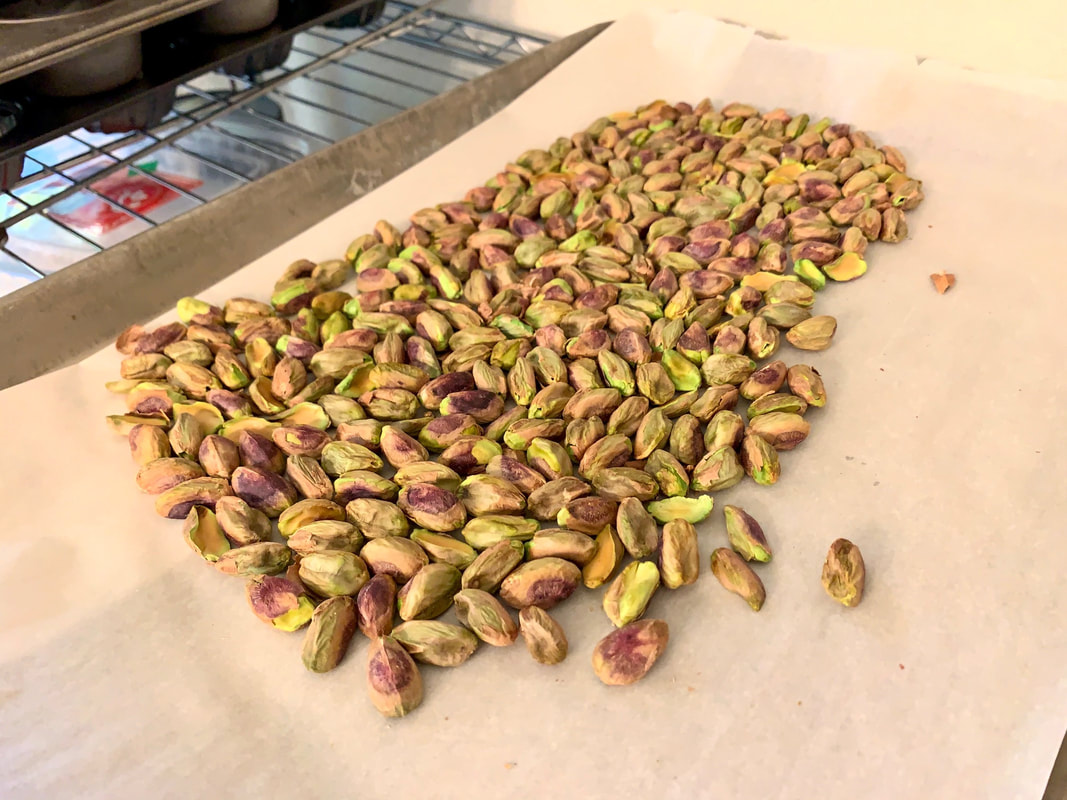
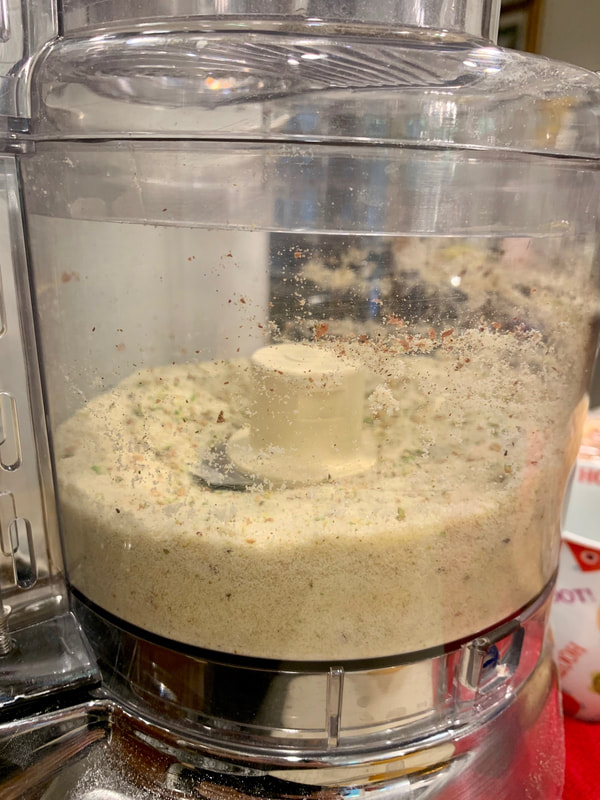
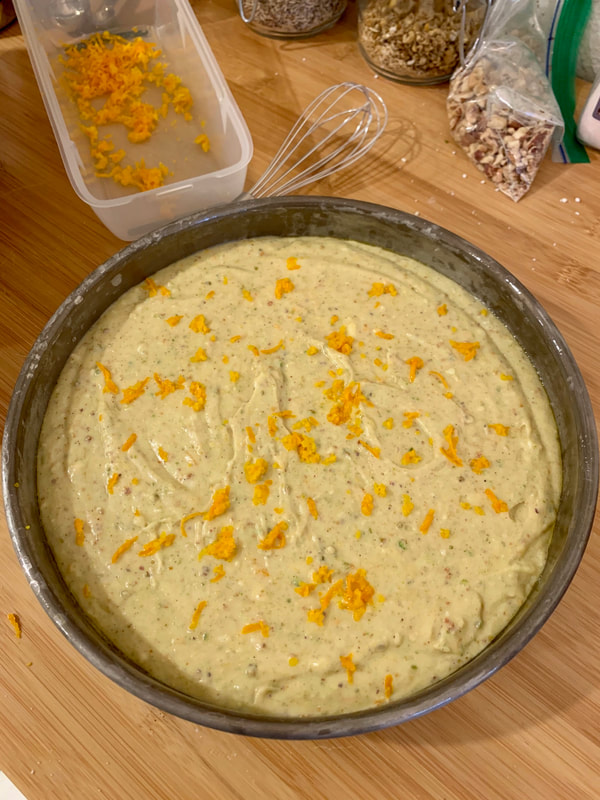
  2. Whisk flour, baking powder, and salt in small bowl. Combine pistachios and sugar in food processor and process until mixture resembles coarse meal. Add butter and ricotta and pulse until smooth, scraping bowl occasionally. Add eggs and process until smooth, scraping bowl occasionally. Zest half the orange into mixture. Squeeze 2 tbsp juice from orange and add to processor, then add vanilla and process until liquids are incorporated.
  3. You can add the flour mixture directly and process, or pour liquid mixture into another bowl and hand-mix flour mixture in until everything is incorporated evenly. Pour batter into prepared pan and smooth the top.
  4. Bake until a toothpick inserted into the center of cake comes out clean, 50-55 mins.
  5. Cool in the pan on wire rack for 10 mins, then run a thin-bladed knife between the edges of the cake and pan. Invert the cake onto the rack and discard parchment paper. Carefully flip cake again to cool completely on rack.
0 Comments

Lemon Ricotta Cake

3/26/2020

0 Comments

 
Originally from this page, this is a remarkable cake where it's neutral enough to go with just about any flavor (both sweet OR savory, to my surprise!) while still having enough character to be consumed on its own. One of my friends dumped gravy and cheese dip all over it and said it was just as good as with the macerated strawberries! I personally liked it just by itself or with a bit of strawberries, and another friend simply consumed it with some of the homemade whipped cream. Along with its simple, no-fuss recipe, this makes a fantastic staple to come back to over and over again.
Picture
Ingredients
  • 1_1/3 cups (188g) all-purpose flour (scoop and level to measure)
  • 2 tsp baking powder
  • 1/4 tsp salt
  • 1 cup (200g) granulated sugar
  • 1/2 cup (113g) unsalted butter, softened
  • 2_1/2 Tbsp lemon zest
  • 3 large eggs
  • 1 tsp vanilla extract
  • 1_1/2 cups (356g) whole milk ricotta cheese
Topping
  • 1 lb. fresh strawberries, diced or sliced
  • 3_1/2 Tbsp (42g) granulated sugar, divided
  • 1 cup (235ml) heavy cream
​For the cake:
  1. Preheat oven to 350 degrees. Butter a 9-inch springform pan, line bottom with a round of parchment paper and butter parchment.
  2. In a medium mixing bowl whisk together flour, baking powder and salt, set aside.
  3. In the bowl of an electric stand mixer fitted with the paddle attachment cream together sugar, butter and lemon zest until pale and fluffy.
  4. Mix in eggs one at a time (mixture will appear lumpy), blend in vanilla.
  5. Add in half of the flour mixture and mix just until combined, add ricotta and mix just until combined. 
  6. Add in last half of the flour mixture and mix just until combined. Gently fold batter to ensure ingredients are evenly incorporated. 
  7. Pour batter into prepared springform pan and spread into an even layer. Bake in preheated oven until cake is set (a toothpick can come out moist but no batter), about 45 - 50 minutes.
  8. Let cake cool 10 minutes then run a knife around edge to loosen any edges that may have stuck slightly, remove springform ring and continue to let cool.
  9. Once cool, slice and serve with macerated strawberries and whipped cream.
For the strawberries and whipped topping:
  1. In a medium mixing bowl toss strawberries with 2 Tbsp of the sugar. Cover and let rest in refrigerator while cake is baking and cooling.
  2. In a separate medium mixing bowl using an electric hand mixer whip heavy cream until soft peaks form. 
  3. Add 1_1/2 Tbsp sugar and whip until stiff peaks form. Store in refrigerator until ready to serve.
0 Comments

Ricotta Almond Peach Crumble Cake

8/21/2018

0 Comments

 
I first found this recipe in my inbox via the Tasting Table's newsletter. It seemed like a quick and easy experiment that would give me an excuse to play with the fruit of the season, and so I eked out a two hour period one night to throw this together.

This cake is proof that you can know a person for your whole life and still learn something new about them. I had no idea that my father didn't like peaches until I made this cake, and he asked me what it was and baldly stated when I told him, "Oh. I don't like peaches." Shock and horror on my part ensued.

But this cake was also the first part of a 2-part proof that my father could learn something new too - as in, he actually does like peaches. If they're included in the right way. He pretty much single-handedly finished off the entire thing. On top of that, he claimed that it actually became even better when it was stored in the fridge overnight - I suspect because the chill and the moisture helped to counter the natural mealy-texture of the almond flour. Not to mention that it was super-easy to make.

So, a win-win-win all around!

Picture
For the cake:
  • 1/2 cup (1 stick) soft, unsalted butter
  • 1_1/3 cups sugar
  • Zest from 1 lemon
  • 3 eggs
  • 1_1/2 cups ricotta
  • 1_3/4 cups all-purpose flour
  • 1/2 cup almond flour
  • 2 teaspoons baking powder
  • 1/2 teaspoon salt
  • 2 to 3 fresh peaches, diced
For the crumb:
  • 1_1/2 cups cake flour
  • 1/2 cup sugar
  • 1/2 cup raw almonds, coarsely chopped
  • 1/2 cup unsalted butter, melted and cooled

The cake:
  1. Preheat oven to 350º. Line a 9-inch springform pan with parchment paper and butter it or spray it with nonstick spray.
  2. In a stand mixer or with a handheld beater, cream butter, sugar and lemon zest for 1 to 2 minutes. Add eggs, scrape down the bowl and mix until thoroughly combined. Mix in ricotta.
  3. In separate bowl, combine the flours, baking powder, and salt. In 2 to 3 batches, gently mix into butter mixture without overbeating. When fully combined, fold in peaches with a spatula.
  4. Pour batter into prepared pan and set aside while making the crumb.
The crumb:
  1. Combine cake flour, sugar and almonds in a bowl. Use your hands to mix together.
  2. Pour in melted butter and gently toss until soft clumps form. Continue until no more flour is visible, and a crumble has formed with small and large crumbs.
  3. Distribute crumble evenly over cake batter and bake for 60 to 70 minutes, rotating halfway. The cake is done when a cake tester comes out clean.
  4. Let cake fully cool before removing from the pan and serving.

Note: The original crumb recipe called for 2 cups of flour, but I felt that 1) the crumb became an overwhelming layer and 2) the crumb really needed a long time to toast correctly. As it was, I was making the cake late at night, and it was already pushing 1:30 am and I decided to pull it out before the crumb layer was really done, even if the cake was already just right. So hopefully reducing the flour content helps with these two points.
0 Comments

Stuffed Squash Blossoms

10/24/2015

0 Comments

 
I've always loved stuffed squash blossoms - I order them every chance I get, which is usually far and few between - but never seriously considered making them myself until I was wandering through a farmer's market and lo and behold, apparently it is blossom season because every other stand seemed to have bunches of them for sale. With such an opportunity literally at my fingertips, I immediately looked up some baked-versions of the recipe to see if it was something I could do on short notice.

As with most cooking, the filling is really up to a person's taste, and so I threw together a mish-mash of my favorite flavors. It's somewhat of a novelty to be able to taste-test before baking - I kept forgetting that I didn't have to guesstimate what to put in, I could immediately test whether the flavor's just right.
Picture
  • 1 dozen large blossoms or 2 dozen small ones
Filling:
  • 1 cup ricotta cheese
  • 2 large heads of garlic
  • 1 lemon (juice and zest the peel)
  • salt, pepper, and spice to taste (garlic powder, thyme, parsley, etc)
Crust:
  • 2 eggs
  • panko or breadcrumbs
Dip (optional):
  • pesto
  • vinegar glaze

  1. Roast the garlic: If you're not using pre-roasted garlic, set an oven or toaster to 400 F. Peel off all the papery outer layers of the garlic head. Cut off the tops of the individual cloves, leaving them exposed. Set them on a sheet of aluminum foil, then drizzle olive oil over them, making sure that all the exposed areas of the cloves have been covered. Fold the foil over the garlic heads, then set them in the toaster for 40-50 minutes, until the cloves are very soft and easily mashable.
  2. While the garlic is toasting, prepare the blossoms. Use a knife to make a slit down one side of each blossom to the base. Reach inside and pinch off and discard the anther. Rinse the blossoms and lay on a paper towel to dry.
  3. Once the garlic is done, pinch out each clove, roughly mash, and mix with the ricotta. If you really like to emphasize the garlic flavor, add a dash of garlic powder. Zest the lemon and mix both the zest and the lemon's juice into the ricotta. Salt, pepper, and spice to taste.
  4. Cover a baking sheet with parchment paper. Set the oven to 400 F.
  5. Lightly beat the eggs in one dish, and pour the panko or breadcrumbs in another dish for dipping. Stuff each blossom with a portion of the filling, carefully close the blossom and twist the petal ends together, then roll it into the egg, then the crumbs to coat. Spread the finished stuffed blossoms out on the baking sheet.
  6. Bake for about 10 minutes, until the crumbs are golden brown. Keep an eye on them - do not let them burn.
  7. I like to serve these with some pesto and a few drops of vinegar glaze.
Note: The lemon juice really helped to brighten up the taste of the garlic and ricotta. I was surprised by the difference - I would definitely add a lemon to every filling variation of this I make.
0 Comments
    Picture

    Sweet Enough

    Part of the reason I started baking was because I like my goodies to be less obviously sweet - I want to taste the flavor, not just the sugar. So most of these recipes will have the sugar dialed down.

    This site also acts as my mobile recipe box, so instructions are often pared down to a minimum - very few frills but for some hints and suggestions!

    RSS Feed

    Categories

    All
    Alcohol
    Almond
    Apple
    Avocado
    Baklava
    Banana
    Bars
    Biscotti
    Blackberry
    Blueberry
    Bread
    Buttercream
    Cake
    Candy
    Carrot
    Cheese
    Cherry
    Chickpea
    Chinese
    Chocolate
    Cider
    Cobbler
    Coconut
    Coconut Milk
    Cookie
    Corn
    Cranberry
    Cream
    Cream Cheese
    Creme Brulee
    Crumb
    Crust
    Cupcake
    Custard
    Dates
    Decoration
    Dip
    Dough
    Doughnut
    Dumpling
    Easy Peasy
    Egg
    Filling
    Flowers
    Frosting
    Fruit
    Garnish
    Gelee
    Granola
    Green Tea
    Honey
    Ice Cream
    Icing
    Jam
    Lamb
    Lemon
    Lime
    Lobster
    Lotus Seed
    Macaron
    Mango
    Marshmallow
    Meringue
    Mochi
    Muffin
    Nectarine
    Nutella
    Nuts
    Oat
    Oats
    Onion
    Orange
    Pancake
    Panna Cotta
    Peach
    Peanut Butter
    Pear
    Pecan
    Phyllo
    Pie
    Pistachio
    Plum
    Popsicle
    Pound Cake
    Pumpkin
    Quiche
    Raspberry
    Red Bean
    Rhubarb
    Rice
    Ricotta Cheese
    Rugelach
    Sauce
    Savory
    Scone
    Sesame
    Shortbread
    Soup
    Sponge
    Sponge Cake
    Strawberry
    Streusel
    Tart
    Tofu
    Topping
    Torte
    Vegetable
    Vinaigrette
    Walnut
    Watermelon
    Yogurt
    Zucchini

    Archives

    November 2020
    October 2020
    July 2020
    May 2020
    April 2020
    March 2020
    October 2019
    December 2018
    October 2018
    August 2018
    April 2017
    July 2016
    May 2016
    March 2016
    February 2016
    January 2016
    December 2015
    November 2015
    October 2015
    September 2015
    July 2015
    June 2015
    May 2015
    April 2015
    February 2015
    January 2015
    November 2014

© 2019 Jacqueline Teng | DragonWarden