DragonWarden
  • Adventures
  • The Oven
  • The Un-Tea Party
  • Secret Ingredients
  • About

Magic (Custard) Cake

7/6/2016

0 Comments

 
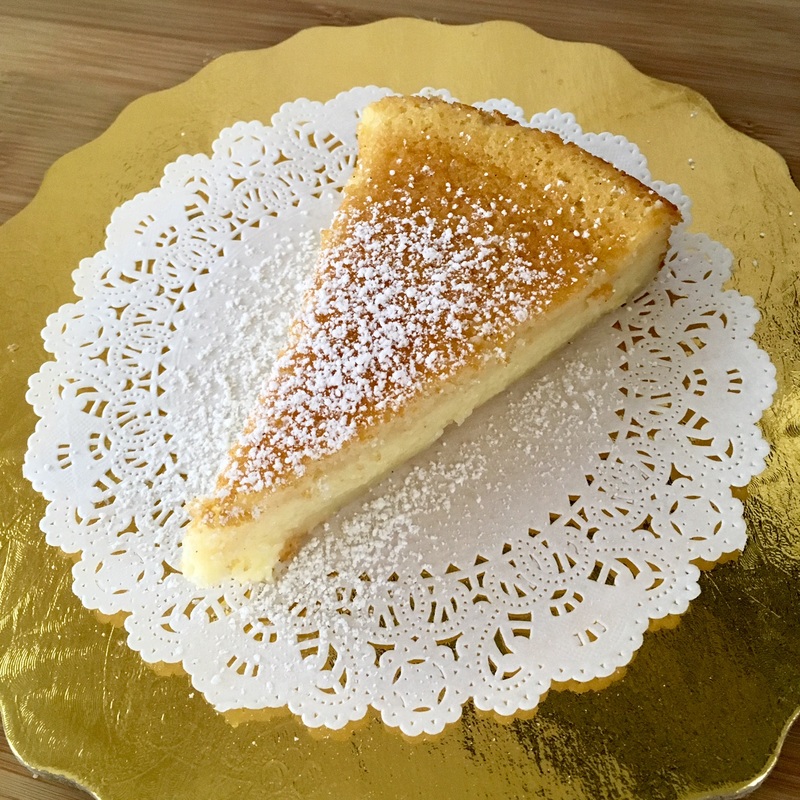
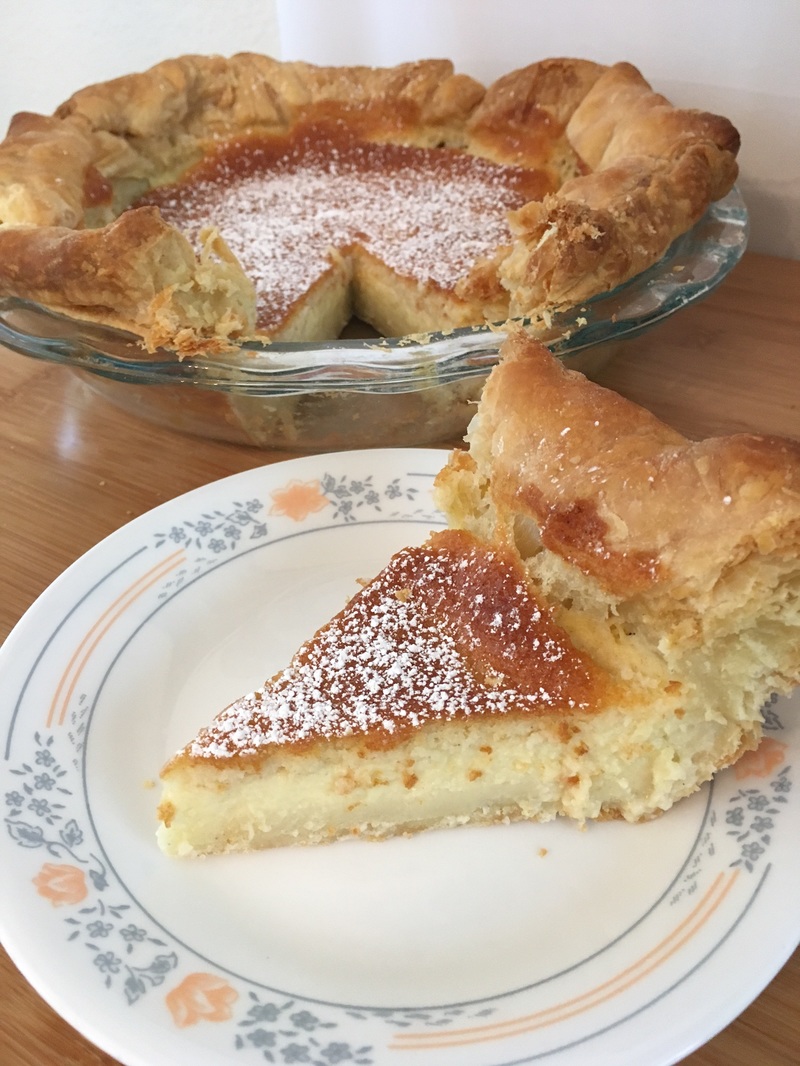
How could I possible resist trying something calling itself "Magic Cake"? While the supposed "magic" is in how it separates itself into layers during the baking process and maintains a soft, moist center with an almost quiche-like crust, I think the real magic is in how easy it was to make and how quickly it disappeared - a 9" round disappeared in literally less than 24 hours. Twice.
Picture
  • 4 eggs (separate yolks from whites) at room temperature
  • 3/4 cup (150 g) sugar
  • 1 stick or ½ cup (125 g) butter, melted
  • 1 tsp vanilla extract
  • 2 cups (500 ml) milk lukewarm
  • ¾ cup (4 oz or 115 g) of all purpose flour
  • powdered sugar for dusting cake
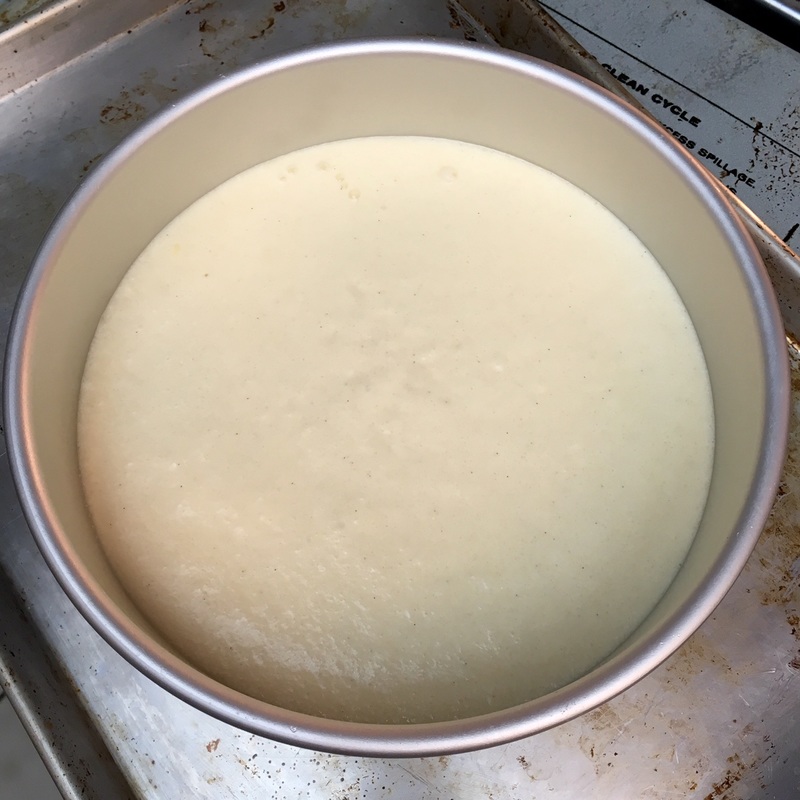
  1. Preheat oven to 325 F degrees. Grease a 8" x 8" baking dish or a 9" cake pan (either spring-form or with removable bottom).
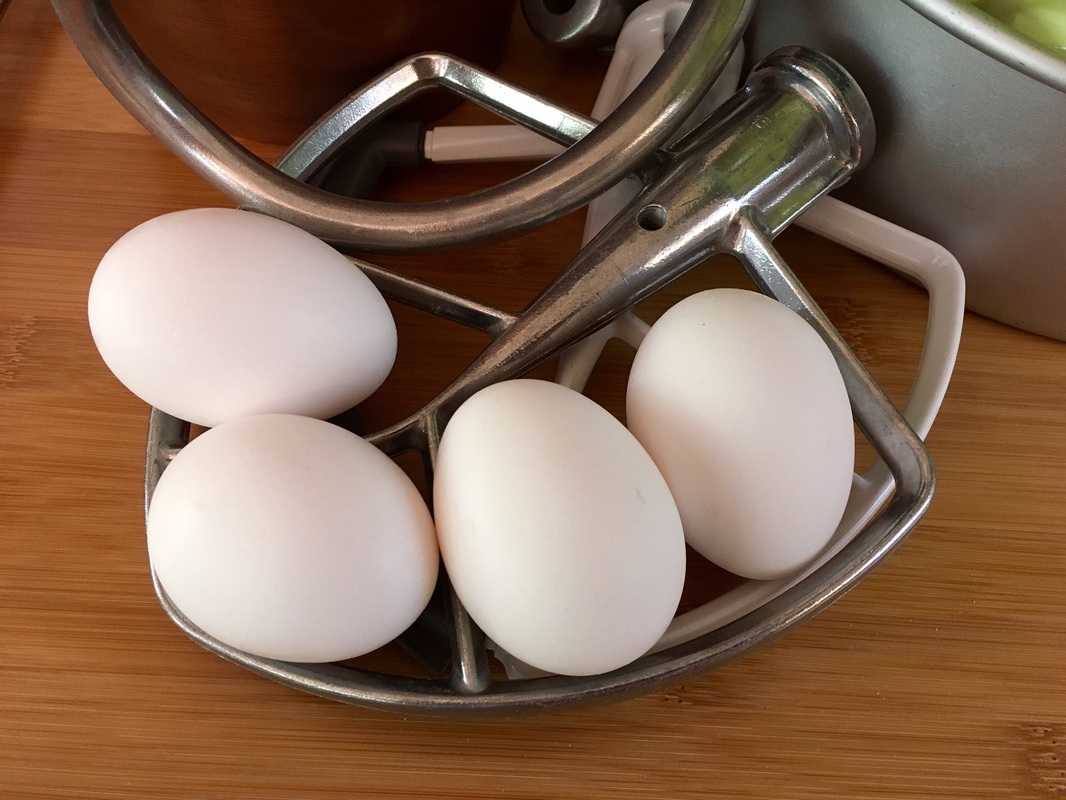
  2. Separate eggs and beat the egg yolks with the sugar until light. Add butter and vanilla extract and continue beating for another minute or two
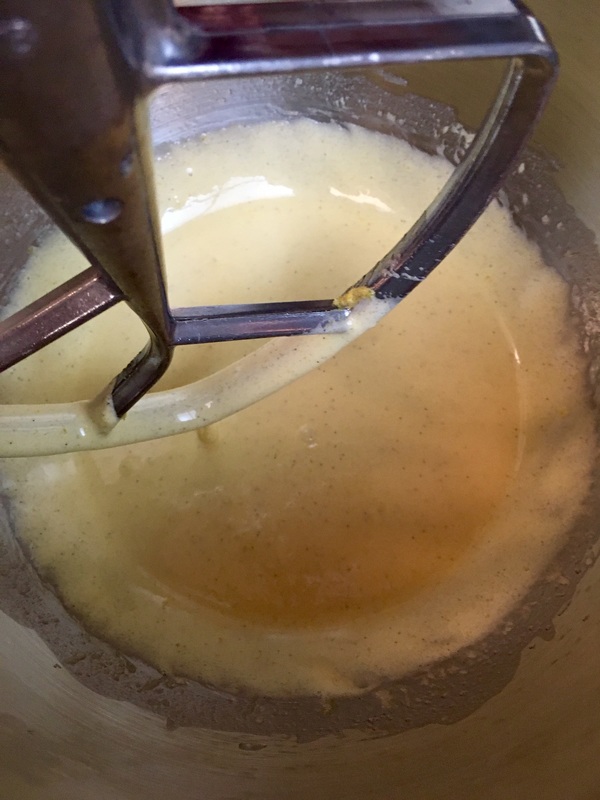
  3. Add the flour and mix it in until fully incorporated. Slowly start adding the milk and beat until everything is well mixed together.
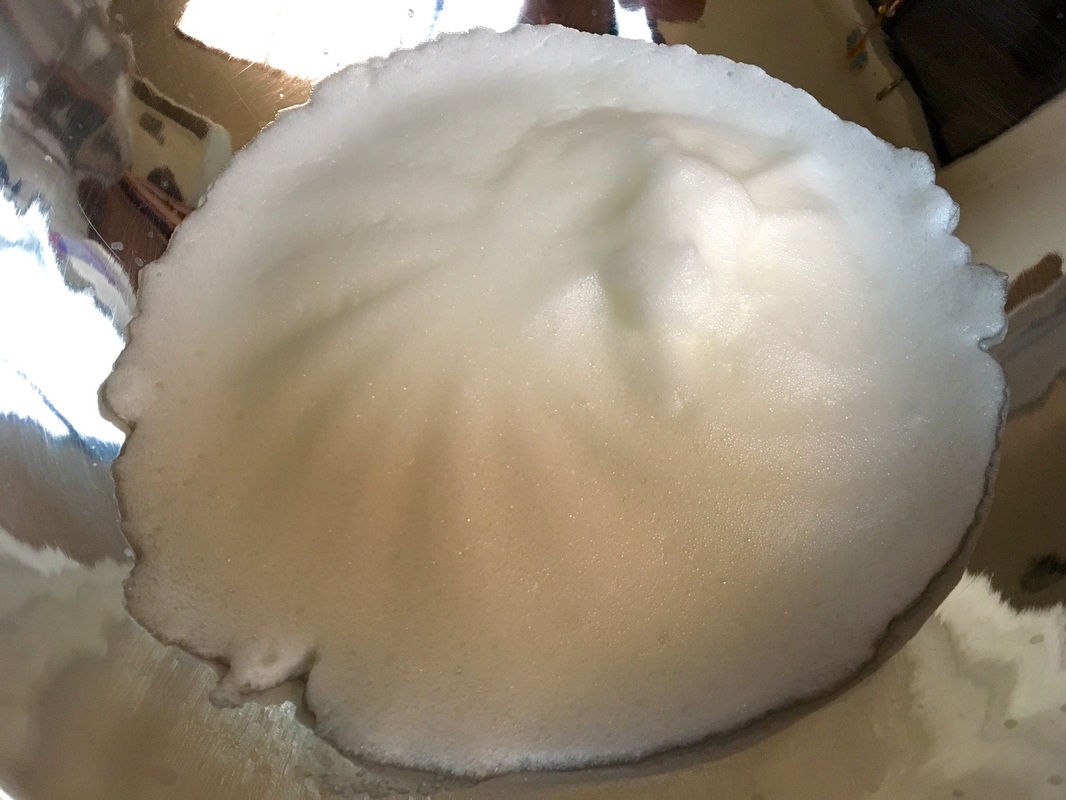
  4. Whip the egg whites until they are stiff. Gently whisk (or fold with a spatula) the egg whites into the batter, a third at a time.
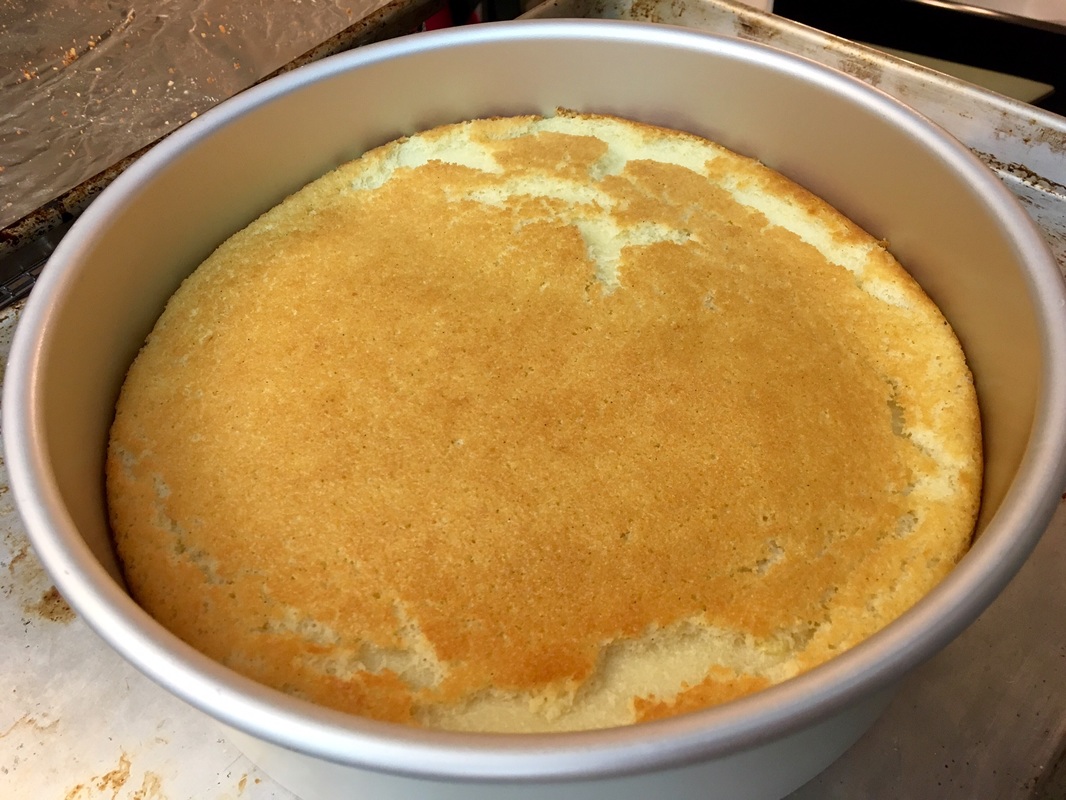
  5. Pour batter into baking dish and bake for 40 to 70 minutes or until the top is lightly golden. The baking time could vary greatly depending on the oven, so take a peek at around 40 minutes and see how it looks.
  6. Set on a rack to cool. If using a cake pan, after about 15 minutes, run a knife gently around the edges and then remove the cake from the pan, then allow to cool completely. 
  7. Sprinkle some powdered sugar after cake has completely cooled.
Notes: My personal oven seemed to need about 50 minutes. The middle will be a little runny when it's still warm - if you let it cool completely, it should set nicely.

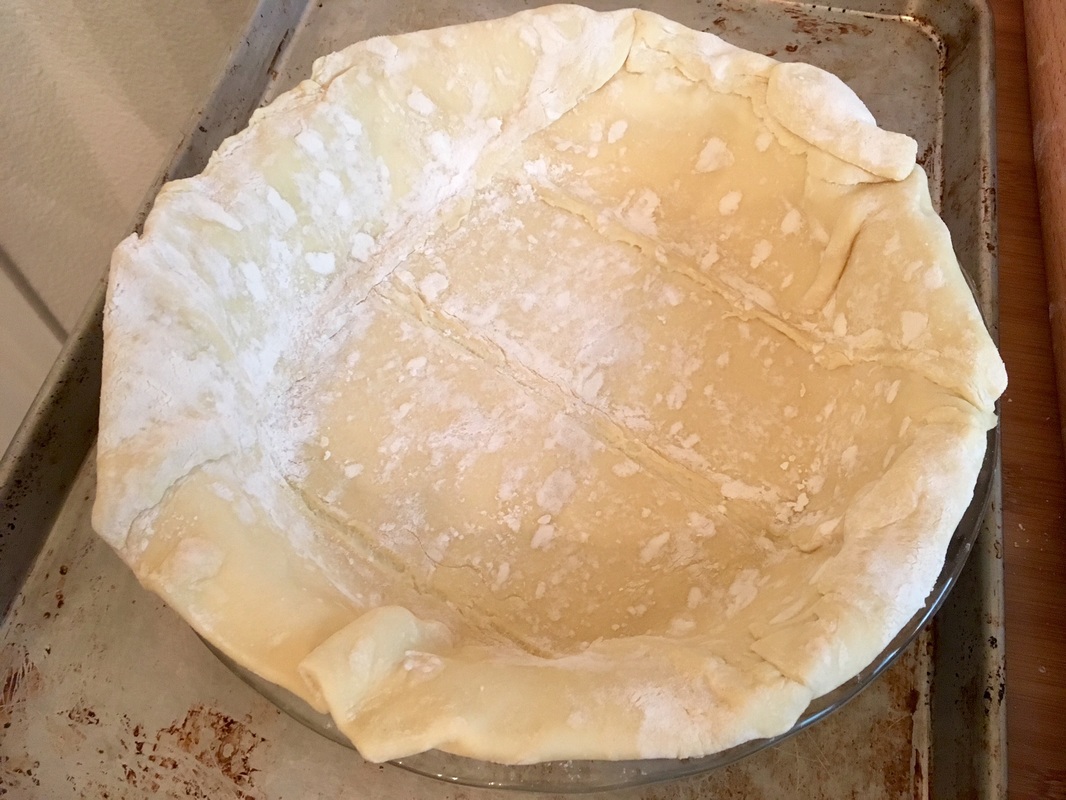
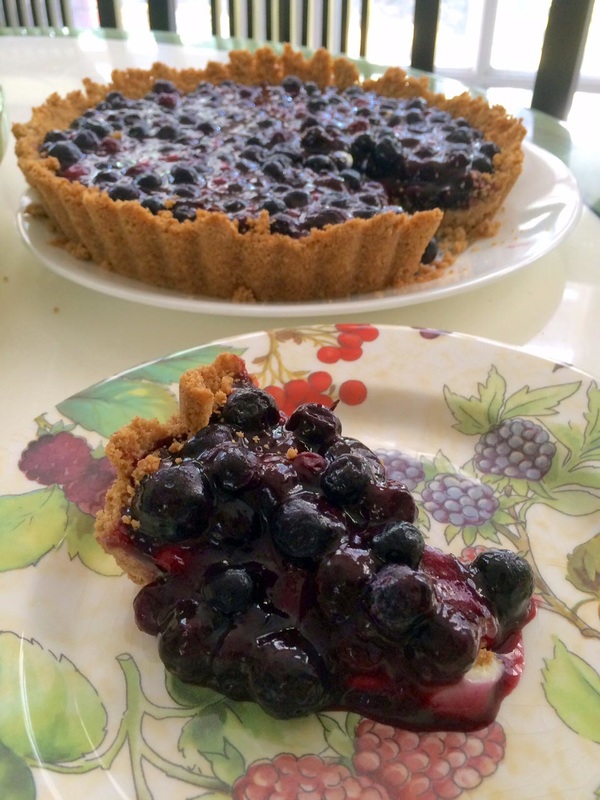
​I also made a "pie" version, where I pieced together some puff-pastry from the store and used it as a rough/rustic crust. This version was much more complicated in terms of timings and what needed to be done, but roughly:
  1. Use a deep-dish pie pan. Lay out the crust in it, then keep it in the fridge until you're ready to fill it. Pre-heat oven to 400 F. 
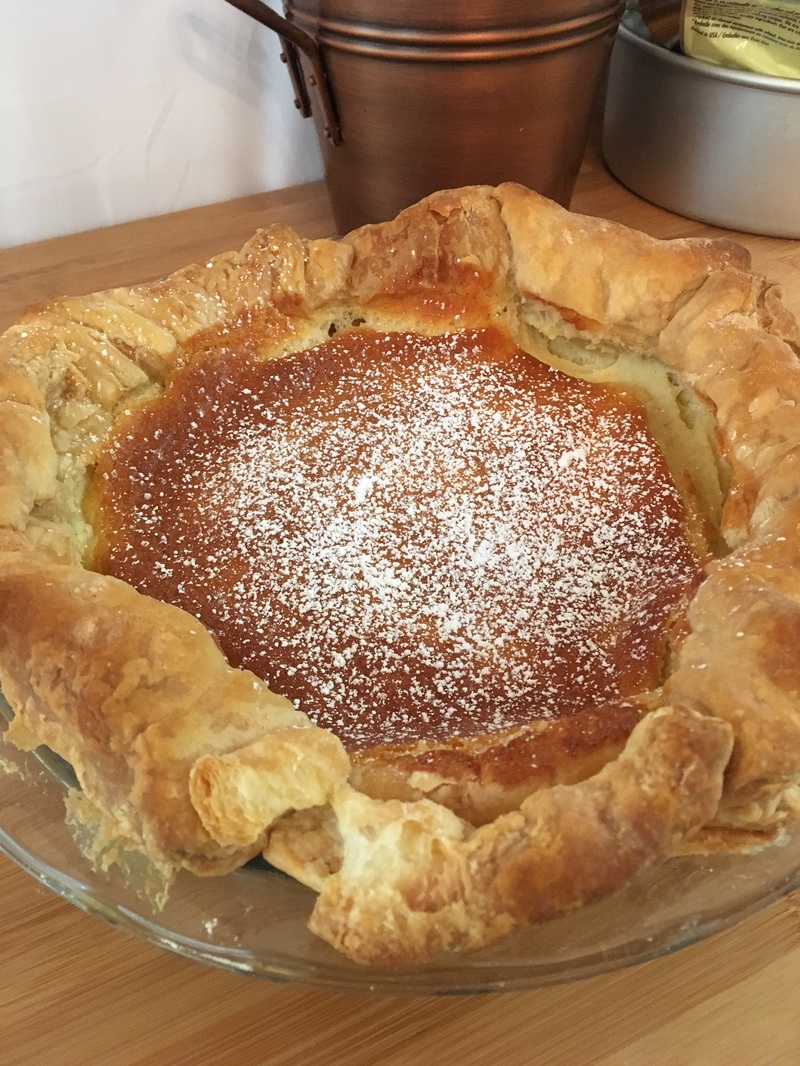
  2. After pouring the filling in, bake it for about 12-15 mins until the crust is to the desired golden/brown shade.
  3. Turn the oven down to 325 F and bake for another 12-15 mins until the filling is the desired golden/brown shade.
  4. Cover the entire "pie" with a foil cover and continue baking about 50-60 mins. To check if it's done, lift the foil cover and give the pie a light nudge or shake - the center may shiver a bit (because the filling will have a layer of cooked custard over a pocket of hot air and steam), but it shouldn't jiggle as if it's still filled with water.
  5. Remove and let cool fully on a cooling rack. The center will deflate and settle as it cools.
0 Comments

Blueberry Custard Pie or Tart

7/3/2015

 
This was adapted from a Country Living recipe. The first attempt was both weirdly my least-favorite but my family's most-favorite baking attempt ever - I simply could not get over the weird snot-thick consistency of the blueberry topping that came from the original recipe's 3 tbsp of cornstarch, though my father and brother literally gobbled up over half the tart in the space of a morning. A second try not only improved the texture but the appearance considerably, and after substituting lactose-free milk for whole milk, I was also able to enjoy it tablet free! With the sweetness dialed down somewhat and a few extra steps added to improve custard and topping consistency, the second one disappeared nearly as quickly as the first.
Picture
  • 1 graham cracker crust, either store-bought or hand-made
The custard:
  • 1.25 cups whole milk
  • 2 large egg yolks
  • 1/4 cup sugar
  • 2 tbsp cornstarch
  • 1/2 tsp vanilla extract
  • 1 tbsp unsalted butter
The blueberry topping:
  • 4 cups fresh or frozen blueberries
  • 1/3 cup sugar
  • 1.5 tbsp cornstarch
  • 3/4 cups water
  • 1 tbsp lemon juice
  • 1 tbsp butter
  1. In a saucepan, cook the milk, egg yolks, sugar, and cornstarch over medium heat, stirring constantly, until mixture boils and thickens. Stir in vanilla and butter. Transfer custard to a shallow dish to cool.
  2. Meanwhile, in a saucepan, mix 1 cup of blueberries with sugar over medium to high heat. Stir occasionally, until the blueberries start to soften and burst and become a slurry. Mix the cornstarch into the water, then pour into the saucepan. Bring to a boil while continuing to stir, until the mixture thickens. Stir in lemon juice and butter, then remove from heat and let cool. Gently stir in remaining 3 cups of berries.
  3. Once the custard is near room temperature, spread it into the bottom of the graham cracker crust. Top with the berry mixture and refrigerate until set.
Note: If you're going to use lactose-free milk instead of whole milk, you might want to dial down the sugar amount for the custard slightly, as lactose-free milk tends to be sweeter. The filling can be made a day ahead and refrigerated separately. To prevent the custard from forming a film, press cling film all over the surface.

ARCHIVE: Creme Brulee

1/1/2015

0 Comments

 
  • 6 egg yolks
  • 4 tablespoons white sugar
  • 1/2 teaspoon vanilla extract
  • 2 1/2 cups heavy cream
Servings: 5
  1. Preheat oven to 300 degrees F (150 degrees C).
  2. Beat egg yolks, white sugar, and vanilla extract in a mixing bowl until thick and creamy.
  3. Pour cream into a saucepan and stir over low heat until it almost comes to boil. Remove the cream from heat immediately. Pour a little of the hot cream into the egg yolk mixture and whisking briskly, pour the cream/yolk mixture into the rest of the cream and whisk. There will be a lot of foam on the top. Skim this off with a strainer and throw away. 
  4. Pour the hot mixture into individual serving dishes or ramekins and place in a baking dish. Set the dish with the ramekins in it on your oven shelf, then pour hot water in the dish so the water comes halfway up the sides of the ramekins. Bake at 375 anywhere from 15 to 30 minutes. They are done when you shake the dish gently and the brulees jiggle just slightly in the middle. The jiggle shouldn't be a liquid jiggle, but more of a gelatin-like jiggle. 
  5. Remove from oven and let the brulees cool in the water bath for about 15 minutes, then remove and put the brulees in the refrigerator to chill. Just before serving, sprinkle the tops with white granulated sugar and shake off the excess. Place under broiler to caramelized or use a propane torch to burn the tops. Serve immediately.
0 Comments

ARCHIVE: Black Pansy Panna Cotta (from Sooke Harbour House)

1/1/2015

0 Comments

 
  • 2 cups pansies with 1" of stem (finely chopped)
  • 1.5 cups homogenized milk
  • 1 cup whipping cream
  • 3/4 cup fireweed honey
  • 2 packages gelatine leaves (soaked in cold water for 10 minutes)
  • 6 5oz ramekins
  1. Place milk, cream, and honey in a medium sized pot and heat to 150 degrees. Remove milk mixture from heat and let rest for five minutes.
  2. Remove gelatine from cold water and add to milk mixture; stir until gelatine is fully dissolved.
  3. Add pansies and stir for one more minute.
  4. Divide the finished mixture between ramekins and refrigerate for at least 2 hours. When ready to serve, remove the Panna Cotta from the ramekins by dipping them into hot water for one minutes and turning them upside down on a serving plate.
0 Comments
    Picture

    Sweet Enough

    Part of the reason I started baking was because I like my goodies to be less obviously sweet - I want to taste the flavor, not just the sugar. So most of these recipes will have the sugar dialed down.

    This site also acts as my mobile recipe box, so instructions are often pared down to a minimum - very few frills but for some hints and suggestions!

    RSS Feed

    Categories

    All
    Alcohol
    Almond
    Apple
    Avocado
    Baklava
    Banana
    Bars
    Biscotti
    Blackberry
    Blueberry
    Bread
    Buttercream
    Cake
    Candy
    Carrot
    Cheese
    Cherry
    Chickpea
    Chinese
    Chocolate
    Cider
    Cobbler
    Coconut
    Coconut Milk
    Cookie
    Corn
    Cranberry
    Cream
    Cream Cheese
    Creme Brulee
    Crumb
    Crust
    Cupcake
    Custard
    Dates
    Decoration
    Dip
    Dough
    Doughnut
    Dumpling
    Easy Peasy
    Egg
    Filling
    Flowers
    Frosting
    Fruit
    Garnish
    Gelee
    Granola
    Green Tea
    Honey
    Ice Cream
    Icing
    Jam
    Lamb
    Lemon
    Lime
    Lobster
    Lotus Seed
    Macaron
    Mango
    Marshmallow
    Meringue
    Mochi
    Muffin
    Nectarine
    Nutella
    Nuts
    Oat
    Oats
    Onion
    Orange
    Pancake
    Panna Cotta
    Peach
    Peanut Butter
    Pear
    Pecan
    Phyllo
    Pie
    Pistachio
    Plum
    Popsicle
    Pound Cake
    Pumpkin
    Quiche
    Raspberry
    Red Bean
    Rhubarb
    Rice
    Ricotta Cheese
    Rugelach
    Sauce
    Savory
    Scone
    Sesame
    Shortbread
    Soup
    Sponge
    Sponge Cake
    Strawberry
    Streusel
    Tart
    Tofu
    Topping
    Torte
    Vegetable
    Vinaigrette
    Walnut
    Watermelon
    Yogurt
    Zucchini

    Archives

    November 2020
    October 2020
    July 2020
    May 2020
    April 2020
    March 2020
    October 2019
    December 2018
    October 2018
    August 2018
    April 2017
    July 2016
    May 2016
    March 2016
    February 2016
    January 2016
    December 2015
    November 2015
    October 2015
    September 2015
    July 2015
    June 2015
    May 2015
    April 2015
    February 2015
    January 2015
    November 2014

© 2019 Jacqueline Teng | DragonWarden