DragonWarden
  • Adventures
  • The Oven
  • The Un-Tea Party
  • Secret Ingredients
  • About

Lemon Bars

11/27/2020

0 Comments

 
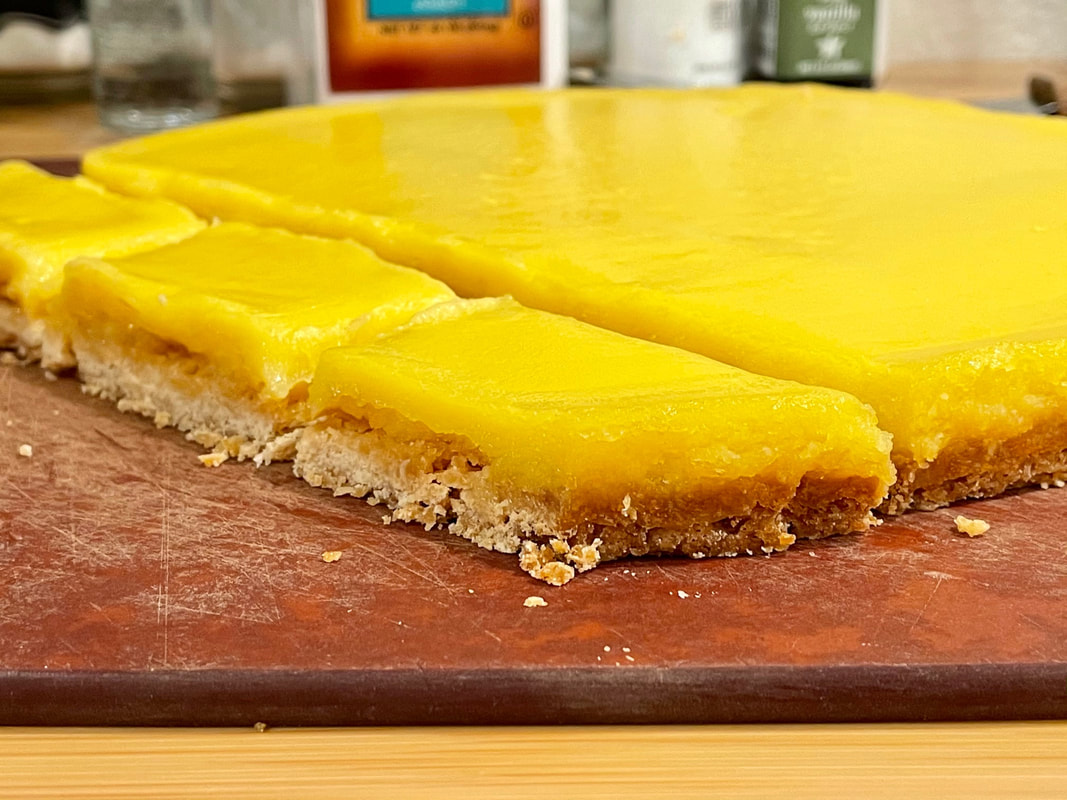
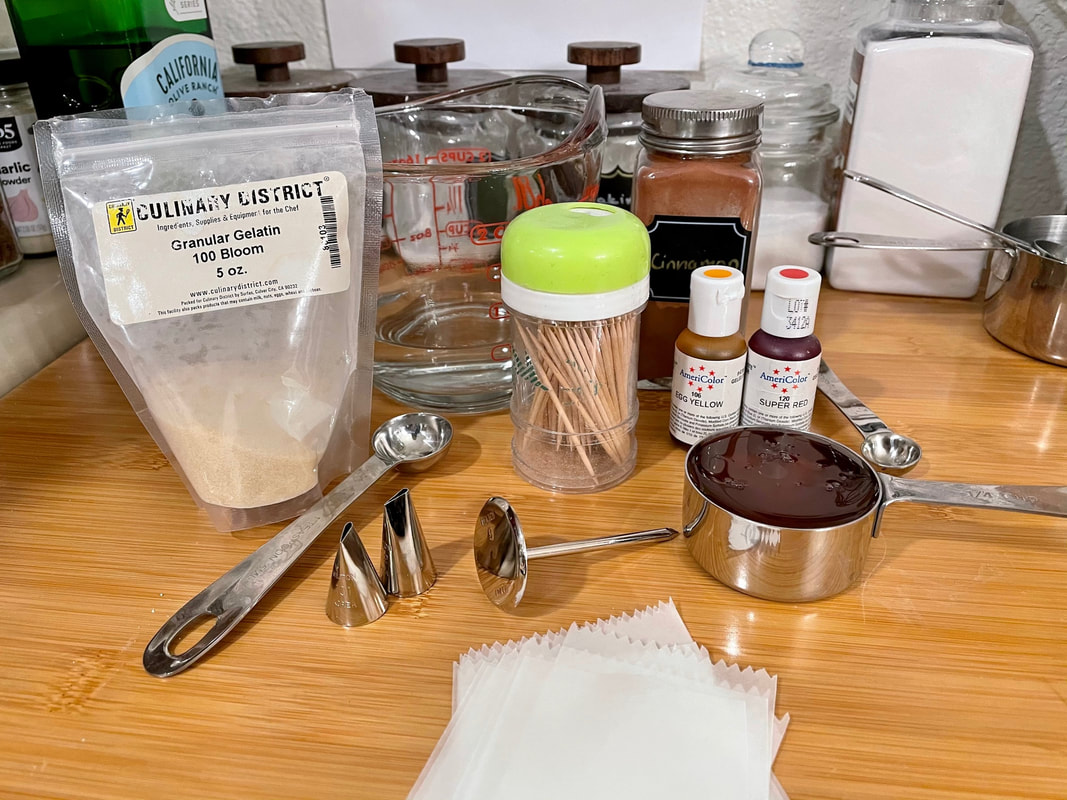
This started out as an experiment as I had read a Cook's Illustrated article on how to make an intensely lemon-y lemon bar without the fillers starting to get in the way. It's a tough balance between the liquid - the lemon juice - and the dry ingredients - the flour - because you can't really increase one without increasing the other. Adding more lemon means it becomes a runny mess unless you add more flour, but adding more flour simply cuts into the lemony taste.

Unfortunately, I've since lost the link to the Cook's Illustrated article, but it talked about a secret ingredient - cream of tartar. And from its detailed descriptions, I worked backwards from a standard lemon bar recipe and reconstructed the following for a crisp, crunchy shortbread topped with a truly lemony curd.
Picture
  • one portion of shortbread crust
  • ⅔ cup lemon juice (about 3-4 lemons)
  • 3 eggs + 3 egg yolks
  • 1 cup sugar
  • ¼ tsp salt
  • 2 tsp cream of tartar
  • 2 tsp zest
  • 2 tbsp flour
  • 4 tbsp butter, cut into four 1 tbsp chunks
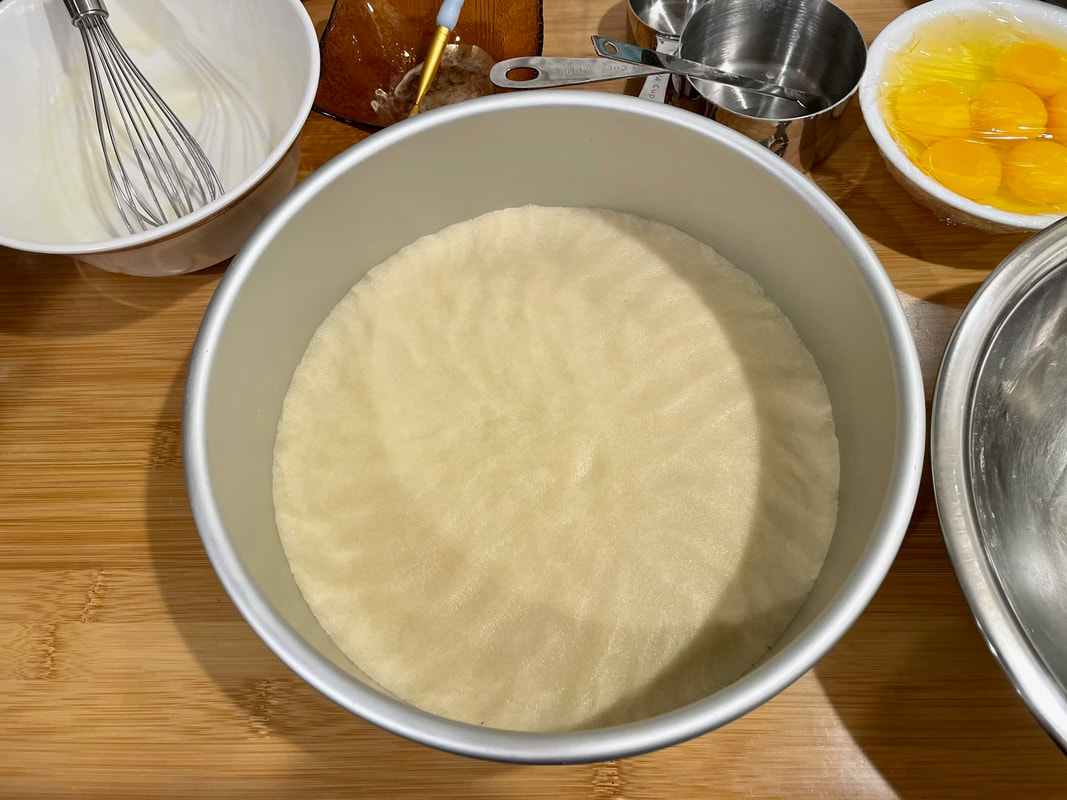
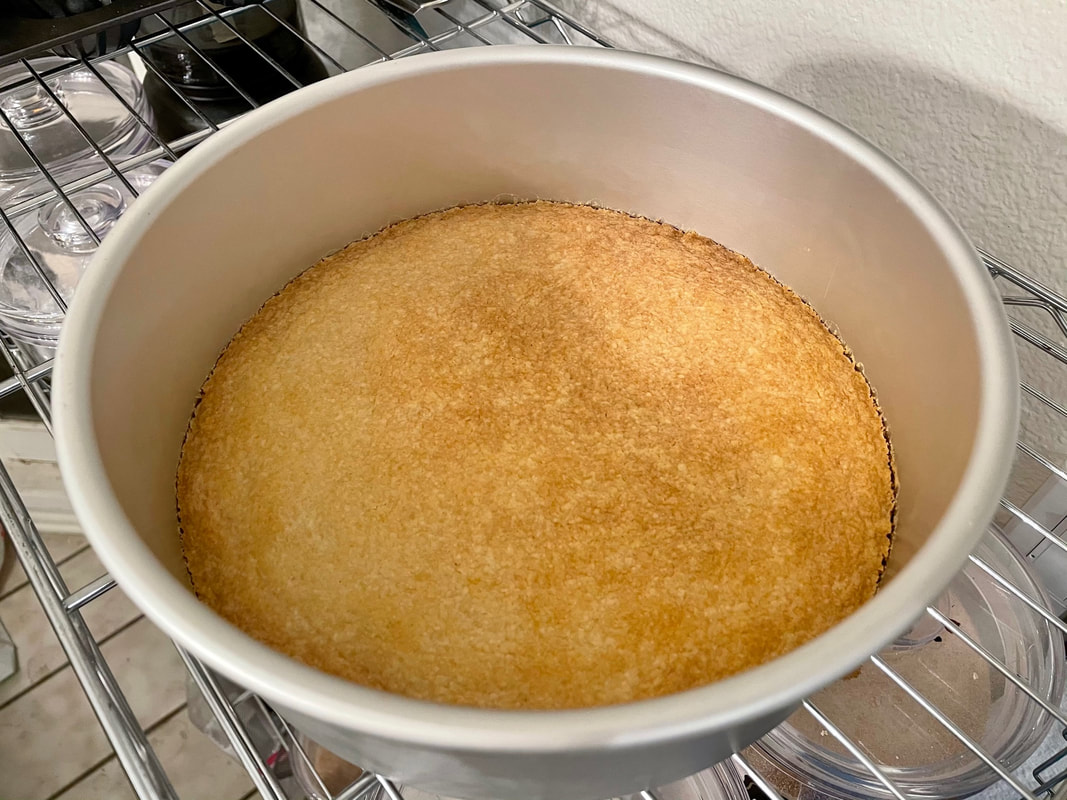
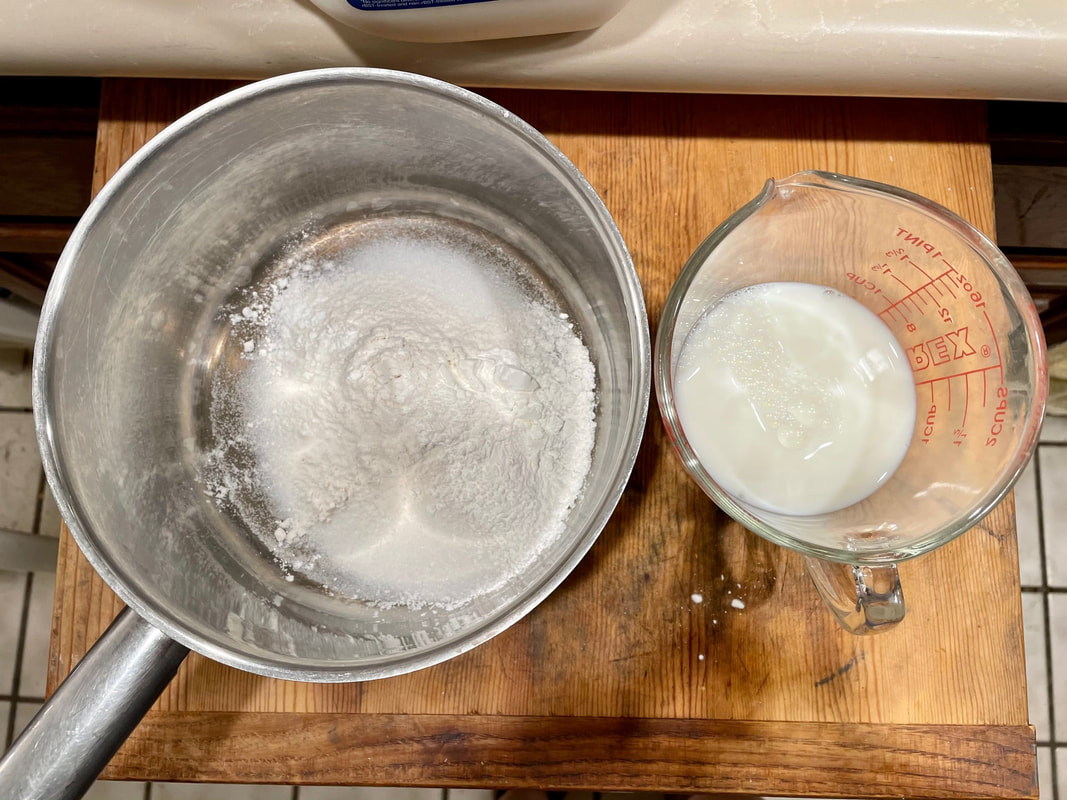
  1. Make one portion of the shortbread crust.
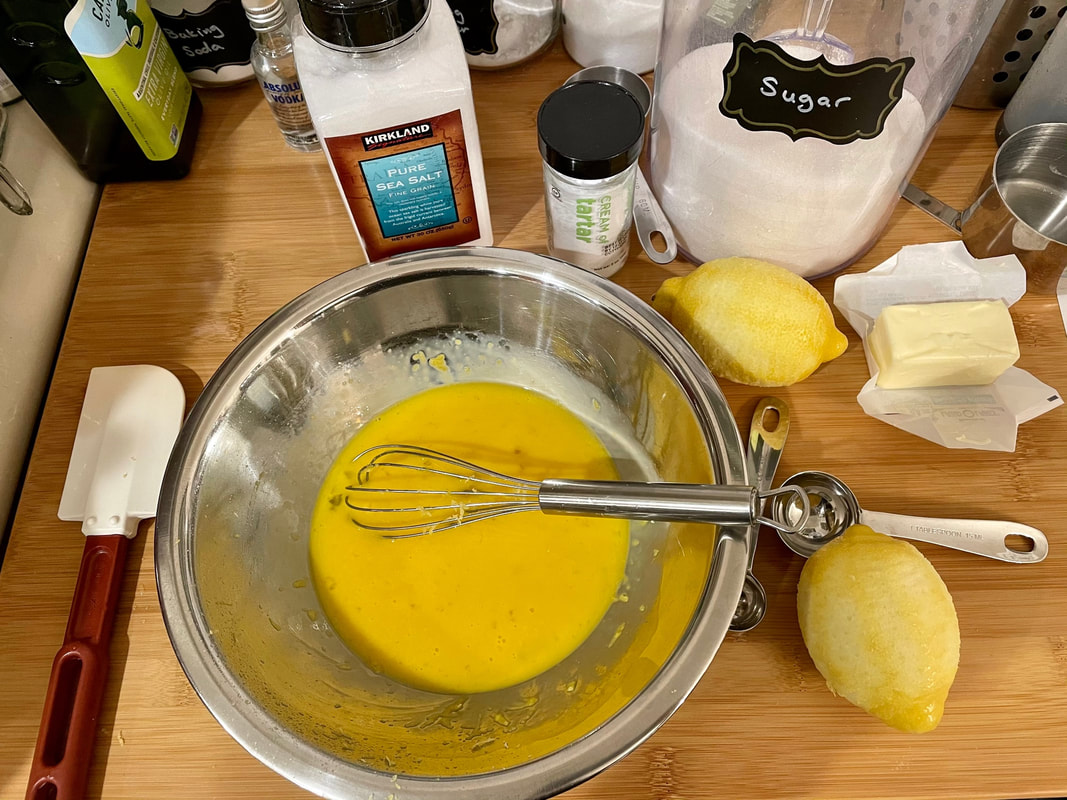
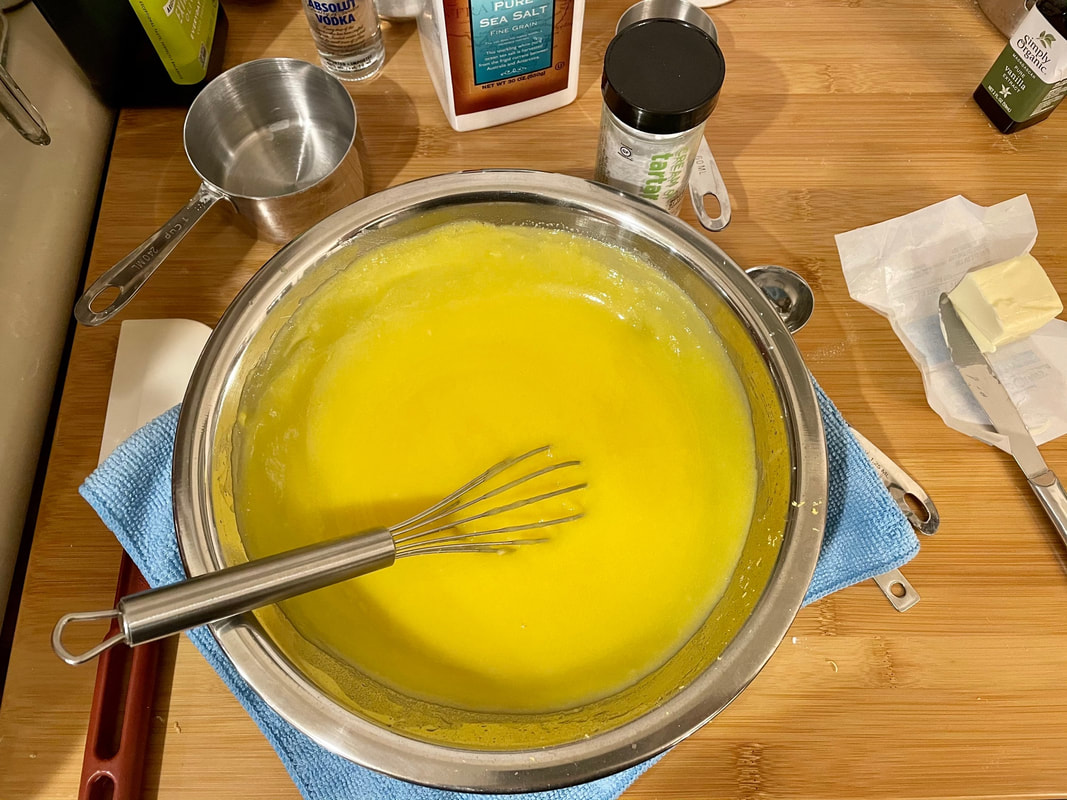
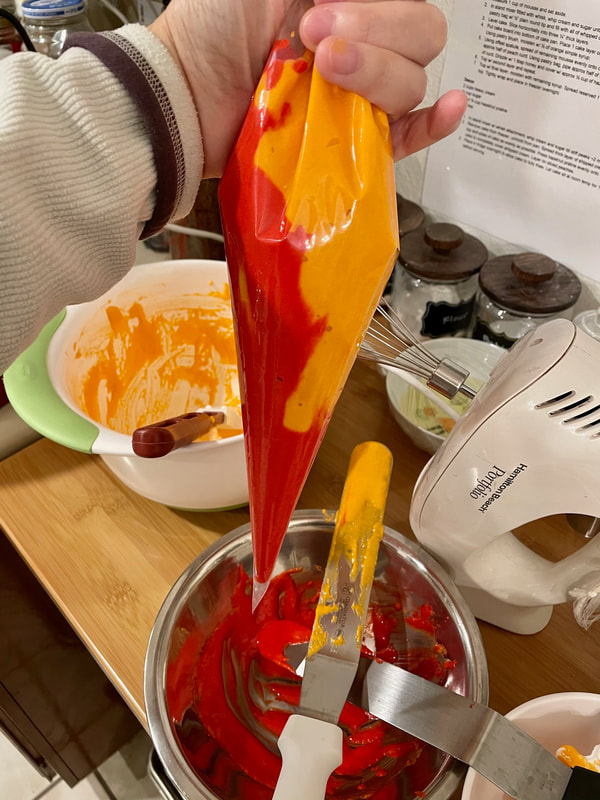
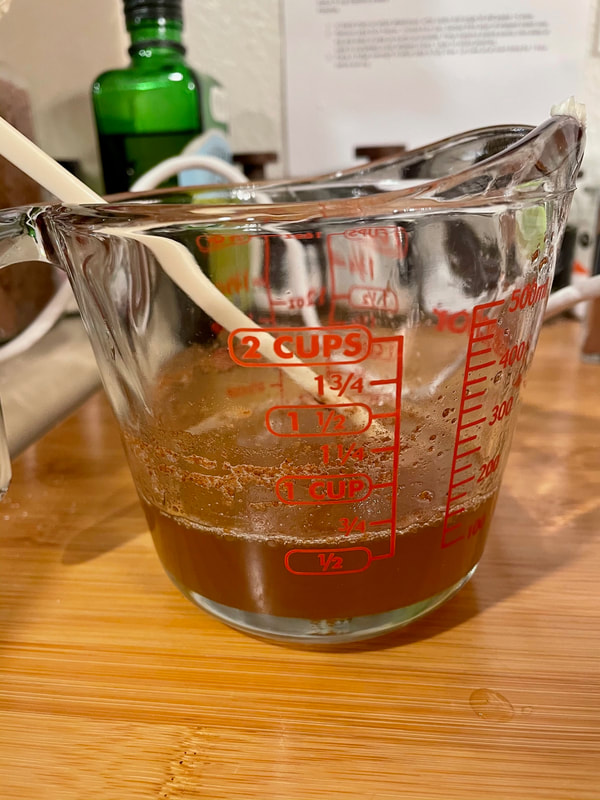
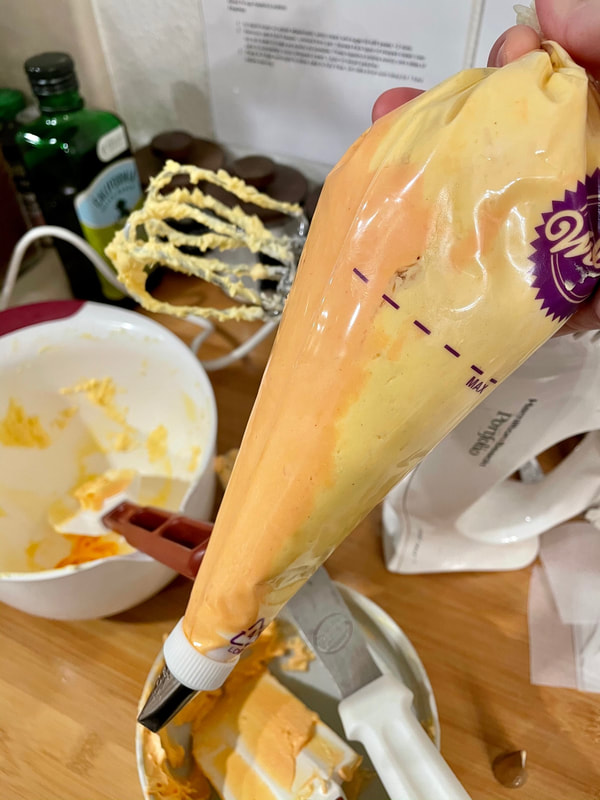
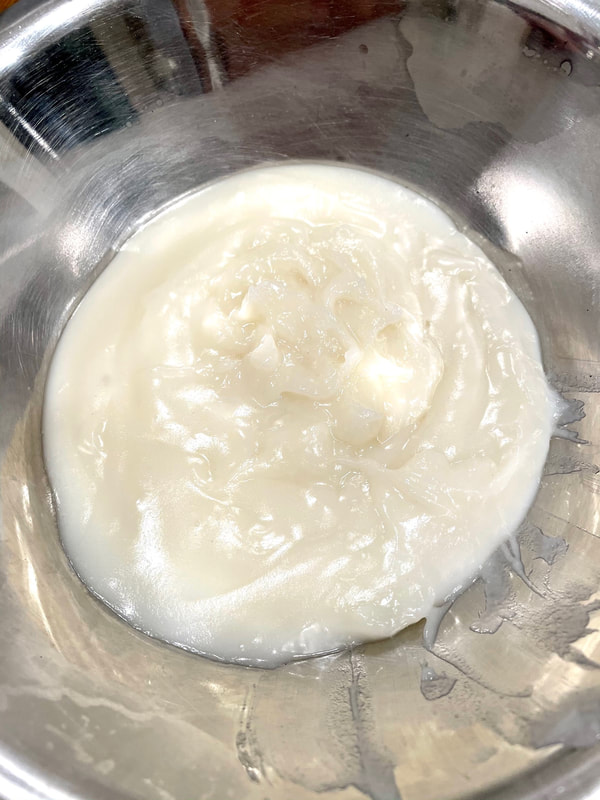
  2. While the shortbread is cooling, combine all filling ingredients except the butter in a double boiler over medium heat. Continuously whisk while the double boiler is simmering, until the mixture has thickened to about a custard consistency, with faint trails left behind by the whisk.
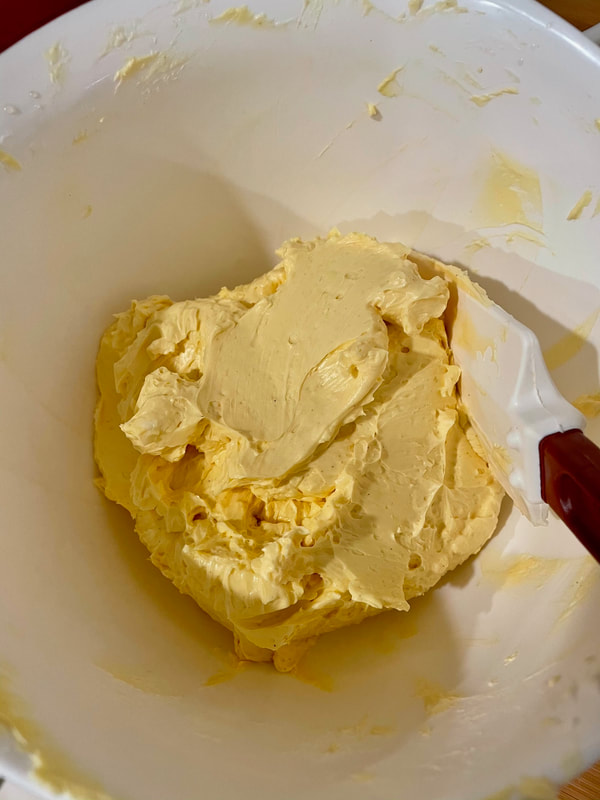
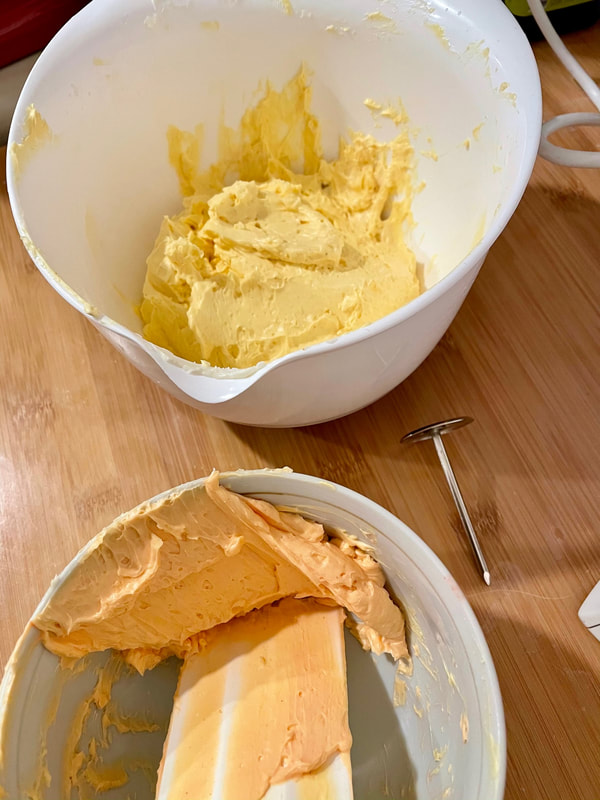
  3. Remove the mixture from the heat and whisk in the butter one tbsp at a time, mixing until all the butter has been incorporated. Strain through a sieve into a clean bowl.
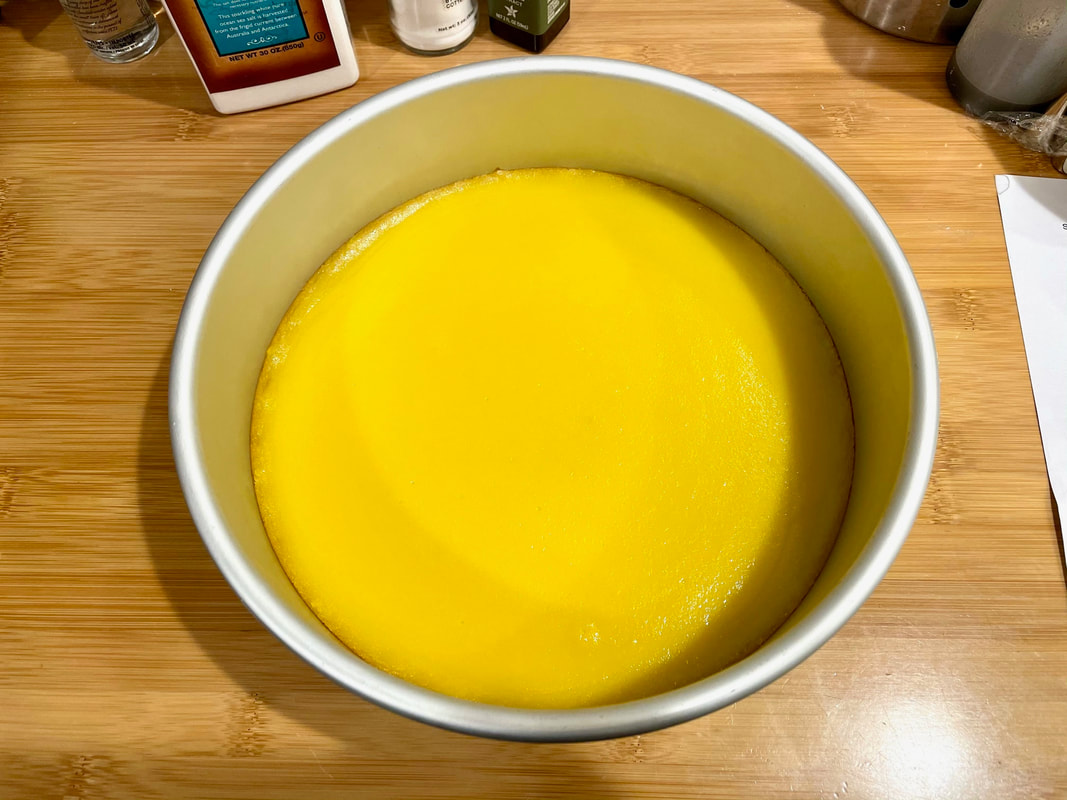
  4. Pour over the shortbread crust in about a ½” thick layer and return to the oven for about 10 minutes. The filling should have only the slightest wobble to it when you shake it.
  5. Let cool completely, remove from pan, then cut into rectangular pieces.
0 Comments

Macaron filling: Raspberry Buttercream

11/16/2020

0 Comments

 
The raspberry buttercream is one of my favorites as a macaron filling - a little tartness to take off that edge of berry sweetness. 
Picture
  • 1/4 cup soft butter
  • 1/2 to 1_1/2 cups confectioners sugar, divided
  • 4 tablespoons raspberry jam
  • 1 tablespoon cream
  • 1 teaspoon vanilla extract
  1. Blend together the butter and 1/2 cup of sugar. Add in jam, cream, and vanilla extract.
  2. Gradually continue adding sugar to taste or until the mixture is soft enough to sandwich two macarons gently together. 
0 Comments

Macaron

11/16/2020

0 Comments

 
One of the iconic tests of a baker's skill, the macaron, was something I had never had an inclination to try. Not only because of their storied fussiness, but quite simply, I hadn't liked to eat them. But! I was introduced to an episode or two of the Great British Baking Show in which featured a showstopper piece that used tiny, adorable maroon macarons ... and I was hooked. I absolutely had to try making them because they were just so cute and tidy-looking.

Well, as happy endings go, this won the slam dunk, as in the process of having to taste-test my own work, I started learning an appreciation for the taste and texture of the macaron as I tried to figure what the heck made them so special to other consumers. And now, I love both playing around with these little bakery sandwiches and consuming the results! Win-win!

Picture
  • 100 g egg whites, room temperature (about 3 large eggs)
  • 90 g granulated sugar
  • 1/4 tsp cream of tartar (800mg)
  • 130 g almond flour
  • 130 g powdered sugar
Note: If you would like more details about the process (along with why you should or should not do certain things), this website was an excellent resource during my research. It helped me make proper macarons right out of the gate, no failures at all!
  1. 1-3 days before making: Separate egg whites and keep them in a container in the fridge. You may cover them with a sheet of plastic wrap and poke several holes into the top. When ready to make the macarons, take the egg whites out of the fridge an hour beforehand and let them come up to room temperature.
  2. (optional) Prepare a guide for the macarons by printing out rows of one-inch circles on 4 sheets of paper and lining them on the bottoms of two baking sheets.
  3. Lay parchment paper over two baking sheets, cutting them down to the size of the sheet tray. It's important not to fold over/overlap the parchment paper on itself, otherwise the macarons won't bake evenly.
  4. Gently sift the confectioners sugar and almond flour into a bowl (don't try to force it through the sieve), throwing away the large bits that are left behind (don't be afraid to toss as much as a teaspoon's worth if necessary). Transfer to a food processor and pulse a few times for several seconds at a time. Then sift back into a bowl, once again throwing away the large pieces.
  5. Add the room temperature egg whites into a very clean bowl.
  6. Using an electric mixer, whisk egg whites. Once they begin to foam add the cream of tartar and then SLOWLY start to add the granulated sugar while you whip to the soft peak stage.
  7. (optional) You can add food coloring if desired at any point between now and just before step 10. However, if you're planning on making more than one color of macaron from a single batch of batter, I would suggest you add it toward the end of step 9, just as the batter is coming together into its "lava" form. The last few folds of the spatula to mix the color thoroughly will also help the batter achieve this final state. It may take a little practice to recognize when the batter is about to achieve this ideal phase, so I would suggest making it using a single color a few times first until you learn the timing of each phase the batter goes through.
  8. Add the vanilla. Continue to beat until stiff peaks form.
  9. Begin folding in 1/3 of the dry ingredients. Once incorporated, carefully add the remaining dry ingredients and fold gently. It will go through a stage in which the batter looks granular, but keep folding and it will slowly start to incorporate and smooth out.
  10. The final mixture should look like flowing lava, and be able to form a figure eight in the bowl without breaking the stream of falling batter. Spoon into a piping bag with a medium round piping tip and you’re ready to start piping.
  11. If you want, you can glue down the parchment paper onto the baking sheet with dabs of batter under the corners. Pipe dollops onto the parchment paper by holding the bag straight up and down, squeezing, and then lifting with a circular motion of the tip. Once all the macarons are piped, lift up the baking sheet and let it drop on the counter several times to release air bubbles. Allow to sit for at least 40 minutes, or until a tacky "skin" forms on top that won't stick to your finger enough to break away if you tap it gently. 
  12. Bake at 300F for 7 minutes, rotate tray, then bake for another 5-8 minutes. The macarons are done when nudging them does not feel like you'll displace the top shell of the macaron from its foot. Allow to cool completely before removing from baking sheet, or else the foot might stick.
Note: Macarons are best made 1-3 days before being consumed. Even if you misjudge and overbake the macaron, they will soften over time. Pipe filling into their centers, then keep them in a covered container, and they will gradually absorb moisture and become more chewy.
0 Comments

Satin Buttercream Frosting

11/16/2020

0 Comments

 
What gives pipe-able frosting its structure and stability is usually sugar. Lots, and lots, and lots of sugar. Which I can't stand. So during one of my many long searches for various flavors of icing that don't need so much sugar, I stumbled across this recipe ... and it set beautifully. While I sometimes wish it had a more neutral sweet taste than the honey, obviously honey itself pairs well with tons of baked goods, so this will be a good go-to for decorations and piping.
Picture
  • 1 cup butter softened to room temperature
  • 1/2 cup room-temperature water
  • 1/4 cup raw honey or favorite Keto liquid sweetener
  • 1 tsp. sustainably-sourced gelatin
  • 1/8 tsp. cinnamon
  • teeny pinch sea salt
  • (optional) 1/16 tsp. powdered stevia
  1. Place water in small microwavable bowl and sprinkle gelatin over its surface. Allow gelatin to dissolve for 1 minute. Heat in microwave for 10 seconds at a time, stirring between each heating, until gelatin dissolves completely.
  2. Stir in honey to dissolve. Also stir in the cinnamon, stevia and sea salt. Allow to cool to room temperature.
  3. Place butter in large metal bowl and beat until creamy with hand beaters; then add honey-gelatin water in a slow stream. Beat until frosting is smooth and all honey water is incorporated evenly.
  4. Frost your cooled baked good at this point. (If you refrigerate frosting before using, melt it down slightly again, beat and refrigerate until you have reached the right temperature and texture. Or bring it to room temperature slowly.)
Notes (taken directly from the author's website):
  • Room temperature Satin Buttercream is ready to eat. Frost any cake, the middle, top and sides and serve!
  • If you refrigerate this frosting it firms up and will not stick to the cake as well.
  • This Satin frosting will hold the shape of fancy, curvy frosting at room temperature, no wilting, no problem. But if you make cakes ahead of time and refrigerate them until the event, pull out the cake 1 hour or more before serving.
  • The only thing not to do with this buttercream is to frost the middle, top and sides, chill and serve. Nope! It will break off in slabs and pieces. If you refrigerate a fully frosted cake, let it first come to room temperature before serving. It’s best to serve the cake right after it’s made; or do like in the photos: pipe pretty shapes on top, fill the middle, but don’t frost the sides and all over, if you plan to chill it.
0 Comments

(Magical) Cream Cheese Frosting

11/16/2020

0 Comments

 
I love cream cheese frosting but hate the amount of sugar that's needed to stiffen it up if you're planning on doing anything more than slapping fat dollops onto a cupcake with a butter knife. So on one of my quests to find a less-sugared pipe-able cream cheese frosting, I stumbled across this - which I was skeptical of at first! But wonder of wonders, it actually held up beautifully as promised; even the tiny ridges in the examples below held up for hours at a time at room temperature! AND it preserved the tangy taste of the cream cheese. This was definitely worth the extra effort!
Picture
  • 1 cup granulated sugar
  • 1/4 cup all-purpose flour
  • 3 tablespoons cornstarch
  • 1/4 teaspoon salt
  • 1 1/2 cups milk
  • 1 tablespoon lemon juice
  • 1 teaspoon vanilla extract
  • 4 ounces cream cheese softened but still cool
  • 1/2 cup unsalted butter softened but still cool
  1. Sift sugar, flour, cornstarch and salt into a small bowl and whisk to combine.
  2. Pour milk into a small pot. Gradually whisk in the dry ingredients, ensuring there are no lumps.
  3. Place over medium-low heat and cook, stirring often, until thickened. Pass mixture through a fine mesh strainer and into a heat-safe container.
  4. Refrigerate for 2 hours.
  5. Place the cooled mixture in a large mixing bowl, along with the lemon juice and vanilla, and whip on medium-high speed.
  6. Whip in cream cheese, a tablespoon at a time, allowing each addition to fully incorporate before adding the next. 
  7. Whip in butter, a tablespoon at a time, allowing each addition to fully incorporate before adding the next.
  8. Turn the mixer up to high speed, and continue to whip until very fluffy.
0 Comments

Pumpkin Cupcakes

11/16/2020

0 Comments

 
While I started baking to accommodate my taste buds, now it's become an outlet for accommodating my eyes as a visual creative outlet. While I had started with browsing cake decorations, it occurred to me that baking cupcakes would give me many more opportunities to decorate on a mini-canvas ... and mini cupcakes even more so! And since I had some leftover pumpkin puree from my Fall baking, it seemed the perfect time to dig up some mini pumpkin cupcake recipes such as this one, which was moist and fluffy and more spice than sugar - my perfect combo.
Picture
  • 1 cup (125 g) flour
  • 1 tsp baking powder
  • 1/2 tsp baking soda
  • 1/2 tsp salt
  • 1 tsp ground cinnamon
  • 1 1/2 tsp pumpkin pie spice OR:
    • 1/2 tsp ground allspice
    • 1/2 tsp ground ginger
    • 1/4 tsp ground nutmeg
    • 1/4 tsp ground cloves
  • 1/2 cup canola or vegetable oil
  • 2 large eggs
  • 3/4 cup (150 g) packed light or dark brown sugar
  • 1 cup (225 g) canned or fresh pumpkin puree
  • 1 tsp vanilla
  1. Preheat oven to 350 F. Line cupcake pans with cupcake liners.
  2. Sift and whisk flour, baking powder, baking soda, salt, cinnamon, and pumpkin pie spices together in small bowl. In another large bowl, whisk oil, eggs, brown sugar, pumpkin, and vanilla extract together until combined. Combine dry ingredients into the wet ingredients in portions of 1/3, combining completely between each addition.
  3. Pour/spoon the batter into the liners, or if doing mini cupcakes, fill a piping bag and snip off the tip to help fill the cupcake liners. Fill each liner 2/3 full. For regular sized cupcakes, bake for 20-22 minutes, or until a toothpick inserted in the center comes out clean. For mini sized cupcakes, bake for about 12-13 minutes.
0 Comments

Dairy-Free Pumpkin Pie

11/16/2020

0 Comments

 
As I've grown older, sadly, I've also grown more lactose-intolerant. While usually this is easily fixable with a tablet or two of Lactaid, I can also get very lazy about taking them (not to mention I don't want to be buying a box of them every other week). So I searched for a dairy-free version of pumpkin pie, and lo and behold, the internet delivered! Here's a version that I adapted from here.
Picture
  • 1 pie crust
  • 1 teaspoon ground cinnamon
  • 1/2 teaspoon ground ginger
  • 1/4 teaspoon ground nutmeg or allspice
  • 1/4 teaspoon ground cloves
  • 1/2 teaspoon salt
  • 1/2 tbsp corn starch
  • 1 cup regular, full-fat, canned coconut milk (make sure to shake up or mix the coconut milk before measuring in case the fat has separated)
  • 2 large eggs + 1 egg white
  • 1/3 cup brown sugar, firmly packed
  • 1/4 cup white sugar
  • 1 tsp vanilla
  • 1 15-oz can pumpkin puree (or 15-oz of fresh pumpkin puree)
  • 1 teaspoon vanilla extract
  1. Line a 9" pie pan with a single pie crust and put in the freezer to chill. Preheat oven to 425 F.
  2. In a small bowl, whisk together the spices and salt. In another small bowl, mix the corn starch into the coconut milk.
  3. In a large bowl, beat the eggs. Then beat into the eggs both sugars, vanilla, pumpkin, and spices. Whisk in the coconut milk.
  4. Pour the filling into your crust. Bake the pie for 15 minutes, then lower the oven temperature to 350 F (you may wish to put a heat shield on the crust rim now). Bake for about another 45 minutes or until a knife or toothpick in the center comes out clean.
  5. Once done, cool on a wire rack before serving.
Note: The pie pictured also uses the gelatin-stabilized Chinese whipped cream frosting and some hazelnut praline sprinkled on top.
0 Comments
    Picture

    Sweet Enough

    Part of the reason I started baking was because I like my goodies to be less obviously sweet - I want to taste the flavor, not just the sugar. So most of these recipes will have the sugar dialed down.

    This site also acts as my mobile recipe box, so instructions are often pared down to a minimum - very few frills but for some hints and suggestions!

    RSS Feed

    Categories

    All
    Alcohol
    Almond
    Apple
    Avocado
    Baklava
    Banana
    Bars
    Biscotti
    Blackberry
    Blueberry
    Bread
    Buttercream
    Cake
    Candy
    Carrot
    Cheese
    Cherry
    Chicken
    Chickpea
    Chinese
    Chocolate
    Cider
    Cobbler
    Coconut
    Coconut Milk
    Cookie
    Corn
    Cranberry
    Cream
    Cream Cheese
    Creme Brulee
    Crumb
    Crust
    Cupcake
    Custard
    Dates
    Decoration
    Dip
    Dough
    Doughnut
    Dumpling
    Easy Peasy
    Egg
    Filling
    Flowers
    Frosting
    Fruit
    Garnish
    Gelee
    Granola
    Green Tea
    Honey
    Ice Cream
    Icing
    Jam
    Lamb
    Lemon
    Lime
    Lobster
    Lotus Seed
    Macaron
    Mango
    Marshmallow
    Meringue
    Mochi
    Muffin
    Nectarine
    Nutella
    Nuts
    Oat
    Oats
    Onion
    Orange
    Pancake
    Panna Cotta
    Peach
    Peanut Butter
    Pear
    Pecan
    Phyllo
    Pie
    Pistachio
    Plum
    Popsicle
    Pound Cake
    Pumpkin
    Quiche
    Raspberry
    Red Bean
    Rhubarb
    Rice
    Ricotta Cheese
    Rugelach
    Sauce
    Savory
    Scone
    Sesame
    Shortbread
    Soup
    Sponge
    Sponge Cake
    Strawberry
    Streusel
    Tahini
    Tart
    Tofu
    Topping
    Torte
    Vegetable
    Vinaigrette
    Walnut
    Watermelon
    Yogurt
    Zucchini

    Archives

    September 2021
    March 2021
    February 2021
    December 2020
    November 2020
    October 2020
    July 2020
    May 2020
    April 2020
    March 2020
    October 2019
    December 2018
    October 2018
    August 2018
    April 2017
    July 2016
    May 2016
    March 2016
    February 2016
    January 2016
    December 2015
    November 2015
    October 2015
    September 2015
    July 2015
    June 2015
    May 2015
    April 2015
    February 2015
    January 2015
    November 2014

© 2019 Jacqueline Teng | DragonWarden