DragonWarden
  • Adventures
  • The Oven
  • The Un-Tea Party
  • Secret Ingredients
  • About

Phyllo Pie Crust

3/16/2016

1 Comment

 
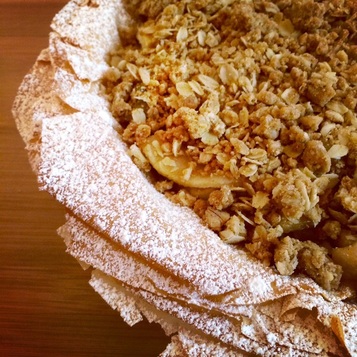
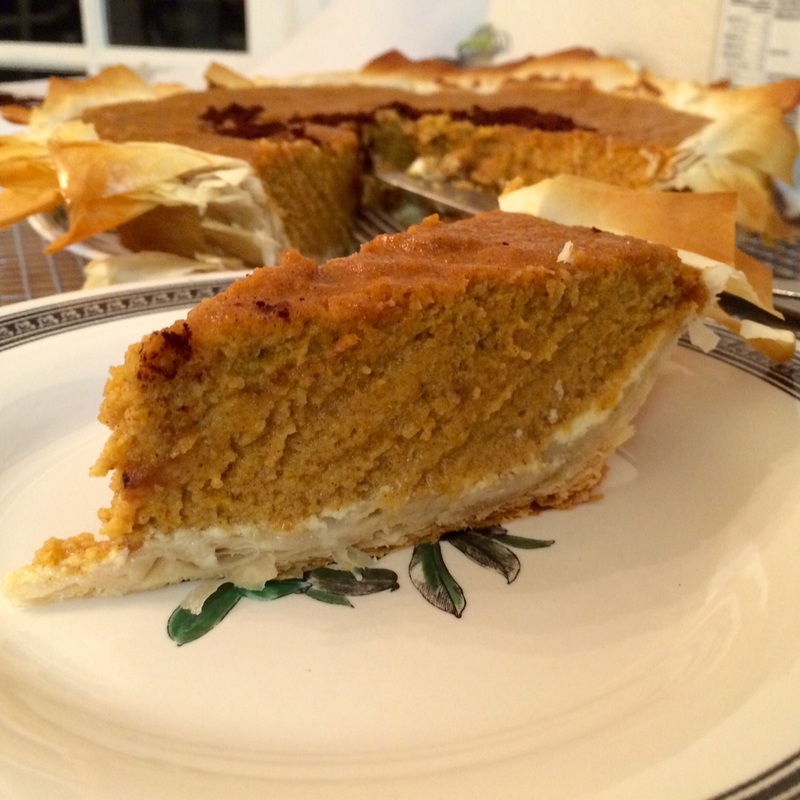
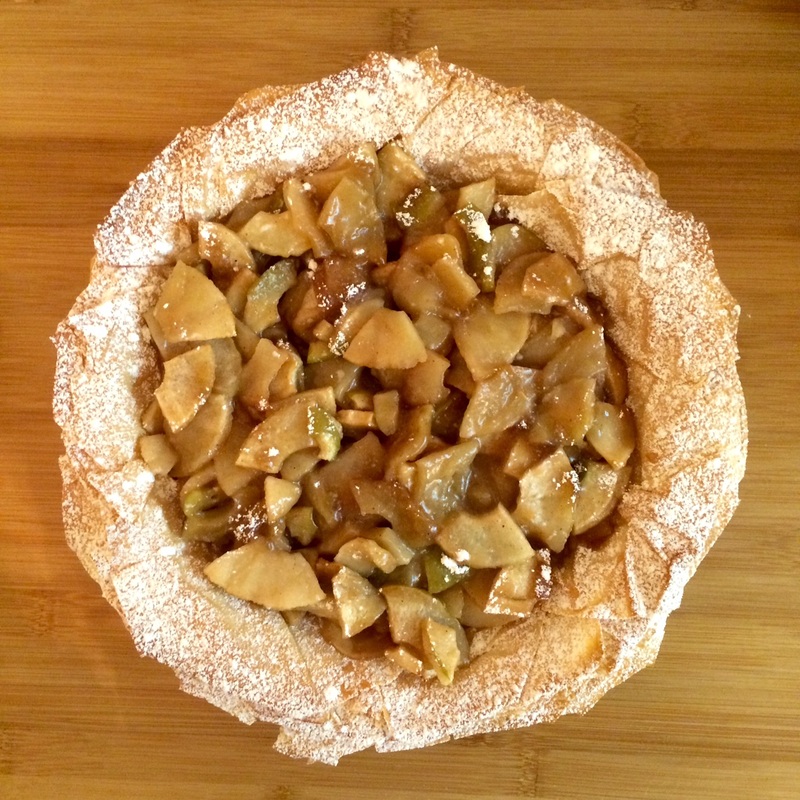
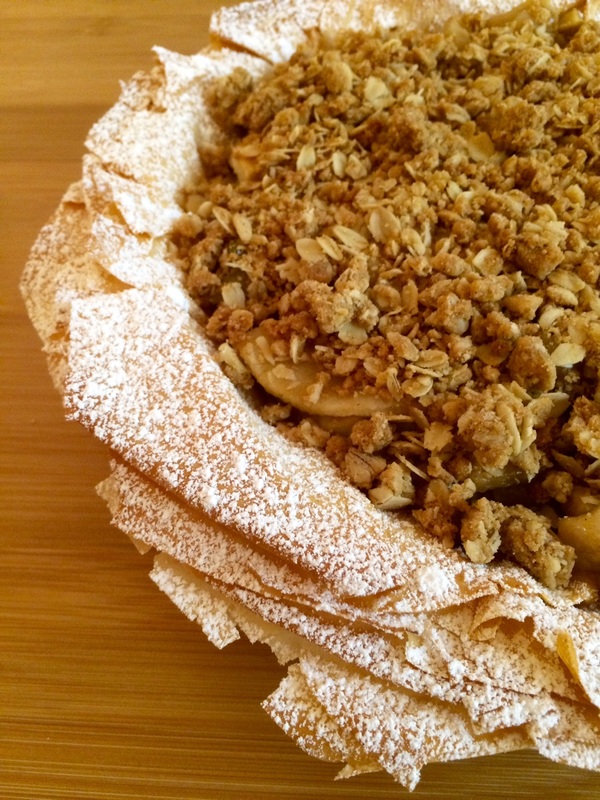
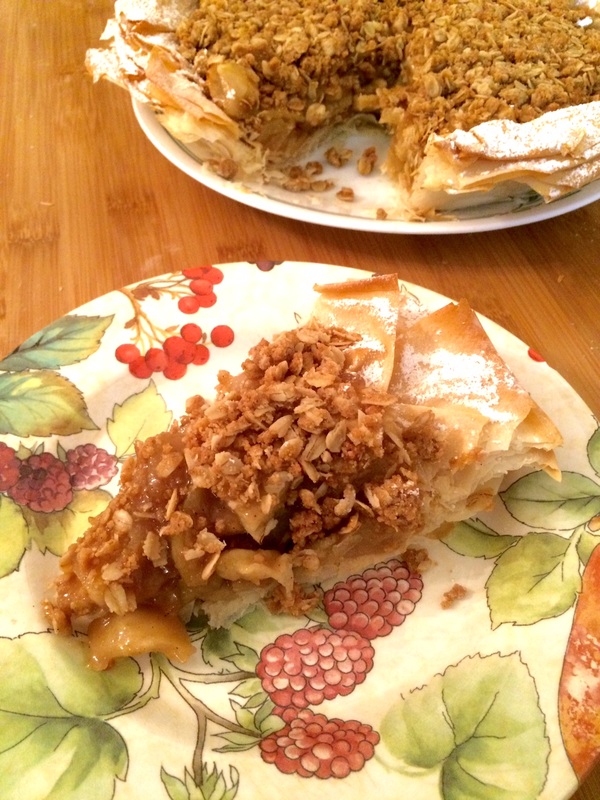
I love the delicate crunchiness of phyllo, and always wanted to try it out in a pie. It's not the easiest thing to work with in terms of both handling and baking with fillings, but perseverance found a way! Presentation-wise, I think a deep dish pie pan looks more interesting than a standard pie, but either way, this is an interesting twist on the conventional crust. Just be prepared to serve it with both a knife and a fork - for all of phyllo's flakiness, it's not the easiest to cut through with just the edge of a fork, particularly the bottom of the crust.
Picture
  • 1/2 package of phyllo dough (defrosted)
  • 1 stick of unsalted butter, melted
  • (optional) sugar
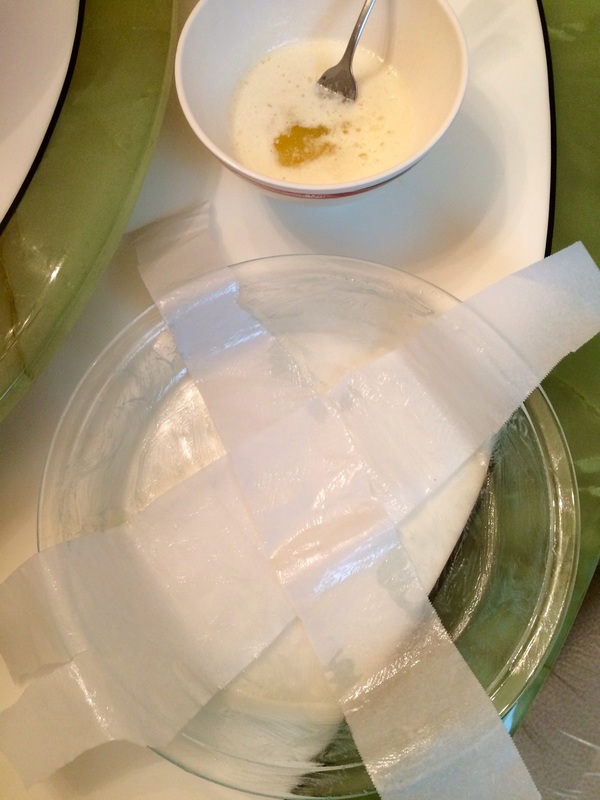
  1. Using the melted butter, coat the pie pan.
  2. Lay two strips of parchment paper, about 2" wide each and long enough to overhang the pan by another 2", in an "x" across the pie pan and gently press them in. Also butter the parchment paper.
  3. Set the oven to 350 F.
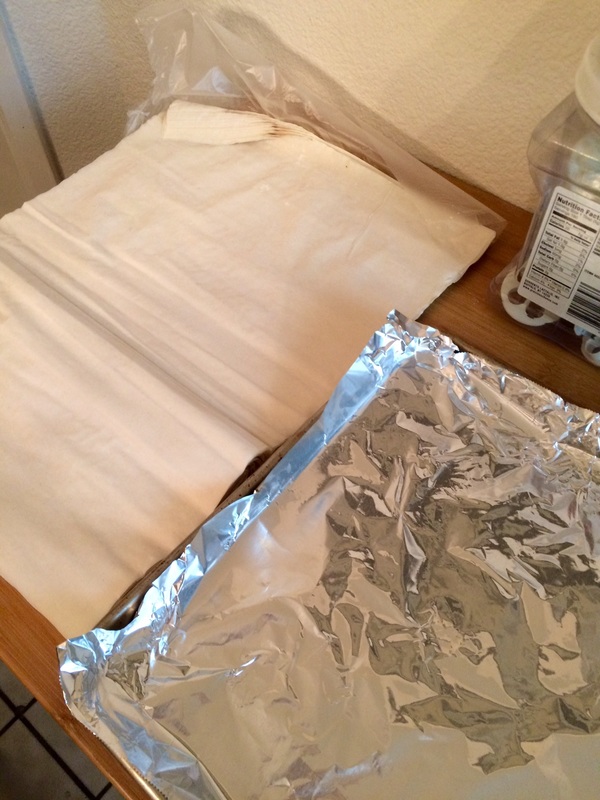
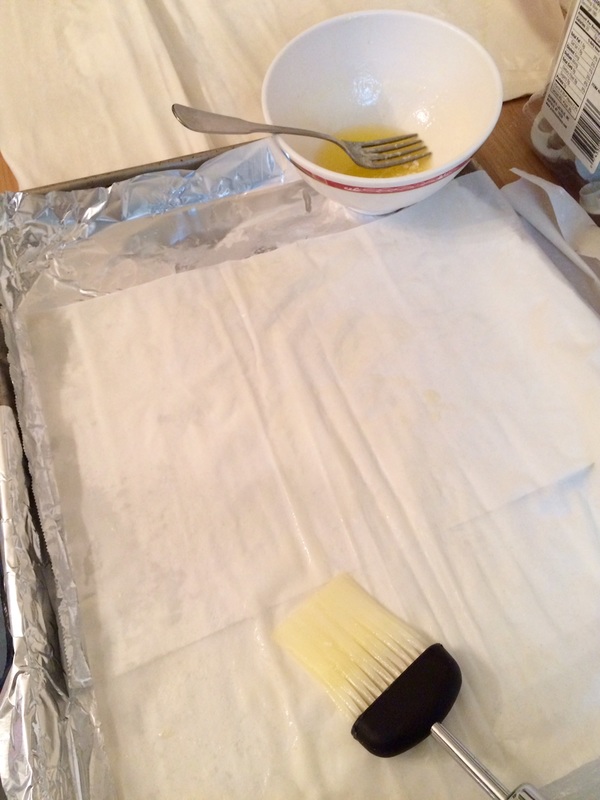
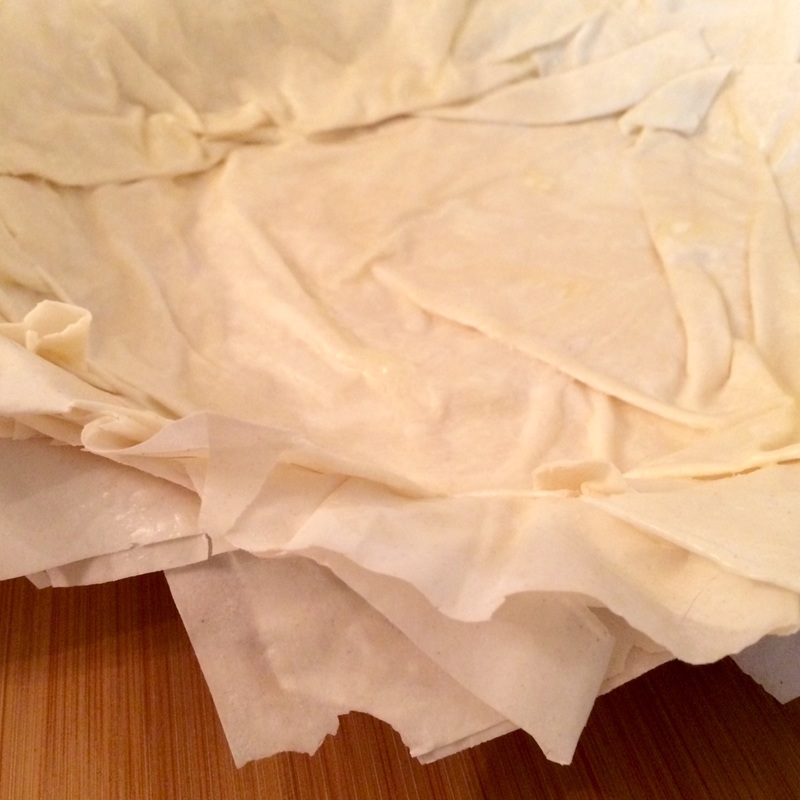
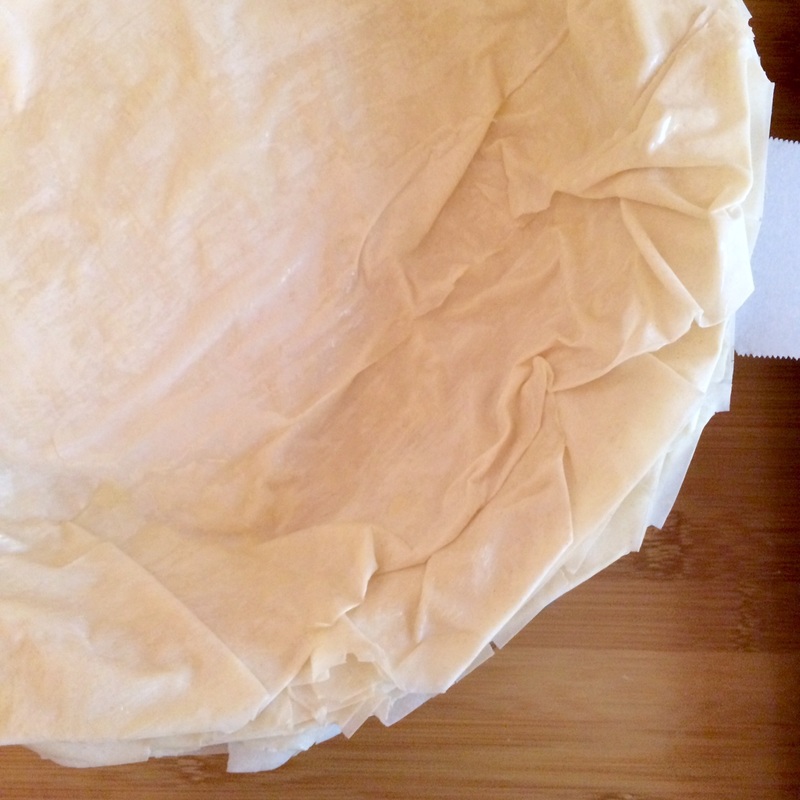
  4. Lay out the phyllo dough flat. Cover your work surface with foil (you only need enough for a little more than half the size of a phyllo sheet). Carefully separate out one of the phyllo sheets and lay one half of it on the foil area. Gently brush butter over half the sheet. (If you wish to sweeten the crust, you can sprinkle some of the sugar over the buttered area.) Fold the other half of the sheet over it and lightly press them together.
  5. Drape the halved phyllo sheet in the pie pan and gently ruffle it as you press it in - the ruffles not only add visual interest, but will keep the phyllo sheets from compressing and baking into one single mass (particularly on the bottom). You can choose to fold the corners that overhang the pan's edge under themselves, or leave them extending out (just keep in mind that extended corners tend to be very delicate and burn easily - be prepared to cover them with a heat shield during baking if necessary). Gently brush butter over the top of this layer.
  6. Keep layering and buttering the sheets until the entire pie pan is covered. Continue until you have used up the phyllo sheets.
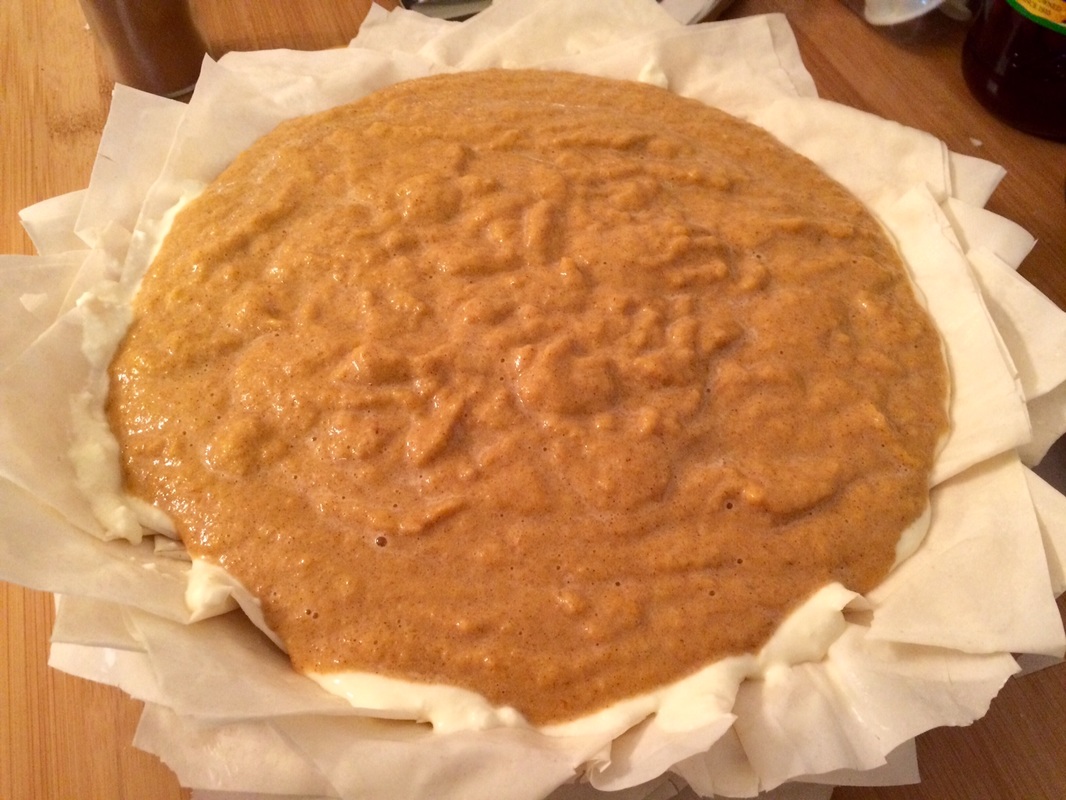
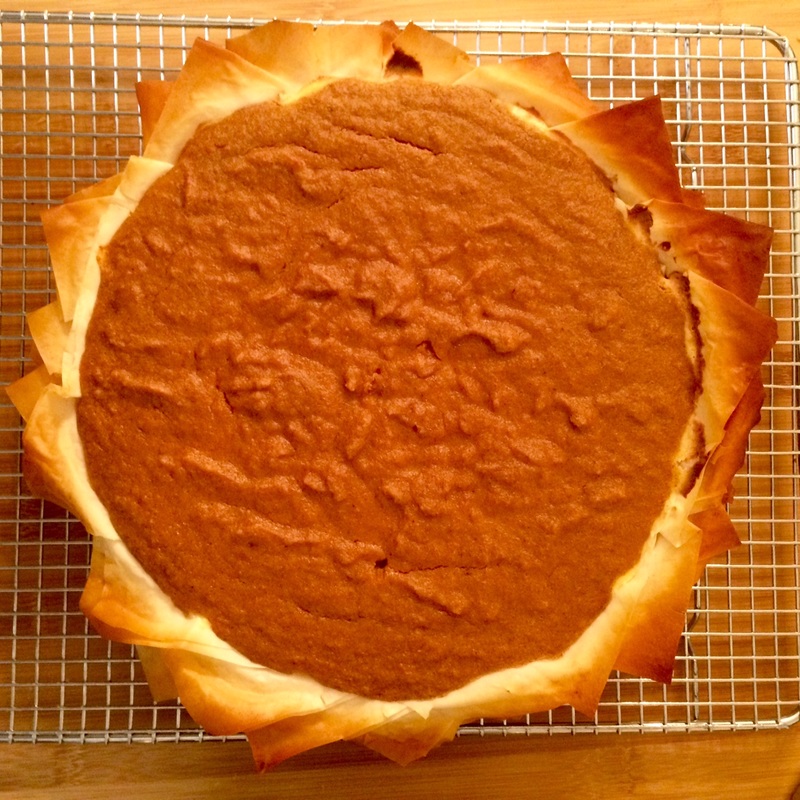
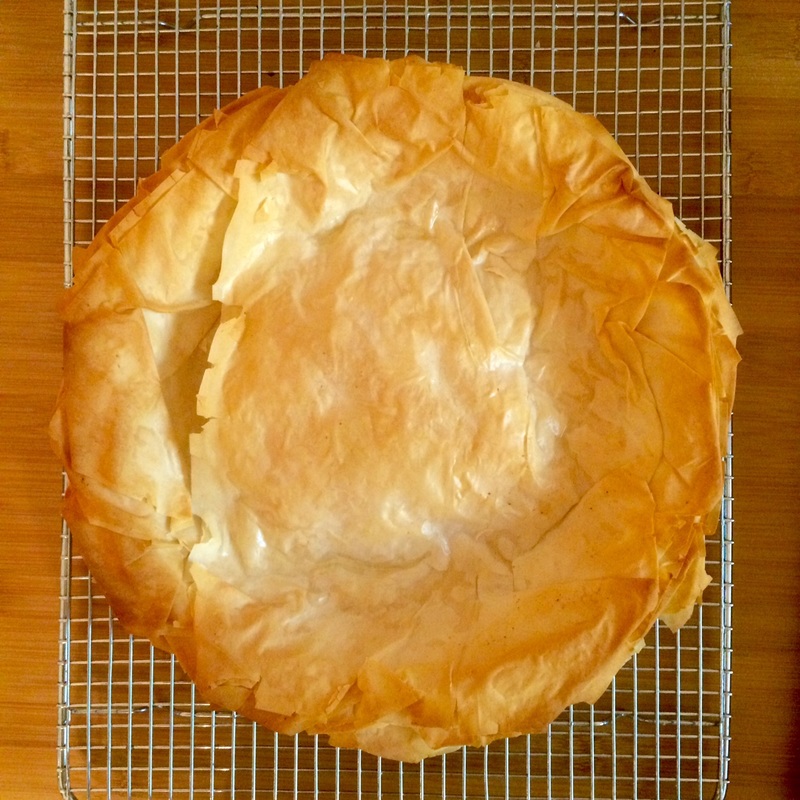
  7. Bake the phyllo crust for about 10 minutes, check if it needs to be turned in the oven, and then continue for another 5-10 minutes until it turns golden (keep a close eye on it so that it does not burn). Remove from the oven and let cool for 10 minutes, then using the parchment strips, lift the crust from the pan onto a wire rack to prevent the bottom from being steamed into softness.
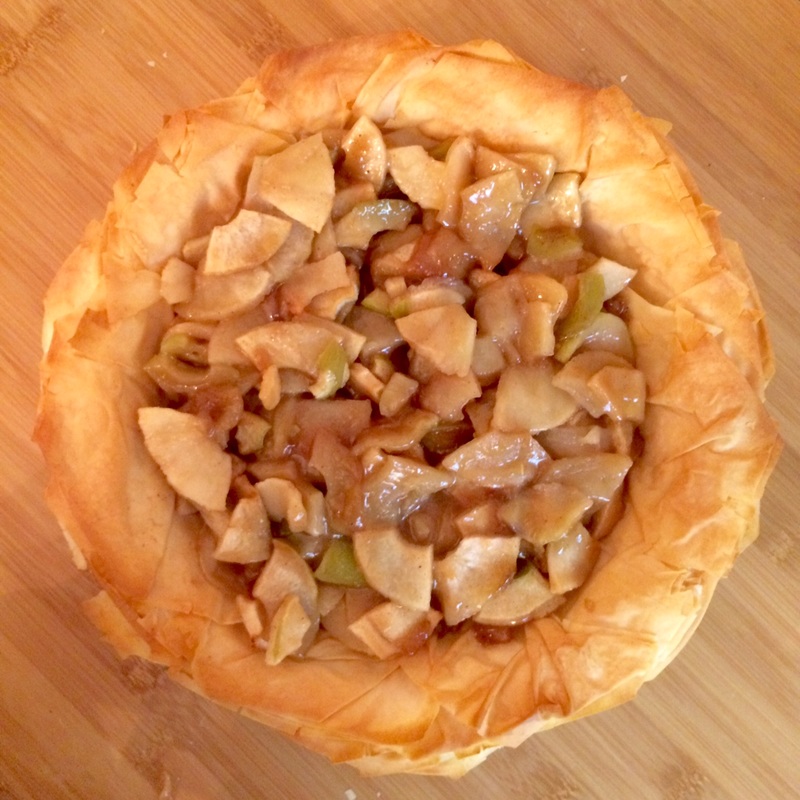
  8. When filling, it's best to let everything cool down (the crust and the filling) to room temperature so that steam isn't trapped between the filling and the crust.
Notes: You may wish to keep the phyllo covered with a sheet of saran wrap so that it doesn't dry out - I personally find though that if I work efficiently and steadily, that I don't need a covering sheet.

I tried this method initially by baking the filling inside the raw phyllo and having both bake at the same time, but this both compressed the bottom too much and made it not as crunchy. Also, since phyllo is prone to getting soaked by wet fillings, you can experiment with "lining" the bottom with something like a mix of ricotta cheese and flour to help buffer the liquids.
1 Comment
Granny Escorts Sutton Coldfield link
3/1/2025 08:37:49 pm

I love how creative this recipe is, using phyllo dough for pie crust.

Reply


Leave a Reply.

    Picture

    Sweet Enough

    Part of the reason I started baking was because I like my goodies to be less obviously sweet - I want to taste the flavor, not just the sugar. So most of these recipes will have the sugar dialed down.

    This site also acts as my mobile recipe box, so instructions are often pared down to a minimum - very few frills but for some hints and suggestions!

    RSS Feed

    Categories

    All
    Alcohol
    Almond
    Apple
    Avocado
    Baklava
    Banana
    Bars
    Biscotti
    Blackberry
    Blueberry
    Bread
    Buttercream
    Cake
    Candy
    Carrot
    Cheese
    Cherry
    Chicken
    Chickpea
    Chinese
    Chocolate
    Cider
    Cobbler
    Coconut
    Coconut Milk
    Cookie
    Corn
    Cranberry
    Cream
    Cream Cheese
    Creme Brulee
    Crumb
    Crust
    Cupcake
    Custard
    Dates
    Decoration
    Dip
    Dough
    Doughnut
    Dumpling
    Easy Peasy
    Egg
    Filling
    Flowers
    Frosting
    Fruit
    Garnish
    Gelee
    Granola
    Green Tea
    Honey
    Ice Cream
    Icing
    Jam
    Lamb
    Lemon
    Lime
    Lobster
    Lotus Seed
    Macaron
    Mango
    Marshmallow
    Meringue
    Mochi
    Muffin
    Nectarine
    Nutella
    Nuts
    Oat
    Oats
    Onion
    Orange
    Pancake
    Panna Cotta
    Peach
    Peanut Butter
    Pear
    Pecan
    Phyllo
    Pie
    Pistachio
    Plum
    Popsicle
    Pound Cake
    Pumpkin
    Quiche
    Raspberry
    Red Bean
    Rhubarb
    Rice
    Ricotta Cheese
    Rugelach
    Sauce
    Savory
    Scone
    Sesame
    Shortbread
    Soup
    Sponge
    Sponge Cake
    Strawberry
    Streusel
    Tahini
    Tart
    Tofu
    Topping
    Torte
    Vegetable
    Vinaigrette
    Walnut
    Watermelon
    Yogurt
    Zucchini

    Archives

    September 2021
    March 2021
    February 2021
    December 2020
    November 2020
    October 2020
    July 2020
    May 2020
    April 2020
    March 2020
    October 2019
    December 2018
    October 2018
    August 2018
    April 2017
    July 2016
    May 2016
    March 2016
    February 2016
    January 2016
    December 2015
    November 2015
    October 2015
    September 2015
    July 2015
    June 2015
    May 2015
    April 2015
    February 2015
    January 2015
    November 2014

© 2019 Jacqueline Teng | DragonWarden