DragonWarden
  • Adventures
  • The Oven
  • The Un-Tea Party
  • Secret Ingredients
  • About

Macaron filling: Raspberry Buttercream

11/16/2020

0 Comments

 
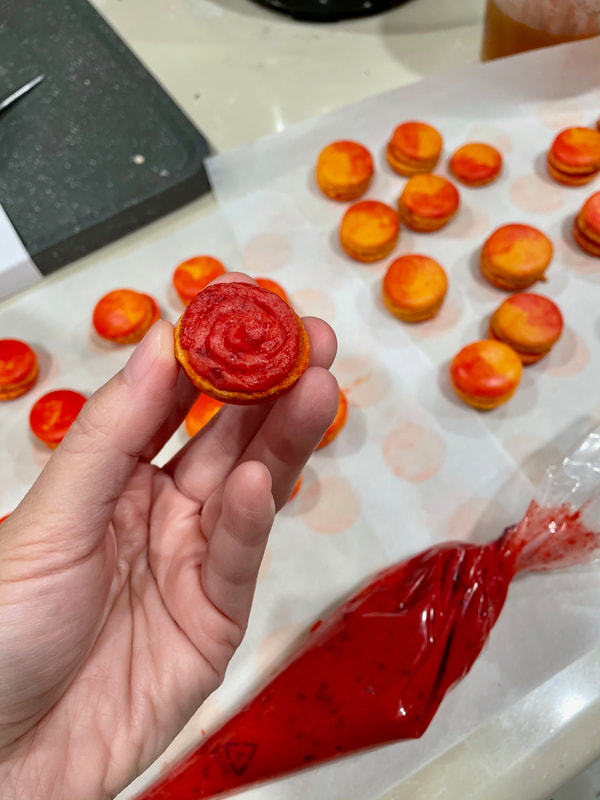
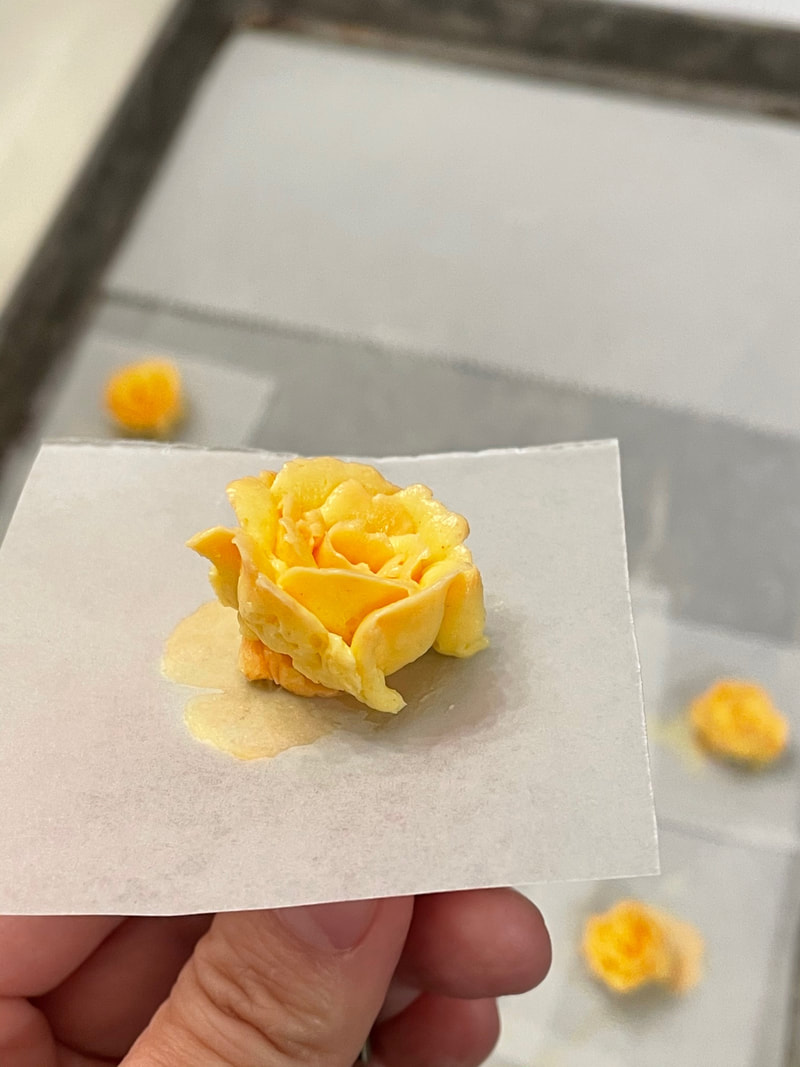
The raspberry buttercream is one of my favorites as a macaron filling - a little tartness to take off that edge of berry sweetness. 
Picture
  • 1/4 cup soft butter
  • 1/2 to 1_1/2 cups confectioners sugar, divided
  • 4 tablespoons raspberry jam
  • 1 tablespoon cream
  • 1 teaspoon vanilla extract
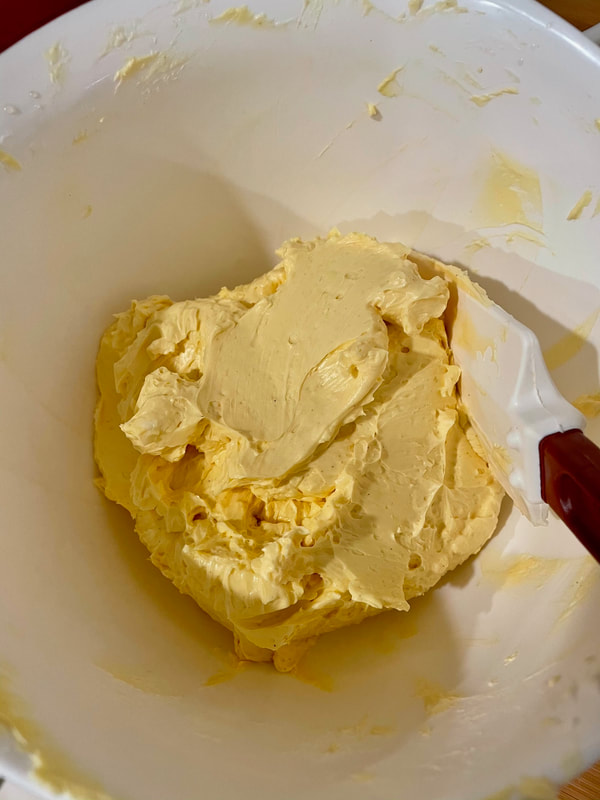
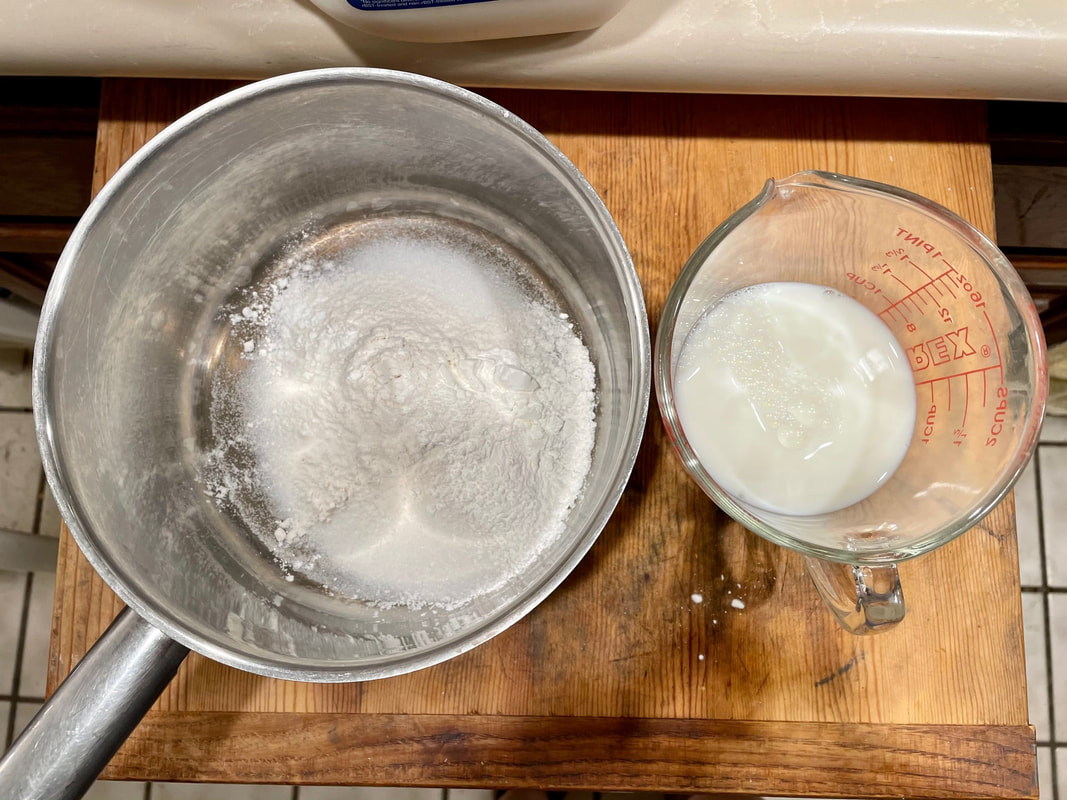
  1. Blend together the butter and 1/2 cup of sugar. Add in jam, cream, and vanilla extract.
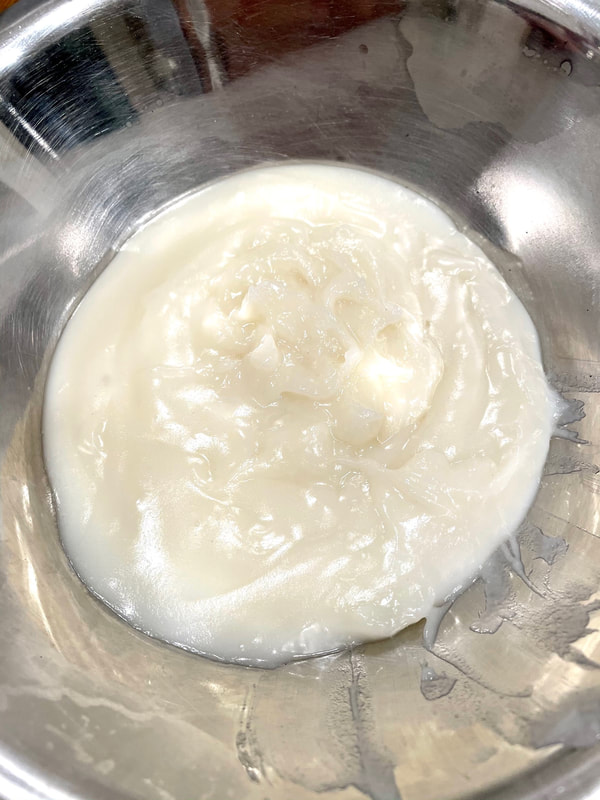
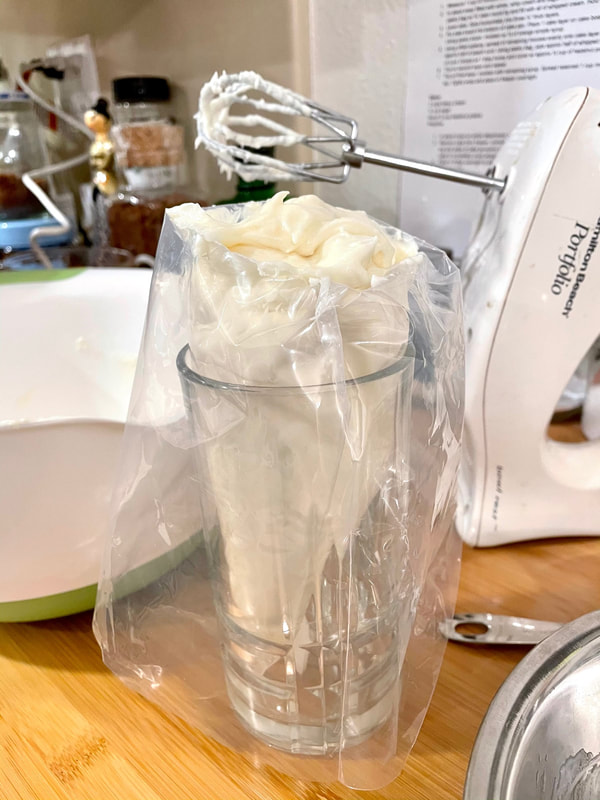
  2. Gradually continue adding sugar to taste or until the mixture is soft enough to sandwich two macarons gently together. 
0 Comments

Macaron

11/16/2020

0 Comments

 
One of the iconic tests of a baker's skill, the macaron, was something I had never had an inclination to try. Not only because of their storied fussiness, but quite simply, I hadn't liked to eat them. But! I was introduced to an episode or two of the Great British Baking Show in which featured a showstopper piece that used tiny, adorable maroon macarons ... and I was hooked. I absolutely had to try making them because they were just so cute and tidy-looking.

Well, as happy endings go, this won the slam dunk, as in the process of having to taste-test my own work, I started learning an appreciation for the taste and texture of the macaron as I tried to figure what the heck made them so special to other consumers. And now, I love both playing around with these little bakery sandwiches and consuming the results! Win-win!

Picture
  • 100 g egg whites, room temperature (about 3 large eggs)
  • 90 g granulated sugar
  • 1/4 tsp cream of tartar (800mg)
  • 130 g almond flour
  • 130 g powdered sugar
Note: If you would like more details about the process (along with why you should or should not do certain things), this website was an excellent resource during my research. It helped me make proper macarons right out of the gate, no failures at all!
  1. 1-3 days before making: Separate egg whites and keep them in a container in the fridge. You may cover them with a sheet of plastic wrap and poke several holes into the top. When ready to make the macarons, take the egg whites out of the fridge an hour beforehand and let them come up to room temperature.
  2. (optional) Prepare a guide for the macarons by printing out rows of one-inch circles on 4 sheets of paper and lining them on the bottoms of two baking sheets.
  3. Lay parchment paper over two baking sheets, cutting them down to the size of the sheet tray. It's important not to fold over/overlap the parchment paper on itself, otherwise the macarons won't bake evenly.
  4. Gently sift the confectioners sugar and almond flour into a bowl (don't try to force it through the sieve), throwing away the large bits that are left behind (don't be afraid to toss as much as a teaspoon's worth if necessary). Transfer to a food processor and pulse a few times for several seconds at a time. Then sift back into a bowl, once again throwing away the large pieces.
  5. Add the room temperature egg whites into a very clean bowl.
  6. Using an electric mixer, whisk egg whites. Once they begin to foam add the cream of tartar and then SLOWLY start to add the granulated sugar while you whip to the soft peak stage.
  7. (optional) You can add food coloring if desired at any point between now and just before step 10. However, if you're planning on making more than one color of macaron from a single batch of batter, I would suggest you add it toward the end of step 9, just as the batter is coming together into its "lava" form. The last few folds of the spatula to mix the color thoroughly will also help the batter achieve this final state. It may take a little practice to recognize when the batter is about to achieve this ideal phase, so I would suggest making it using a single color a few times first until you learn the timing of each phase the batter goes through.
  8. Add the vanilla. Continue to beat until stiff peaks form.
  9. Begin folding in 1/3 of the dry ingredients. Once incorporated, carefully add the remaining dry ingredients and fold gently. It will go through a stage in which the batter looks granular, but keep folding and it will slowly start to incorporate and smooth out.
  10. The final mixture should look like flowing lava, and be able to form a figure eight in the bowl without breaking the stream of falling batter. Spoon into a piping bag with a medium round piping tip and you’re ready to start piping.
  11. If you want, you can glue down the parchment paper onto the baking sheet with dabs of batter under the corners. Pipe dollops onto the parchment paper by holding the bag straight up and down, squeezing, and then lifting with a circular motion of the tip. Once all the macarons are piped, lift up the baking sheet and let it drop on the counter several times to release air bubbles. Allow to sit for at least 40 minutes, or until a tacky "skin" forms on top that won't stick to your finger enough to break away if you tap it gently. 
  12. Bake at 300F for 7 minutes, rotate tray, then bake for another 5-8 minutes. The macarons are done when nudging them does not feel like you'll displace the top shell of the macaron from its foot. Allow to cool completely before removing from baking sheet, or else the foot might stick.
Note: Macarons are best made 1-3 days before being consumed. Even if you misjudge and overbake the macaron, they will soften over time. Pipe filling into their centers, then keep them in a covered container, and they will gradually absorb moisture and become more chewy.
0 Comments

Satin Buttercream Frosting

11/16/2020

0 Comments

 
What gives pipe-able frosting its structure and stability is usually sugar. Lots, and lots, and lots of sugar. Which I can't stand. So during one of my many long searches for various flavors of icing that don't need so much sugar, I stumbled across this recipe ... and it set beautifully. While I sometimes wish it had a more neutral sweet taste than the honey, obviously honey itself pairs well with tons of baked goods, so this will be a good go-to for decorations and piping.
Picture
  • 1 cup butter softened to room temperature
  • 1/2 cup room-temperature water
  • 1/4 cup raw honey or favorite Keto liquid sweetener
  • 1 tsp. sustainably-sourced gelatin
  • 1/8 tsp. cinnamon
  • teeny pinch sea salt
  • (optional) 1/16 tsp. powdered stevia
  1. Place water in small microwavable bowl and sprinkle gelatin over its surface. Allow gelatin to dissolve for 1 minute. Heat in microwave for 10 seconds at a time, stirring between each heating, until gelatin dissolves completely.
  2. Stir in honey to dissolve. Also stir in the cinnamon, stevia and sea salt. Allow to cool to room temperature.
  3. Place butter in large metal bowl and beat until creamy with hand beaters; then add honey-gelatin water in a slow stream. Beat until frosting is smooth and all honey water is incorporated evenly.
  4. Frost your cooled baked good at this point. (If you refrigerate frosting before using, melt it down slightly again, beat and refrigerate until you have reached the right temperature and texture. Or bring it to room temperature slowly.)
Notes (taken directly from the author's website):
  • Room temperature Satin Buttercream is ready to eat. Frost any cake, the middle, top and sides and serve!
  • If you refrigerate this frosting it firms up and will not stick to the cake as well.
  • This Satin frosting will hold the shape of fancy, curvy frosting at room temperature, no wilting, no problem. But if you make cakes ahead of time and refrigerate them until the event, pull out the cake 1 hour or more before serving.
  • The only thing not to do with this buttercream is to frost the middle, top and sides, chill and serve. Nope! It will break off in slabs and pieces. If you refrigerate a fully frosted cake, let it first come to room temperature before serving. It’s best to serve the cake right after it’s made; or do like in the photos: pipe pretty shapes on top, fill the middle, but don’t frost the sides and all over, if you plan to chill it.
0 Comments

(Magical) Cream Cheese Frosting

11/16/2020

0 Comments

 
I love cream cheese frosting but hate the amount of sugar that's needed to stiffen it up if you're planning on doing anything more than slapping fat dollops onto a cupcake with a butter knife. So on one of my quests to find a less-sugared pipe-able cream cheese frosting, I stumbled across this - which I was skeptical of at first! But wonder of wonders, it actually held up beautifully as promised; even the tiny ridges in the examples below held up for hours at a time at room temperature! AND it preserved the tangy taste of the cream cheese. This was definitely worth the extra effort!
Picture
  • 1 cup granulated sugar
  • 1/4 cup all-purpose flour
  • 3 tablespoons cornstarch
  • 1/4 teaspoon salt
  • 1 1/2 cups milk
  • 1 tablespoon lemon juice
  • 1 teaspoon vanilla extract
  • 4 ounces cream cheese softened but still cool
  • 1/2 cup unsalted butter softened but still cool
  1. Sift sugar, flour, cornstarch and salt into a small bowl and whisk to combine.
  2. Pour milk into a small pot. Gradually whisk in the dry ingredients, ensuring there are no lumps.
  3. Place over medium-low heat and cook, stirring often, until thickened. Pass mixture through a fine mesh strainer and into a heat-safe container.
  4. Refrigerate for 2 hours.
  5. Place the cooled mixture in a large mixing bowl, along with the lemon juice and vanilla, and whip on medium-high speed.
  6. Whip in cream cheese, a tablespoon at a time, allowing each addition to fully incorporate before adding the next. 
  7. Whip in butter, a tablespoon at a time, allowing each addition to fully incorporate before adding the next.
  8. Turn the mixer up to high speed, and continue to whip until very fluffy.
0 Comments

Pumpkin Cupcakes

11/16/2020

0 Comments

 
While I started baking to accommodate my taste buds, now it's become an outlet for accommodating my eyes as a visual creative outlet. While I had started with browsing cake decorations, it occurred to me that baking cupcakes would give me many more opportunities to decorate on a mini-canvas ... and mini cupcakes even more so! And since I had some leftover pumpkin puree from my Fall baking, it seemed the perfect time to dig up some mini pumpkin cupcake recipes such as this one, which was moist and fluffy and more spice than sugar - my perfect combo.
Picture
  • 1 cup (125 g) flour
  • 1 tsp baking powder
  • 1/2 tsp baking soda
  • 1/2 tsp salt
  • 1 tsp ground cinnamon
  • 1 1/2 tsp pumpkin pie spice OR:
    • 1/2 tsp ground allspice
    • 1/2 tsp ground ginger
    • 1/4 tsp ground nutmeg
    • 1/4 tsp ground cloves
  • 1/2 cup canola or vegetable oil
  • 2 large eggs
  • 3/4 cup (150 g) packed light or dark brown sugar
  • 1 cup (225 g) canned or fresh pumpkin puree
  • 1 tsp vanilla
  1. Preheat oven to 350 F. Line cupcake pans with cupcake liners.
  2. Sift and whisk flour, baking powder, baking soda, salt, cinnamon, and pumpkin pie spices together in small bowl. In another large bowl, whisk oil, eggs, brown sugar, pumpkin, and vanilla extract together until combined. Combine dry ingredients into the wet ingredients in portions of 1/3, combining completely between each addition.
  3. Pour/spoon the batter into the liners, or if doing mini cupcakes, fill a piping bag and snip off the tip to help fill the cupcake liners. Fill each liner 2/3 full. For regular sized cupcakes, bake for 20-22 minutes, or until a toothpick inserted in the center comes out clean. For mini sized cupcakes, bake for about 12-13 minutes.
0 Comments

Dairy-Free Pumpkin Pie

11/16/2020

0 Comments

 
As I've grown older, sadly, I've also grown more lactose-intolerant. While usually this is easily fixable with a tablet or two of Lactaid, I can also get very lazy about taking them (not to mention I don't want to be buying a box of them every other week). So I searched for a dairy-free version of pumpkin pie, and lo and behold, the internet delivered! Here's a version that I adapted from here.
Picture
  • 1 pie crust
  • 1 teaspoon ground cinnamon
  • 1/2 teaspoon ground ginger
  • 1/4 teaspoon ground nutmeg or allspice
  • 1/4 teaspoon ground cloves
  • 1/2 teaspoon salt
  • 1/2 tbsp corn starch
  • 1 cup regular, full-fat, canned coconut milk (make sure to shake up or mix the coconut milk before measuring in case the fat has separated)
  • 2 large eggs + 1 egg white
  • 1/3 cup brown sugar, firmly packed
  • 1/4 cup white sugar
  • 1 tsp vanilla
  • 1 15-oz can pumpkin puree (or 15-oz of fresh pumpkin puree)
  • 1 teaspoon vanilla extract
  1. Line a 9" pie pan with a single pie crust and put in the freezer to chill. Preheat oven to 425 F.
  2. In a small bowl, whisk together the spices and salt. In another small bowl, mix the corn starch into the coconut milk.
  3. In a large bowl, beat the eggs. Then beat into the eggs both sugars, vanilla, pumpkin, and spices. Whisk in the coconut milk.
  4. Pour the filling into your crust. Bake the pie for 15 minutes, then lower the oven temperature to 350 F (you may wish to put a heat shield on the crust rim now). Bake for about another 45 minutes or until a knife or toothpick in the center comes out clean.
  5. Once done, cool on a wire rack before serving.
Note: The pie pictured also uses the gelatin-stabilized Chinese whipped cream frosting and some hazelnut praline sprinkled on top.
0 Comments

Lobster Tails

10/23/2020

0 Comments

 
Since lobster tails were always the purview of some fancy restaurant, the making of lobster tails was also associated with "fancy cooking" - or, rather, "complicated cooking" - in my mind. But nothing could be further from the truth! Even the prep work was easy peasy, as long as you have some kitchen rubber gloves to protect your hands (as I learned the hard way) and a pair of good kitchen shears. Even a Costco six-pack of lobster tails came out deliciously sweet and delicate! Adapted from this page.
Picture
  • lobster tails
  • 3 tablespoons melted butter or olive oil
  • 1 teaspoon salt
  • 1 teaspoon black pepper
  • 1 teaspoon garlic powder
  • 1 teaspoon paprika
  • 1 teaspoon fresh parsley, chopped
  • 1 teaspoon lemon juice
  • 2 wedges lemon, to serve
Note: Like a lot of cooking recipes, the ingredient amounts are highly flexible. While some ratios are given here, you can really adjust it to your taste - just make sure there's enough to drench all the lobster tails. 
  1. Using a clean pair of scissors or kitchen shears, cut in a straight line along the middle of the top of the shell towards the fins of the tail. Cut through all of the horizontal segments, but do not cut through the end of the tail.
  2. For this step, you may wish to use a pair of kitchen rubber gloves to handle the tails if they are particularly spiny. Using a spoon or your fingers, separate the meat from the two sides of the shell, then lift the meat up and out from inside the shell. (If you are having difficulty opening the shell up to lift out the meat, flip the tail over and make cuts along the carapace where the legs meet the bottom part tail, or you can squeeze the edges of the shell together until the ribs crack. This will help break the rigid structure of the shell and allow it to be more flexible.)
  3. Press the two sides of the shell together, then lay the meat over the seam where the two shells meet.
  4. While cutting through the shell, you may have also cut into the meat, which is perfectly okay. Make a shallow cut through the middle of the lobster meat so that you can peel down the thin layer of meat over the sides. This gives the lobster tail its signature look.
  5. Preheat oven to 425°F (230°C).
  6. In a small bowl, combine the butter, salt, pepper, garlic powder, paprika, lemon juice, and parsley, then brush the mixture evenly over the lobster meat.
  7. Place the tails onto a baking sheet, then bake for approximately 12-15 minutes for larger tails, or 7-10 minutes for smaller tails, until the lobster meat no longer has any translucency throughout. If you have an instant thermometer, you can check that the internal temperature reaches 140°F. The key here is you never want to overcook them - when in doubt, take them out to check their middle, and then put them back into the oven 1-2 minutes at a time depending on how well done they are by that point. 
  8. Serve with a side of lemon wedges.
0 Comments

Pie Crust

10/22/2020

0 Comments

 
This dough needs to sit overnight in the fridge, so plan ahead, but it's totally worth it. Out of the half dozen different recipes of piecrust I've made for my family, they've always voted this one as consistently the best. Other than that overnight stay, it's a very simple recipe and easy to work, especially if you have a food processor to help.

While the ingredients list is exactly the same, the steps to mix the piecrust are slightly different, as I've mixed in some of my own experience working with it. I highly recommend you use the weighed measurements instead as they will provide the most consistent ratios.
Picture
  • 130 grams (1/2 cup + 1 tbsp) warm water
  • 28 grams (2 tbsp) granulated sugar
  • 6 grams (1 tsp) fine salt
  • 312 grams (2.5 cups) all-purpose flour
  • 170 grams (3/4 cup) cold unsalted butter, cut into 1/4-inch cubes and frozen
  • 60 grams (1/4 cup) vegetable shortening, preferably in baking stick form, cut into 1/4-inch pieces, frozen​
  1. Keep some butter and shortening in the freezer as a ready supply whenever you wish to make piecrust. Otherwise, make sure you put some in the freezer far enough in advance of when you want to make the piecrust that the butter can freeze solid (the shortening won't freeze solid, but it should become very very cold).
  2. ​In a large bowl or cup, mix the sugar and salt with the water and stir until they have all melted into the water. Place the water mixture into the freezer; you will want it to be ice cold by the time you use it.
  3. Measure the flour out and also place this in the freezer.
  4. Measure out the required amounts of butter and shortening and cut them up. I don't usually bother going down as much as a 1/4-inch when using a food processor; usually 1/2-inch chunks or smaller are okay.
  5. Take the flour out of the freezer and pour it into the food processor's bowl. Add the butter to it. Turn on the processor for several seconds (don't pulse - if you do, you'll get flour flying everywhere with each pulse) and then stop it to check on the size of the butter pieces. You'll want them to be roughly pea-sized, so continue processing them if necessary.
  6. Add the shortening, then process. Because shortening is so much softer, it will take much less time to get them cut down to size. They should be mostly pea-sized also, but if you find just a few larger pieces, you can smoosh them between your fingers instead of over-processing.
  7. Pour everything into a large bowl. Take the water mixture out of the freezer and drizzle it over the dough. Using a plastic bowl/bench scraper, fold the mixture until the water is roughly mixed throughout, then switch to your hands. Working quickly so that the heat from your hands don't warm up the dough too much, lightly gather the clumps with your fingers and use your palm to fold over and press the dough into the bottom of the bowl a few times (don't knead it, just give it a few quick squishes) until the dough just starts to come together into one large mass. Divide into two equal discs of about 1-inch thickness (mine turn out to be roughly 320 grams each if you want something more precise than just eyeballing). 
  8. Double-wrap them in plastic wrap and then let them rest in the fridge for at least 8 hours. They can stay in the fridge for up to 3 days this way, or you can freeze them for up to a week. When taking them out of the freezer, let them defrost in the refrigerator overnight.
To prebake:
  1. Roll out the dough and pan and flute the piecrust. Chill it in the freezer until firm, 15-20 minutes.
  2. Preheat the oven to 375 F with a rack in the center. Prepare a square of parchment about 13" on each side. Set the pan on a baking sheat and set the square of parchment in the pie shell, gently smoothing it into place and pleating as needed to fit against the bottom and sides of the shell. The edges will project beyond the rim of the pan.
  3. Fill the shell to the top with dried beans or uncooked rice. Gently stir the beans around to ensure there are no air pockets down in bottom edges. Top up as needed so that the beans/rice are level with the top of the piecrust edges.
  4. Bake the shell for 25 minutes. Take the piecrust out and set on a cooling rack. Set a heat-proof mixing bowl nearby, and then carefully bringing together the points of the parchment, lifting the beans/rice out and transfering them to the mixing bowl.
  5. Using a fork, pierce the bottom of the piecrust a few times, then slide the piecrust back into the oven and bake for another 7 minutes for prebaked, or 10 minutes for fully prebaked. Cool on a wire rack.
0 Comments

Fresh Pumpkin (Puree)

10/19/2020

0 Comments

 
This might seem a weirdly simple item to have its own "recipe", but it's precisely because it's so simple that it deserves a call-out! It used to be that I depended solely upon canned pumpkin - which, don't get me wrong, there's nothing wrong with that. But, ever since I found out how easy it was to simply pop a fresh pumpkin into a pie or any other baked good looking for it, I couldn't resist buying up all those pie pumpkins in the supermarket whenever they came in season. (And they'll back you up if there's ever a repeat of the great canned pumpkin shortage of 2019!) Be aware that fresh pumpkin is also super moist - keep that in mind if your recipe is very sensitive to moisture content! I've so far not had any issues with just doing a straight ounce-for-ounce substitution of canned pumpkin (in fact, that extra moisture has been very welcome in some recipes) but forewarned is forearmed.
Picture
  • one or two pumpkins
    Note: Pie pumpkins are smaller and sweeter. You can usually fit two on a baking sheet and it wouldn't change the baking time. Larger pumpkins work just as well for a lot of baking projects, but you probably won't want to try and stuff more than one in the oven at a time.
  • Set the oven to 425 F. Punch a few slits or holes into the pumpkin(s) with a knife for venting while it cooks.
  • Line a baking sheet with foil and fold up the edges a little in case juices vent or leak from the pumpkin. Set the pumpkin in the middle of the foil and then bake in the oven for 1 hour. The pumpkin skin will look slightly burnt but is easy to peel, and the inside should be totally soft (you can test if you're uncertain by sticking a knife or skewer through the side - it should be VERY easy to poke through).
  • Take it the pumpkin out and let it cool. To help it cool more quickly, you can peel back the skin and quarter it with a spoon (be very careful, it will be very hot and as soon as you open it probably a lot of super-heated steam will puff out).
  • Once cooled, scoop out the seeds and guts, then throw the meat of the pumpkin into a food processor. Process for a few seconds, pause to mix it up a little with a spoon, then process again. After two or three rounds of this, it should have released enough moisture that you can just leave it on and it will start to circulate itself until all the bits have been pureed.
  • Scoop out and either use immediately, refrigerate, or freeze for later use. (Note: you can also let it drain a little first by dumping it into a collander and letting it sit for a few hours.)
0 Comments

Peach Pound Cake

7/30/2020

0 Comments

 
It's strange, but while I looooooove pound cakes, this is the very first time I've made on! And quite by accident - I've bookmarked plenty of recipes but kept bumping other stuff up the priority ladder. But then due to a miscommunication between my mother and me, we suddenly had and overabundance of Costco-sized pallets of peaches, and I was trying to figure out what to do with the last of them before they went bad when this recipe happened to land in my inbox. So I decided to give it a whirl - and it seems like such a simple cake, but it turned out so great that even my mom, who is totally not supposed to be eating stuff like this, was sneaking out 1/8" slices of the cake whenever my back was turned!
Picture
Cake:
  • 1 1/2 cups (3 sticks) unsalted butter, at room temperature
  • 2 cups sugar
  • 6 large eggs at room temperature
  • 3 cups all-purpose flour plus extra to coat the pan
  • 1/2 teaspoon salt
  • 1/4 teaspoon baking soda
  • 1 cup sour cream *
  • 2 teaspoons vanilla extract
  • 2 cups fresh peaches peeled, pitted and diced
Glaze:
  • 1 1/2 cups powdered sugar sifted
  • 1-3 tablespoons milk or cream
Cake:
  1. Preheat oven to 325 degrees. Spray a 12 cup bundt pan with nonstick cooking spray and add a few tablespoons of all-purpose flour to pan, shake it around to coat well, then tap out and discard any excess.
  2. In the bowl of an electric stand up mixer, gradually beat butter until it's creamy.  Add sugar and beat at medium speed for 5-7 minutes, until mixture is pale, light, and fluffy. Add eggs, one at a time, beating just until the yolk disappears and is incorporated into the batter.
  3. In a medium bowl, mix together flour, salt, and baking soda.  Add to butter mixture, alternating with sour cream, beginning and ending with the flour mixture.  Beat batter on low just until blended after each addition.  
  4. With the mixer on low, stir in vanilla and peaches and continue to beat for about 1 minute. Using a large rubber spatula or wooden spoon, give the batter a final stir and make sure the peaches are mixed evenly throughout the batter.
  5. Pour the batter into prepared pan, filling the pan only 3/4 full, and bake in preheated oven for 1 hour and 20 minutes to 1 hour and 40 minutes, testing until a wooden skewer or cake tester, inserted into the center of the cake just comes out clean, without any crumbs. Cool pan on a wire rack for 10-15 minutes, then inverts the pan onto a plate, removing cake from pan and cool completely.
* Note: I didn't have sour cream on hand but I did have plain yogurt, which I substituted. The cake was still delicious and baked beautifully.
​

Glaze:
  1. ​Add powdered sugar to a medium bowl.  Add milk or cream to powdered sugar, 1 tablespoon at a time as needed, mixing well after each addition, until you reach desired, pourable consistency. Pour over completely cooled cake. Let cake sit for the glaze to set, then serve.
0 Comments
<<Previous
Forward>>
    Picture

    Sweet Enough

    Part of the reason I started baking was because I like my goodies to be less obviously sweet - I want to taste the flavor, not just the sugar. So most of these recipes will have the sugar dialed down.

    This site also acts as my mobile recipe box, so instructions are often pared down to a minimum - very few frills but for some hints and suggestions!

    RSS Feed

    Categories

    All
    Alcohol
    Almond
    Apple
    Avocado
    Baklava
    Banana
    Bars
    Biscotti
    Blackberry
    Blueberry
    Bread
    Buttercream
    Cake
    Candy
    Carrot
    Cheese
    Cherry
    Chicken
    Chickpea
    Chinese
    Chocolate
    Cider
    Cobbler
    Coconut
    Coconut Milk
    Cookie
    Corn
    Cranberry
    Cream
    Cream Cheese
    Creme Brulee
    Crumb
    Crust
    Cupcake
    Custard
    Dates
    Decoration
    Dip
    Dough
    Doughnut
    Dumpling
    Easy Peasy
    Egg
    Filling
    Flowers
    Frosting
    Fruit
    Garnish
    Gelee
    Granola
    Green Tea
    Honey
    Ice Cream
    Icing
    Jam
    Lamb
    Lemon
    Lime
    Lobster
    Lotus Seed
    Macaron
    Mango
    Marshmallow
    Meringue
    Mochi
    Muffin
    Nectarine
    Nutella
    Nuts
    Oat
    Oats
    Onion
    Orange
    Pancake
    Panna Cotta
    Peach
    Peanut Butter
    Pear
    Pecan
    Phyllo
    Pie
    Pistachio
    Plum
    Popsicle
    Pound Cake
    Pumpkin
    Quiche
    Raspberry
    Red Bean
    Rhubarb
    Rice
    Ricotta Cheese
    Rugelach
    Sauce
    Savory
    Scone
    Sesame
    Shortbread
    Soup
    Sponge
    Sponge Cake
    Strawberry
    Streusel
    Tahini
    Tart
    Tofu
    Topping
    Torte
    Vegetable
    Vinaigrette
    Walnut
    Watermelon
    Yogurt
    Zucchini

    Archives

    September 2021
    March 2021
    February 2021
    December 2020
    November 2020
    October 2020
    July 2020
    May 2020
    April 2020
    March 2020
    October 2019
    December 2018
    October 2018
    August 2018
    April 2017
    July 2016
    May 2016
    March 2016
    February 2016
    January 2016
    December 2015
    November 2015
    October 2015
    September 2015
    July 2015
    June 2015
    May 2015
    April 2015
    February 2015
    January 2015
    November 2014

© 2019 Jacqueline Teng | DragonWarden